
Set up Supabase and Cloudflare
Supabase stores chat messages, guestbook notes, and owner replies. A Cloudflare Worker connects your widget to Supabase and keeps the secret key on the server.
Open your Supabase dashboard ↗ and Cloudflare dashboard ↗ before you begin. One project and one Worker can serve both widgets. Manage and reply to Guestbook notes ↓
-
Create a Supabase project
Create a new Supabase project, or use an existing one with the Data API enabled and start at step 7.
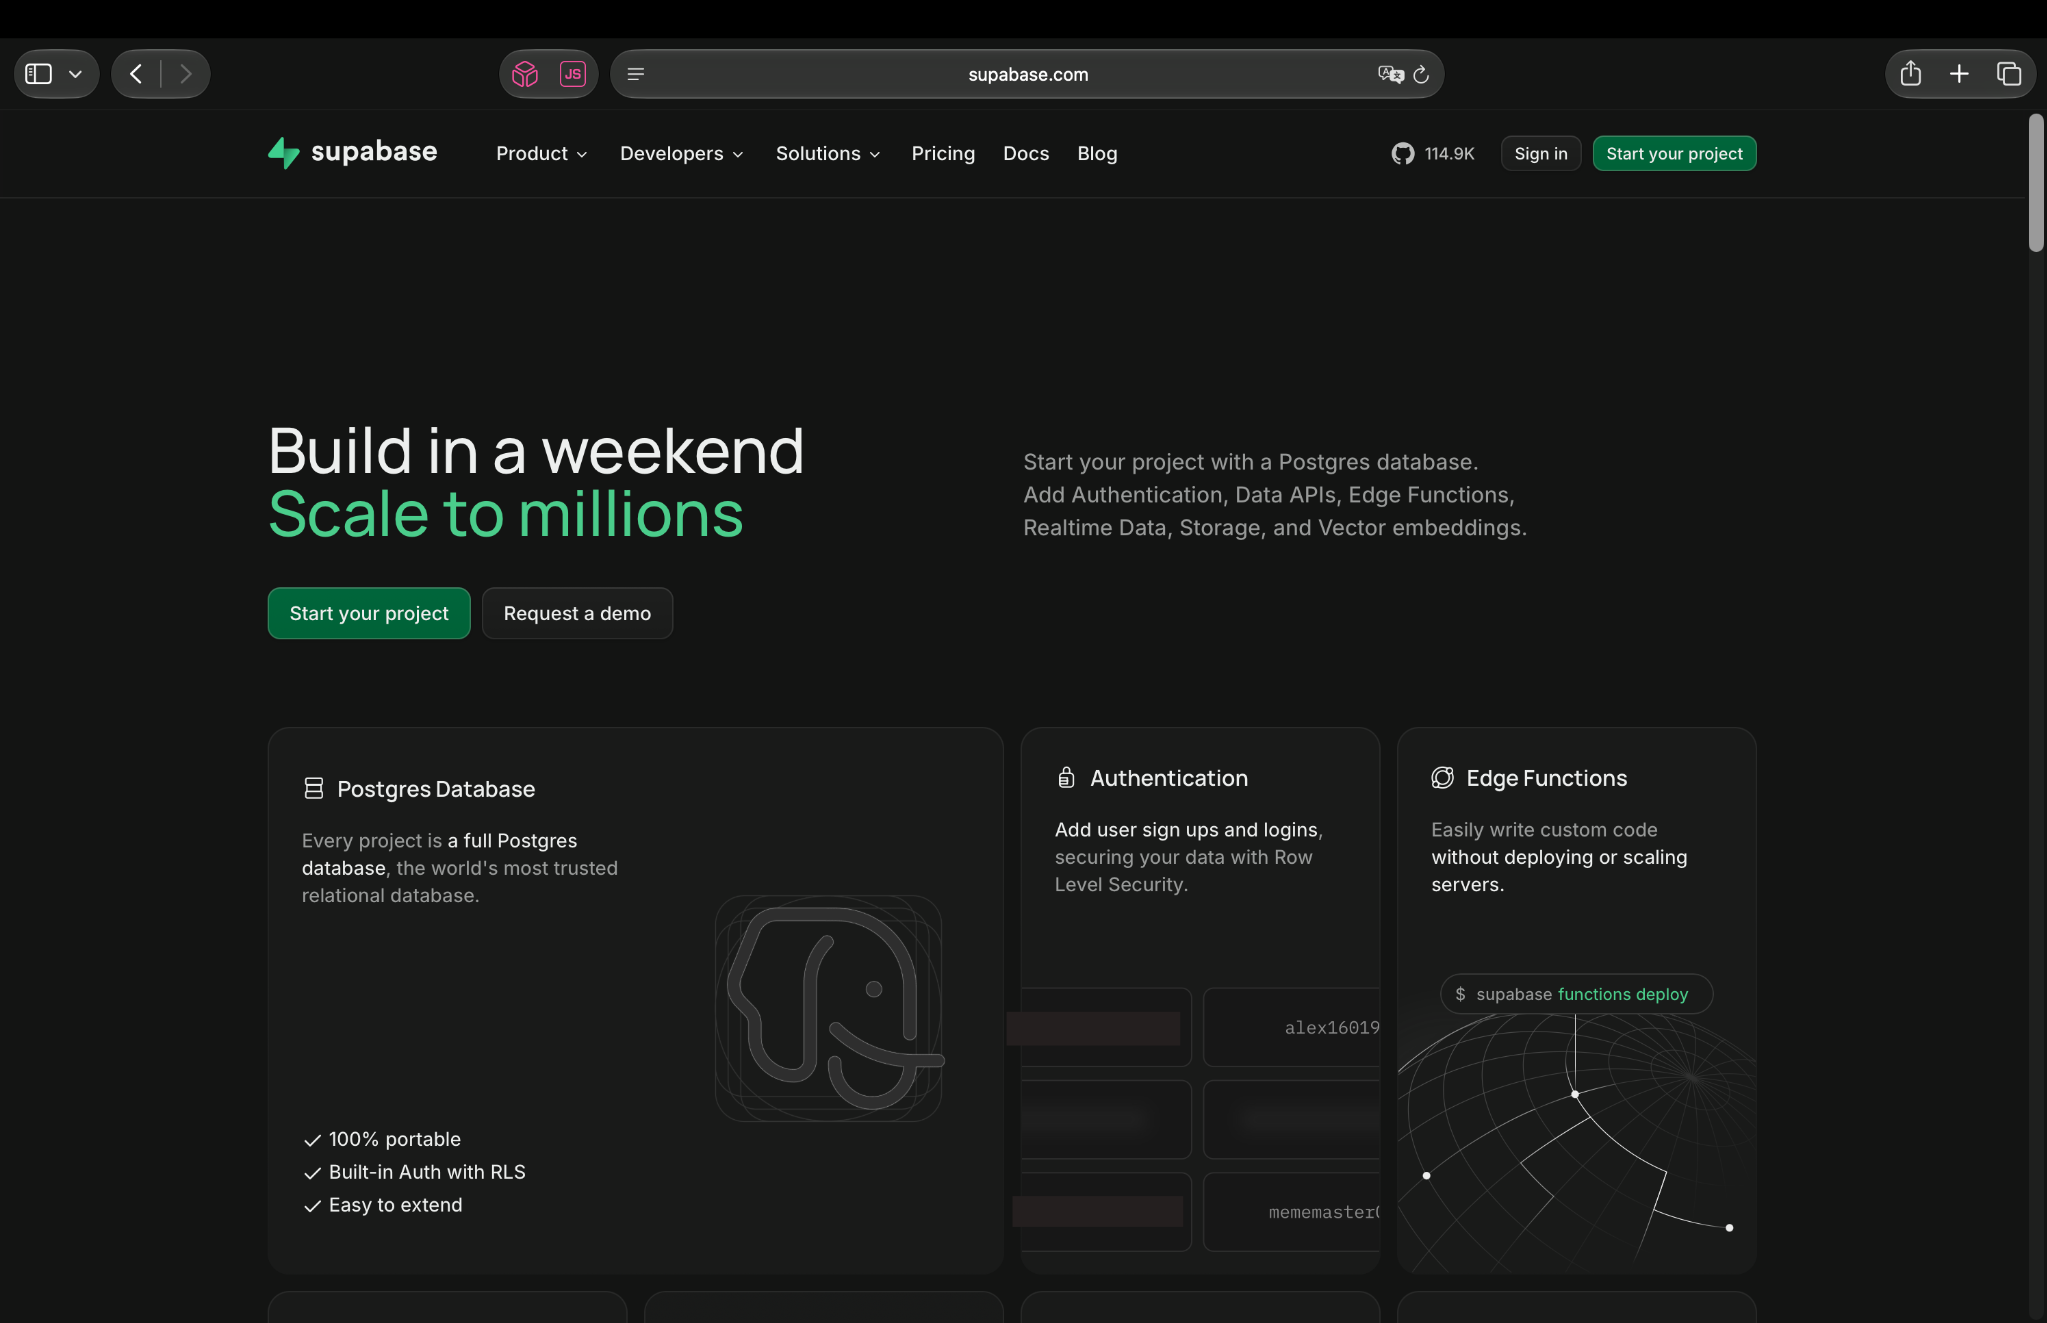
1On supabase.com, click Start your project.
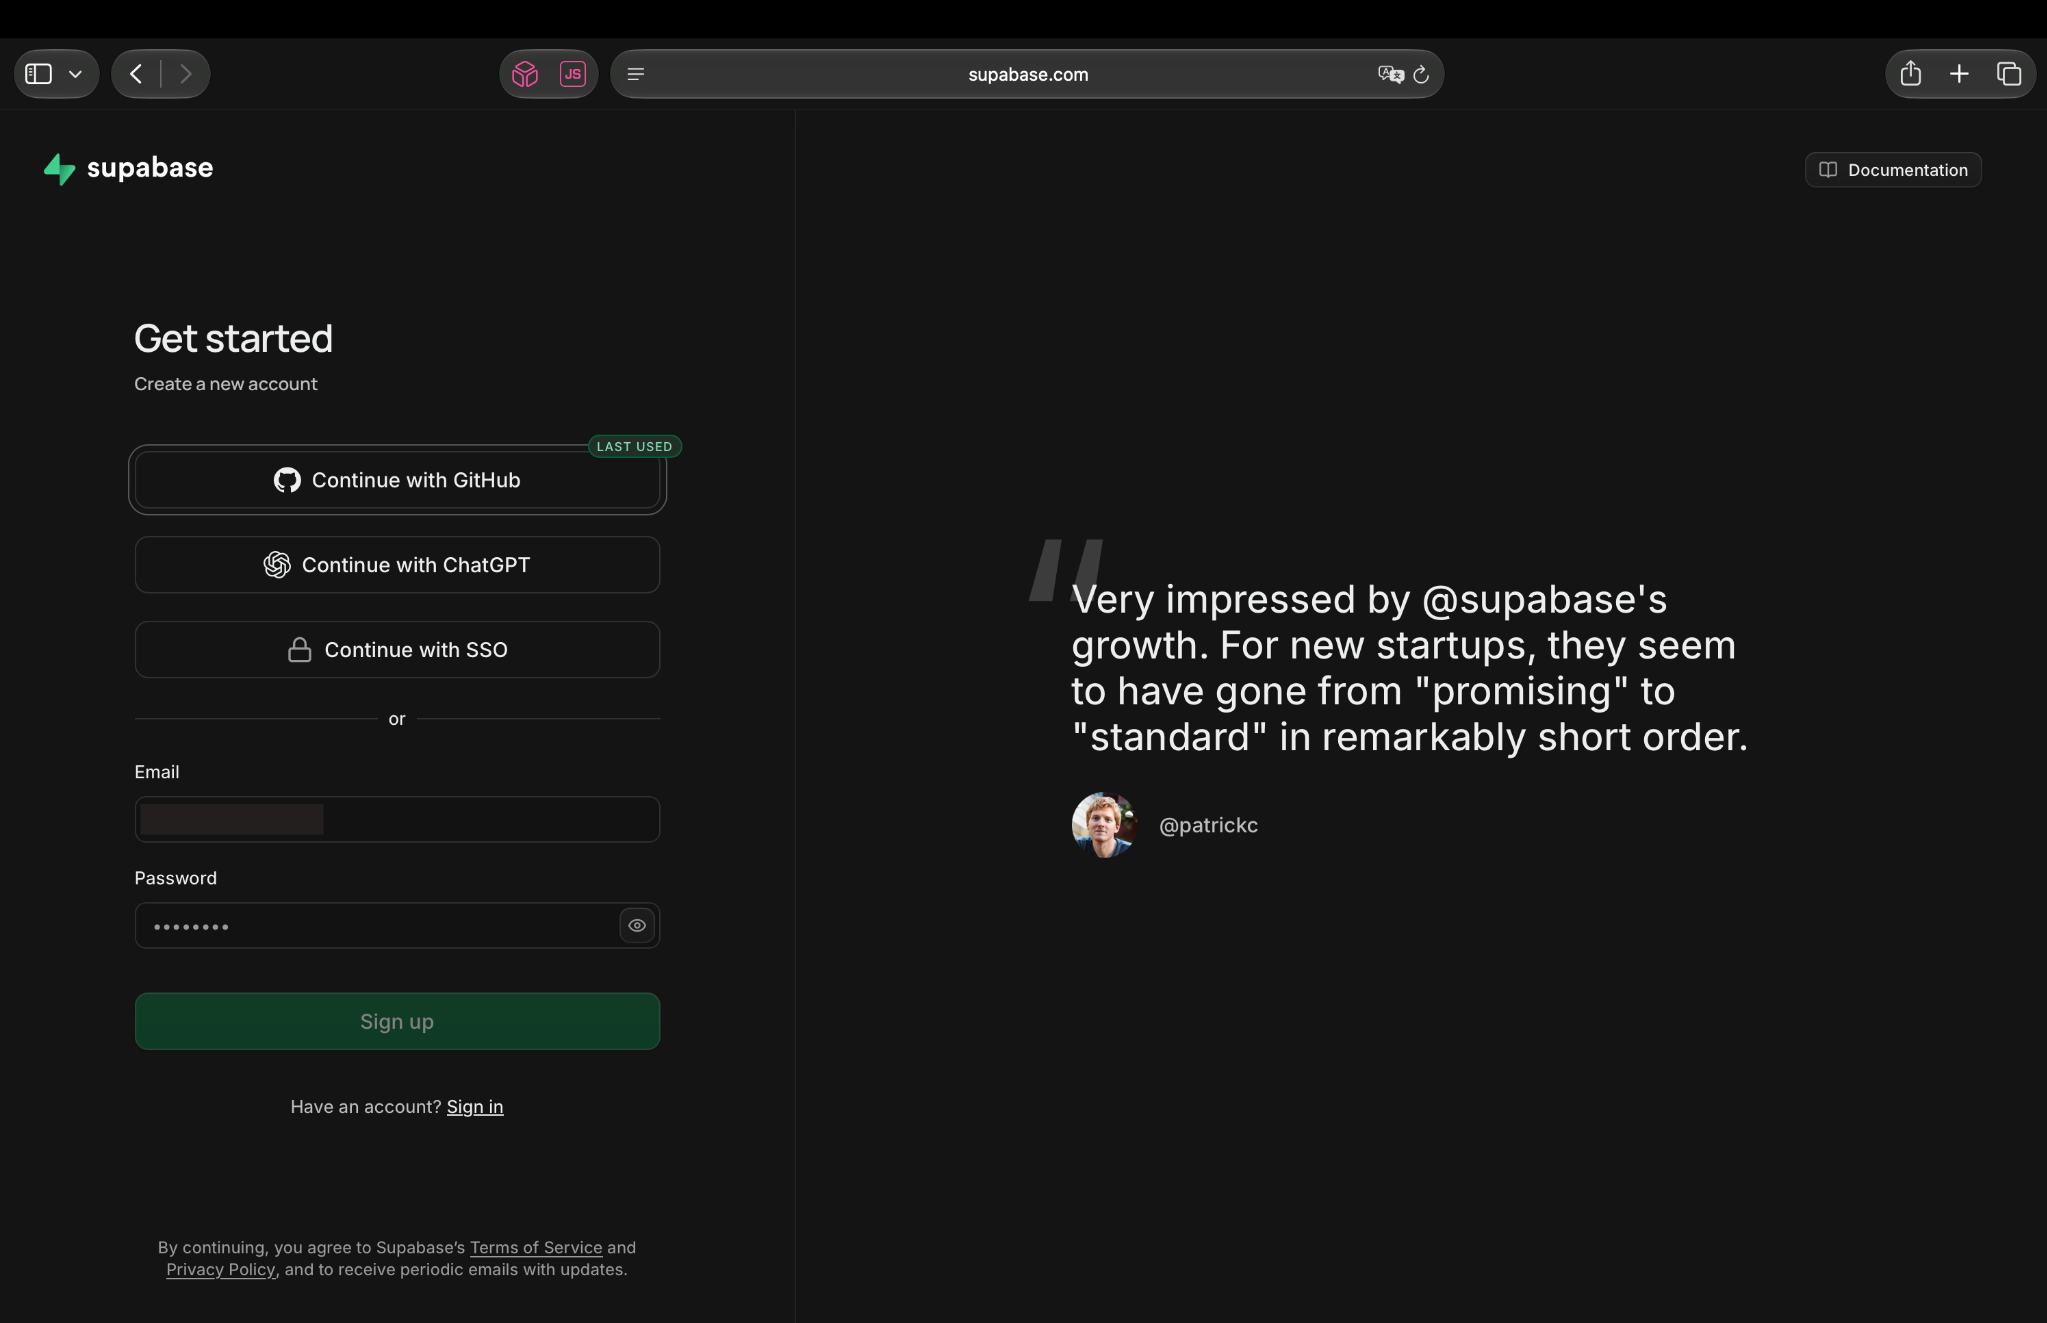
Click the image to view it larger. 2On Create a new account, choose a sign-up method. If you already have an account, click Sign in.
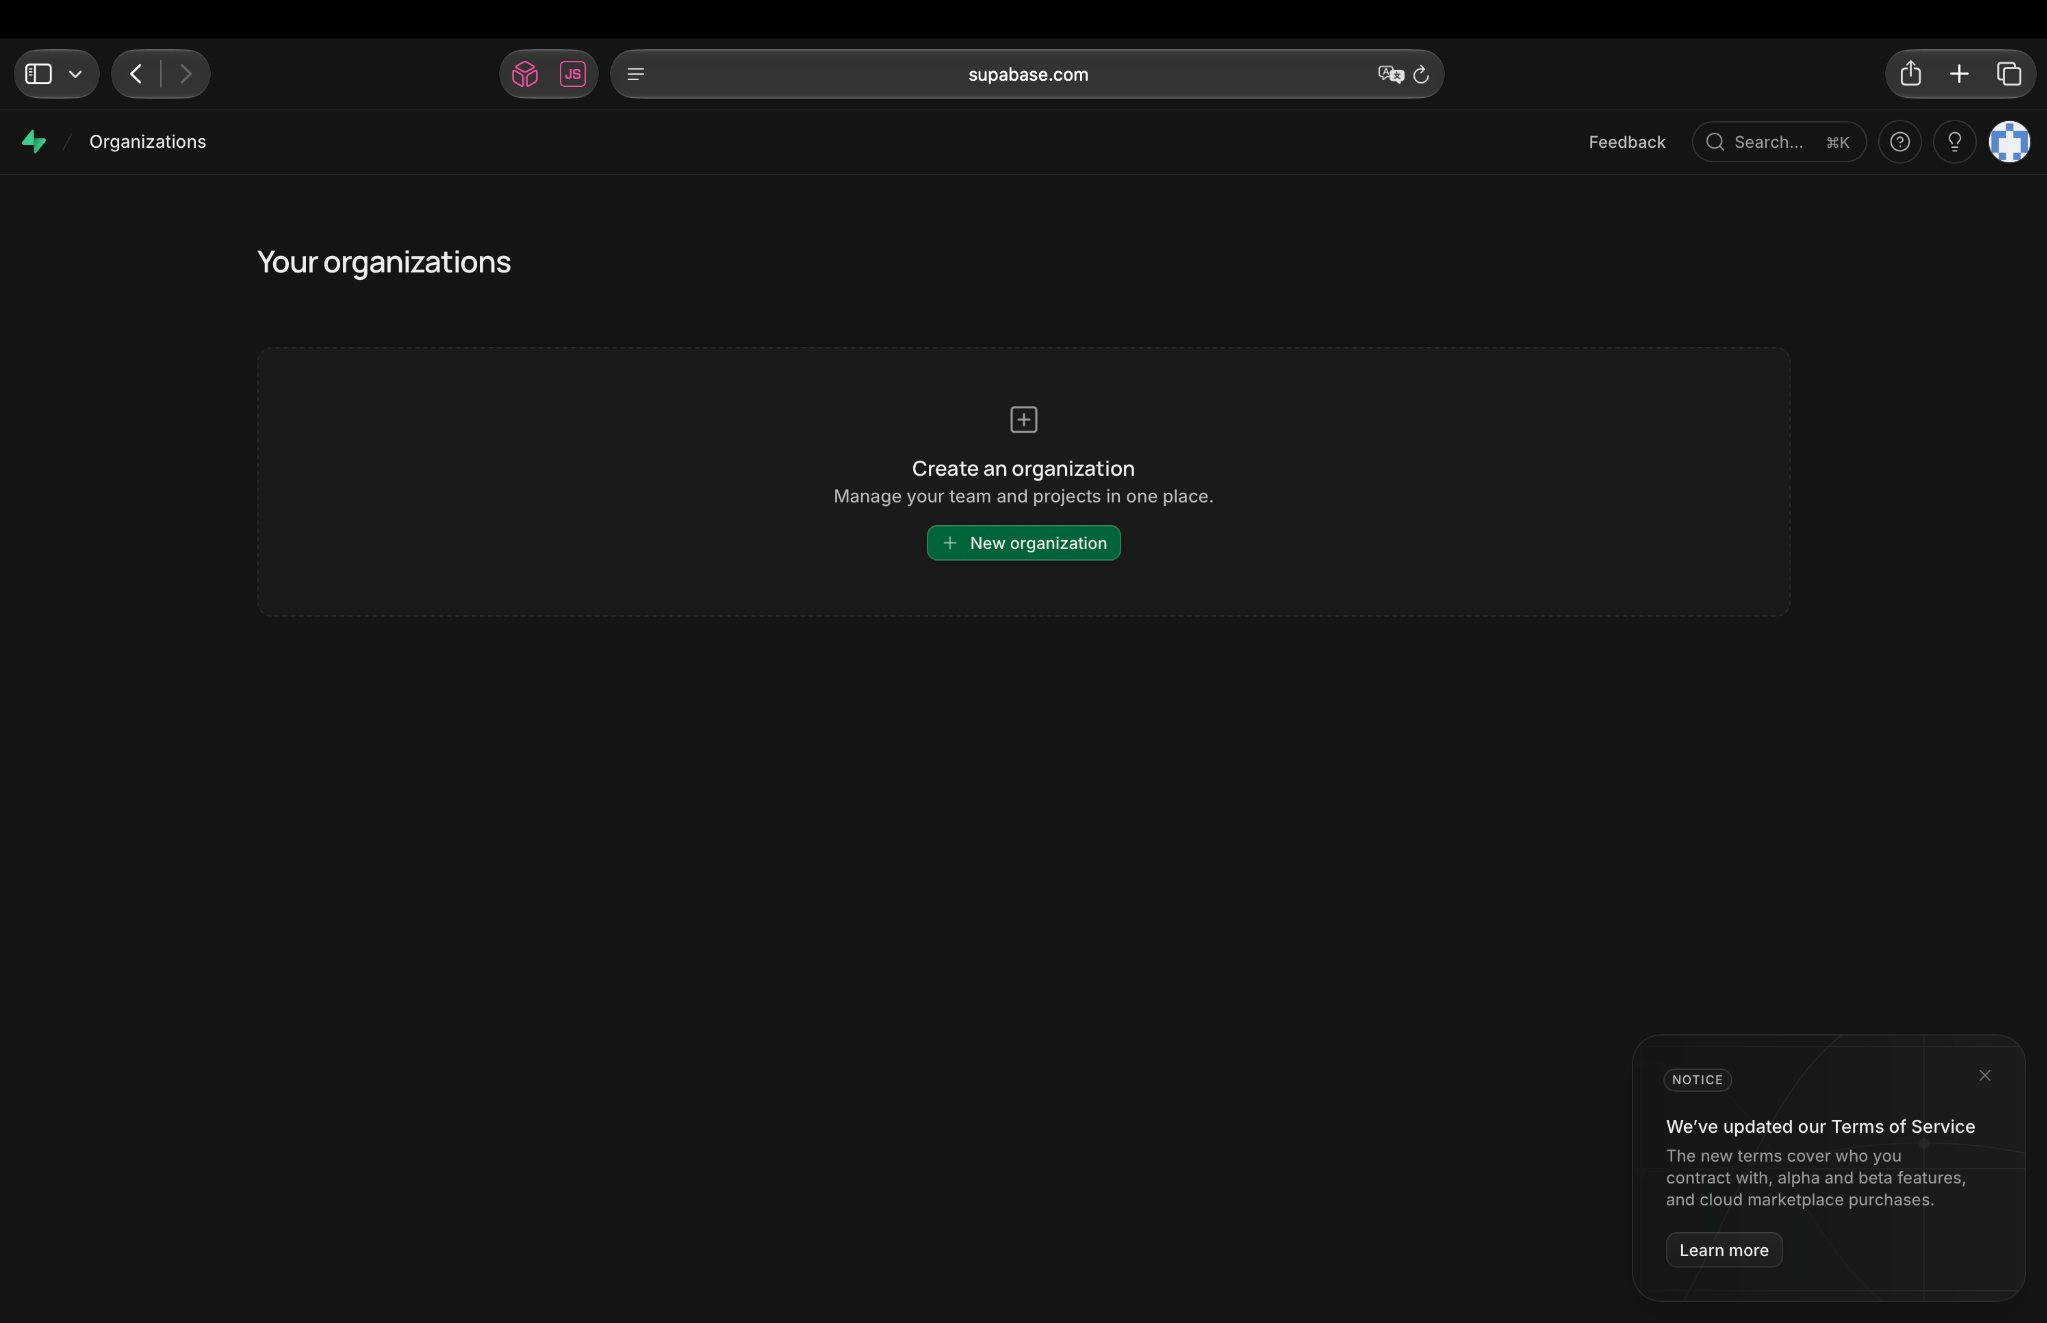
Click the image to view it larger. 3On Your organizations, click + New organization.
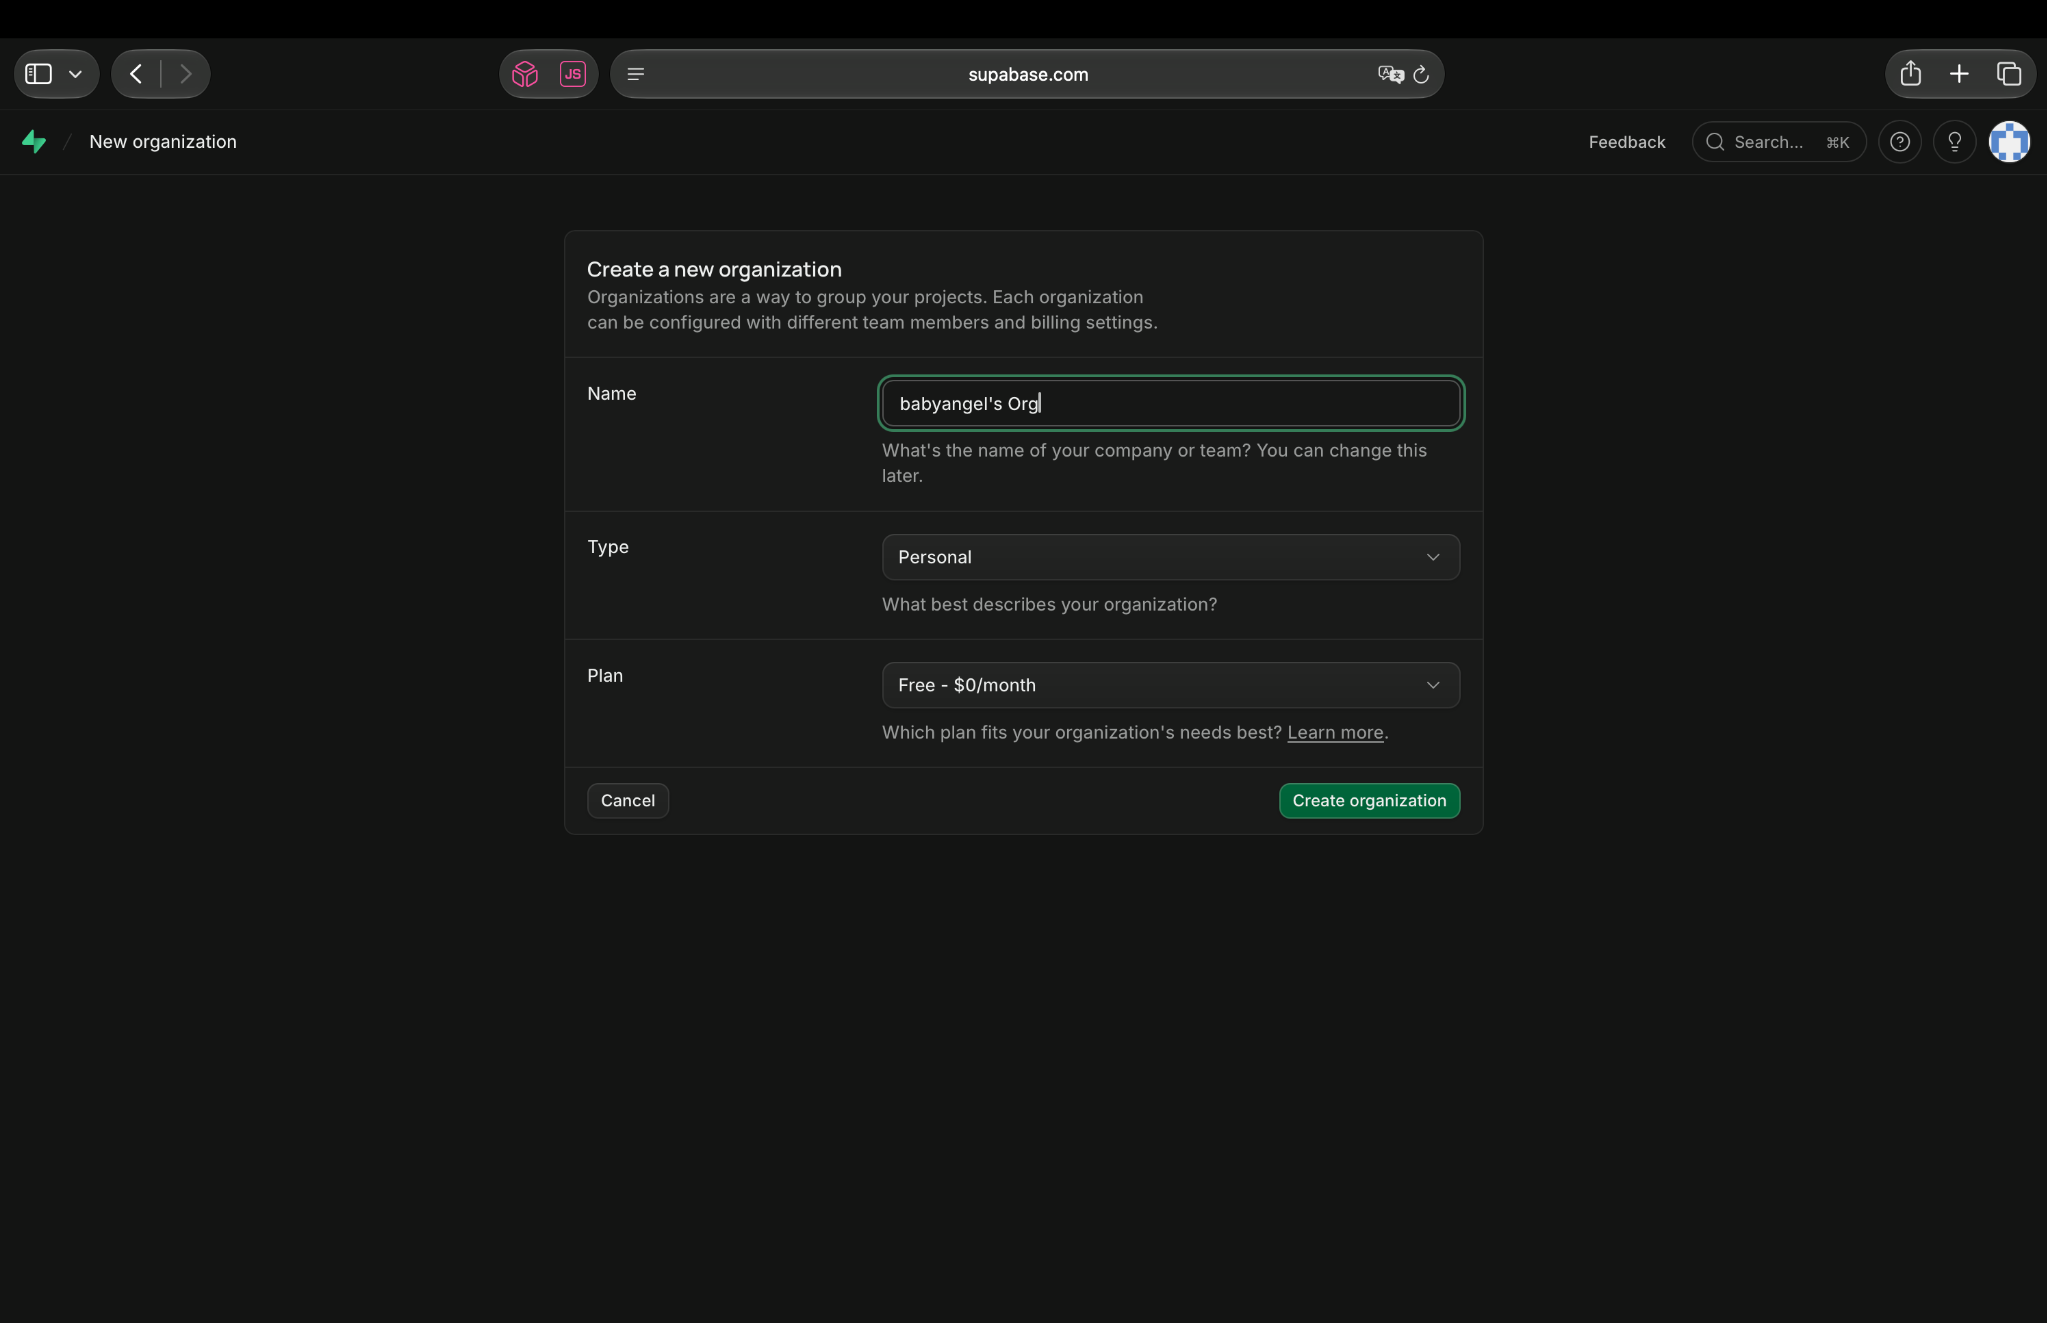
Click the image to view it larger. 4Fill in Name, choose Personal and Free for this setup, then click Create organization.
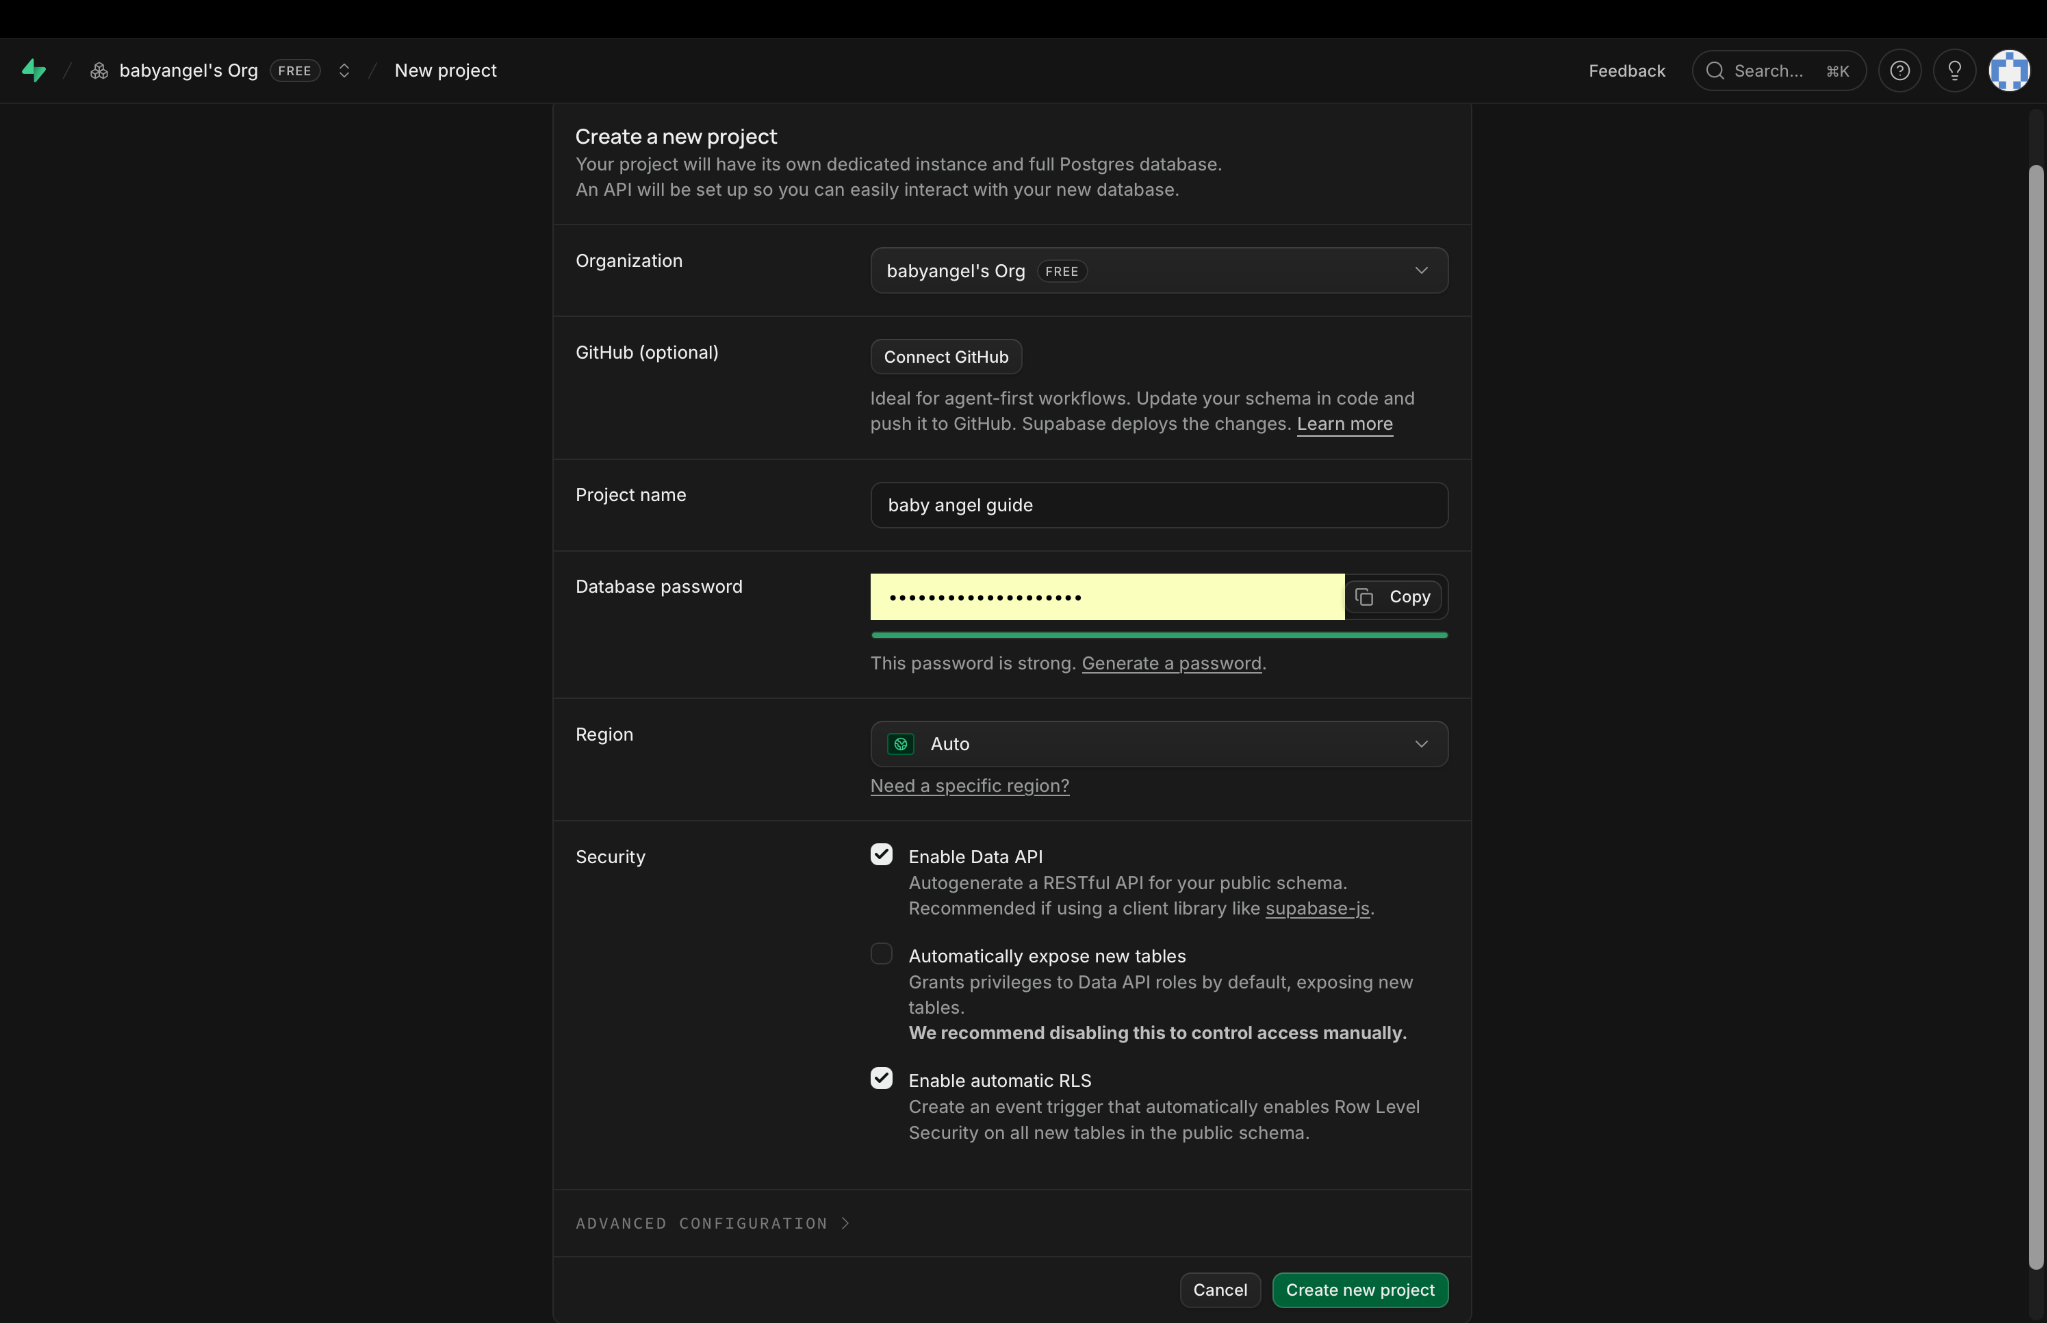
Click the image to view it larger. 5On Create a new project, fill in Project name, Database password and Region. Keep the password private. Turn on Enable Data API. If shown, leave Automatically expose new tables off and turn on Enable automatic RLS. The SQL in this guide enables row-level security for the widget tables. Click Create new project.
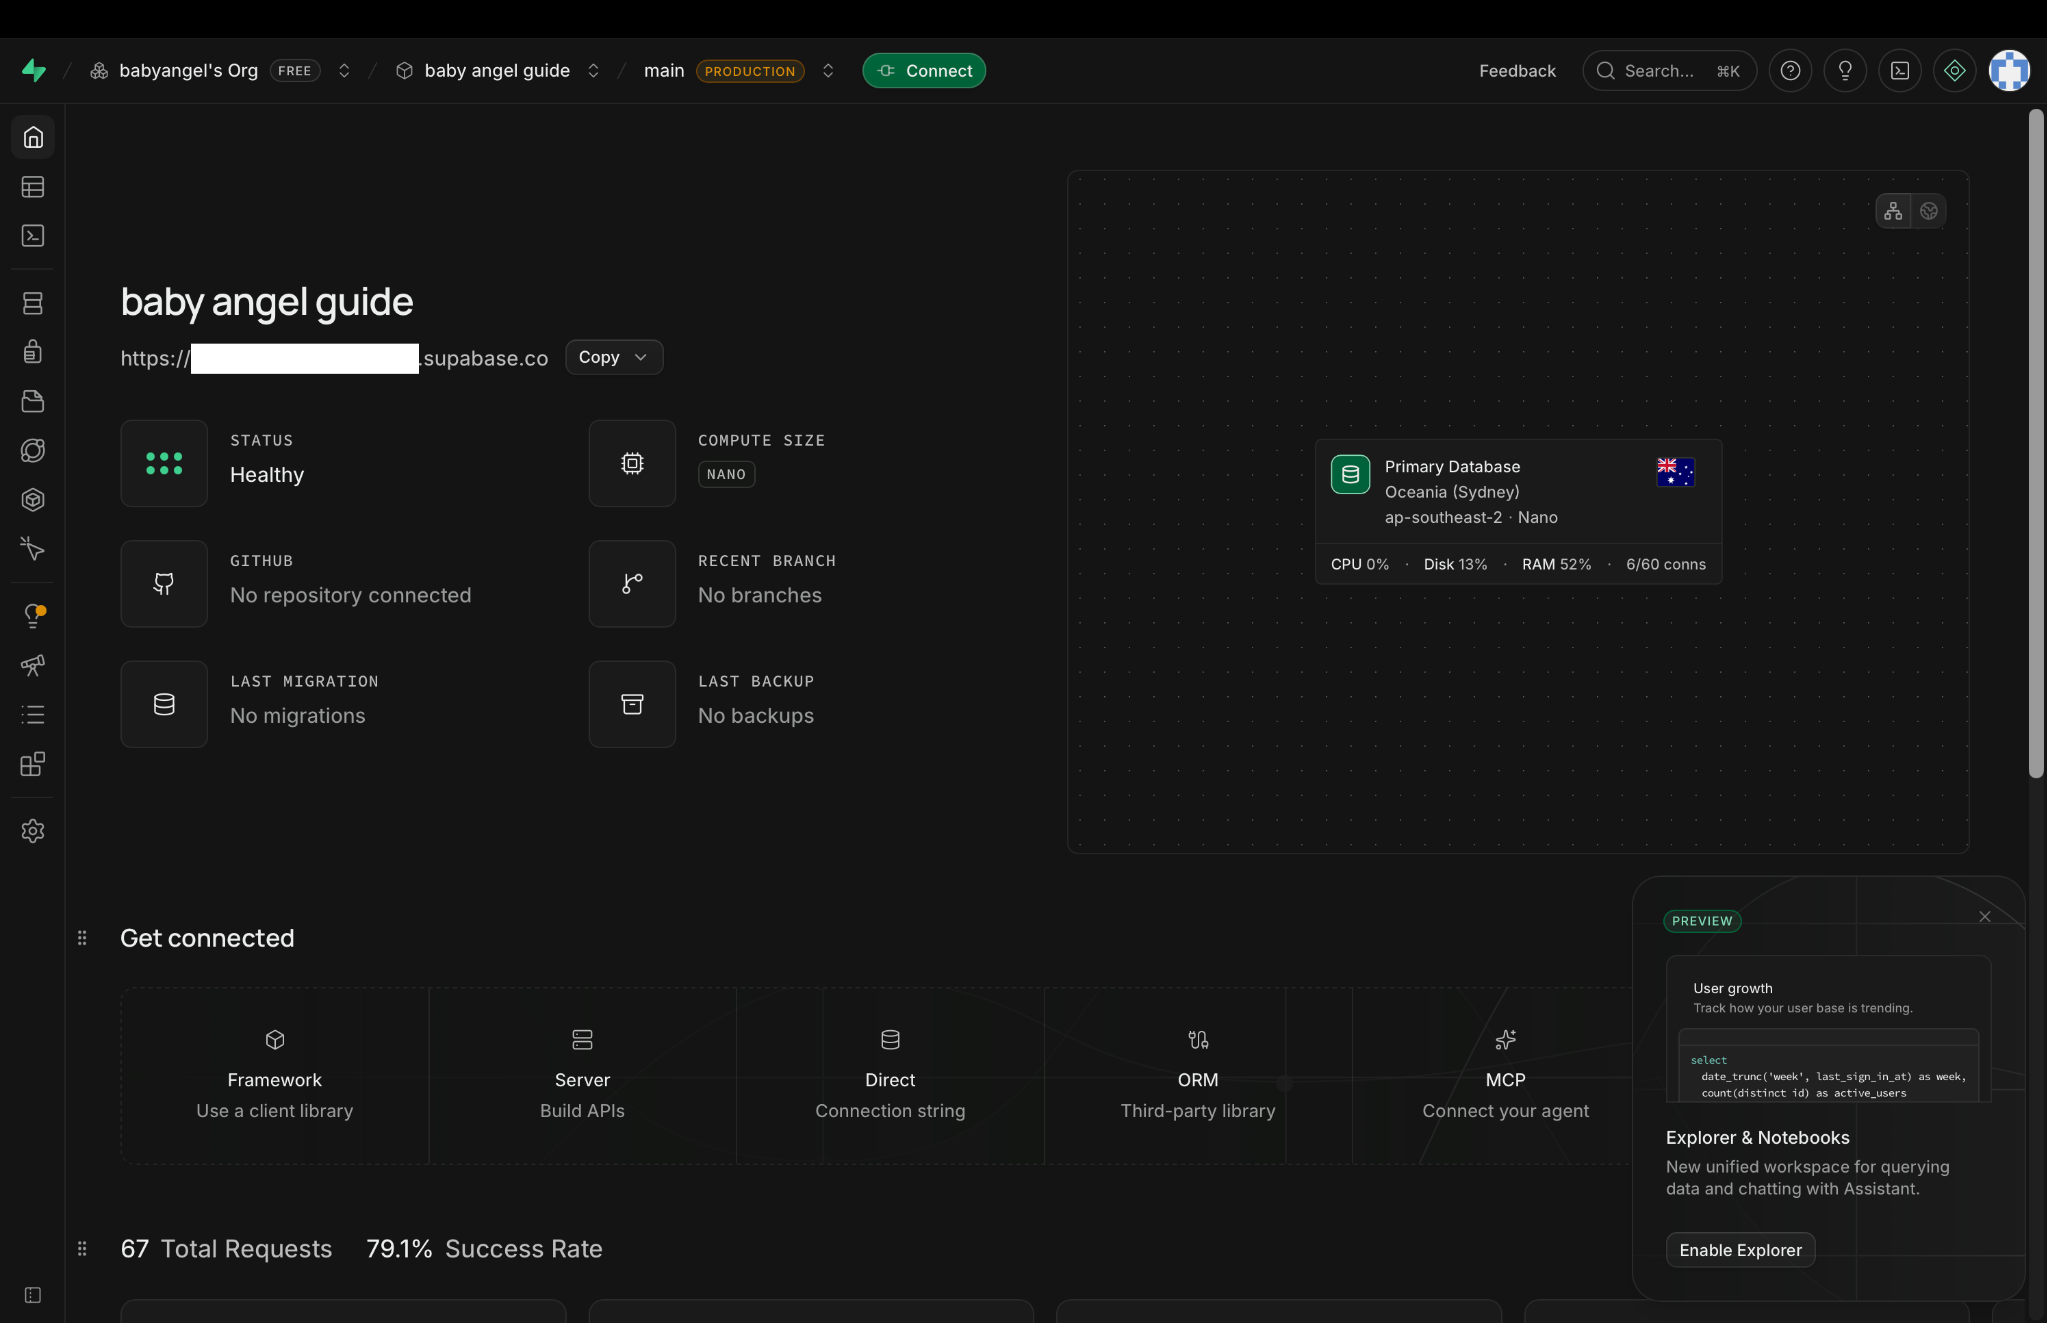
Click the image to view it larger. 6Wait for the new project’s dashboard to load. Keep this Supabase tab open so you can return to the same project when Cloudflare asks for its URL and secret key.
Click the image to view it larger. -
Paste the SQL for the widget you want
Choose Chatroom only, Guestbook only, or both. You only need to run SQL for the widget you want. If you choose both, run each SQL separately. Copy the complete SQL from the code boxes on this page. The screenshots show where to paste and run it.
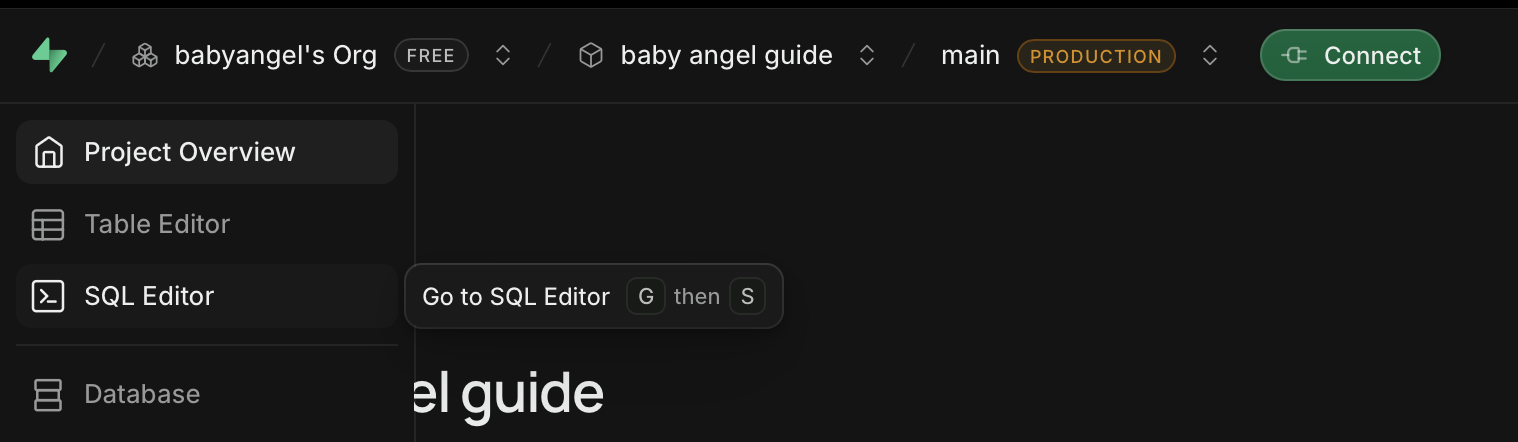
7In the Supabase sidebar, click SQL Editor.
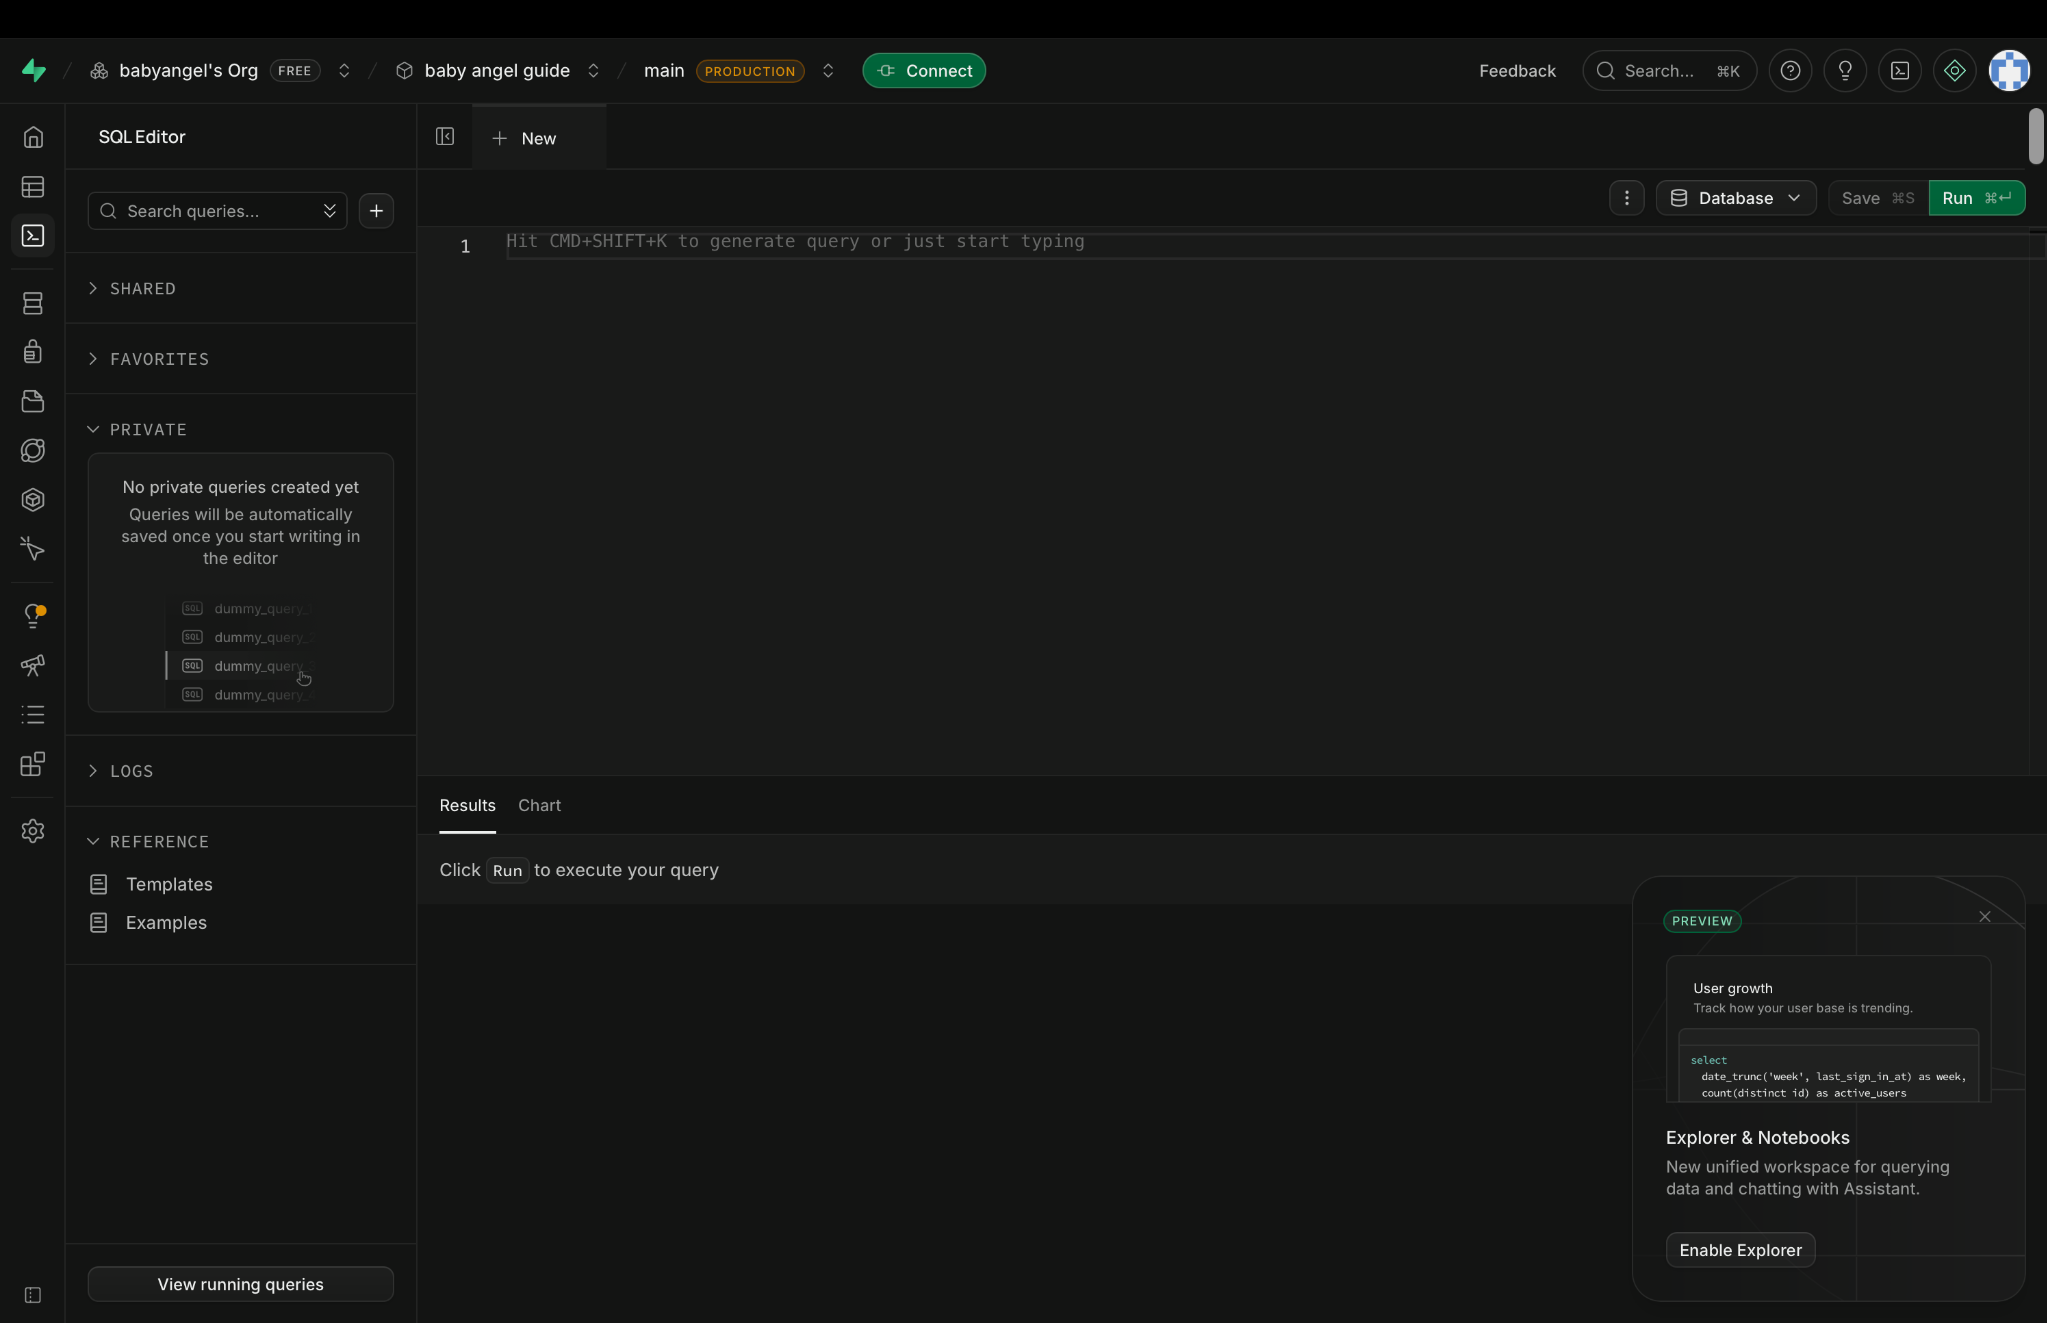
Click the image to view it larger. 8The editor in this picture is already blank. Click line 1 and use it for your SQL. If you have an existing query open instead, click + New for a blank editor. For Guestbook only, skip to step 12.
Click the image to view it larger. 9Click copy chatroom SQL in the box just above, then paste the copied code into the blank editor.
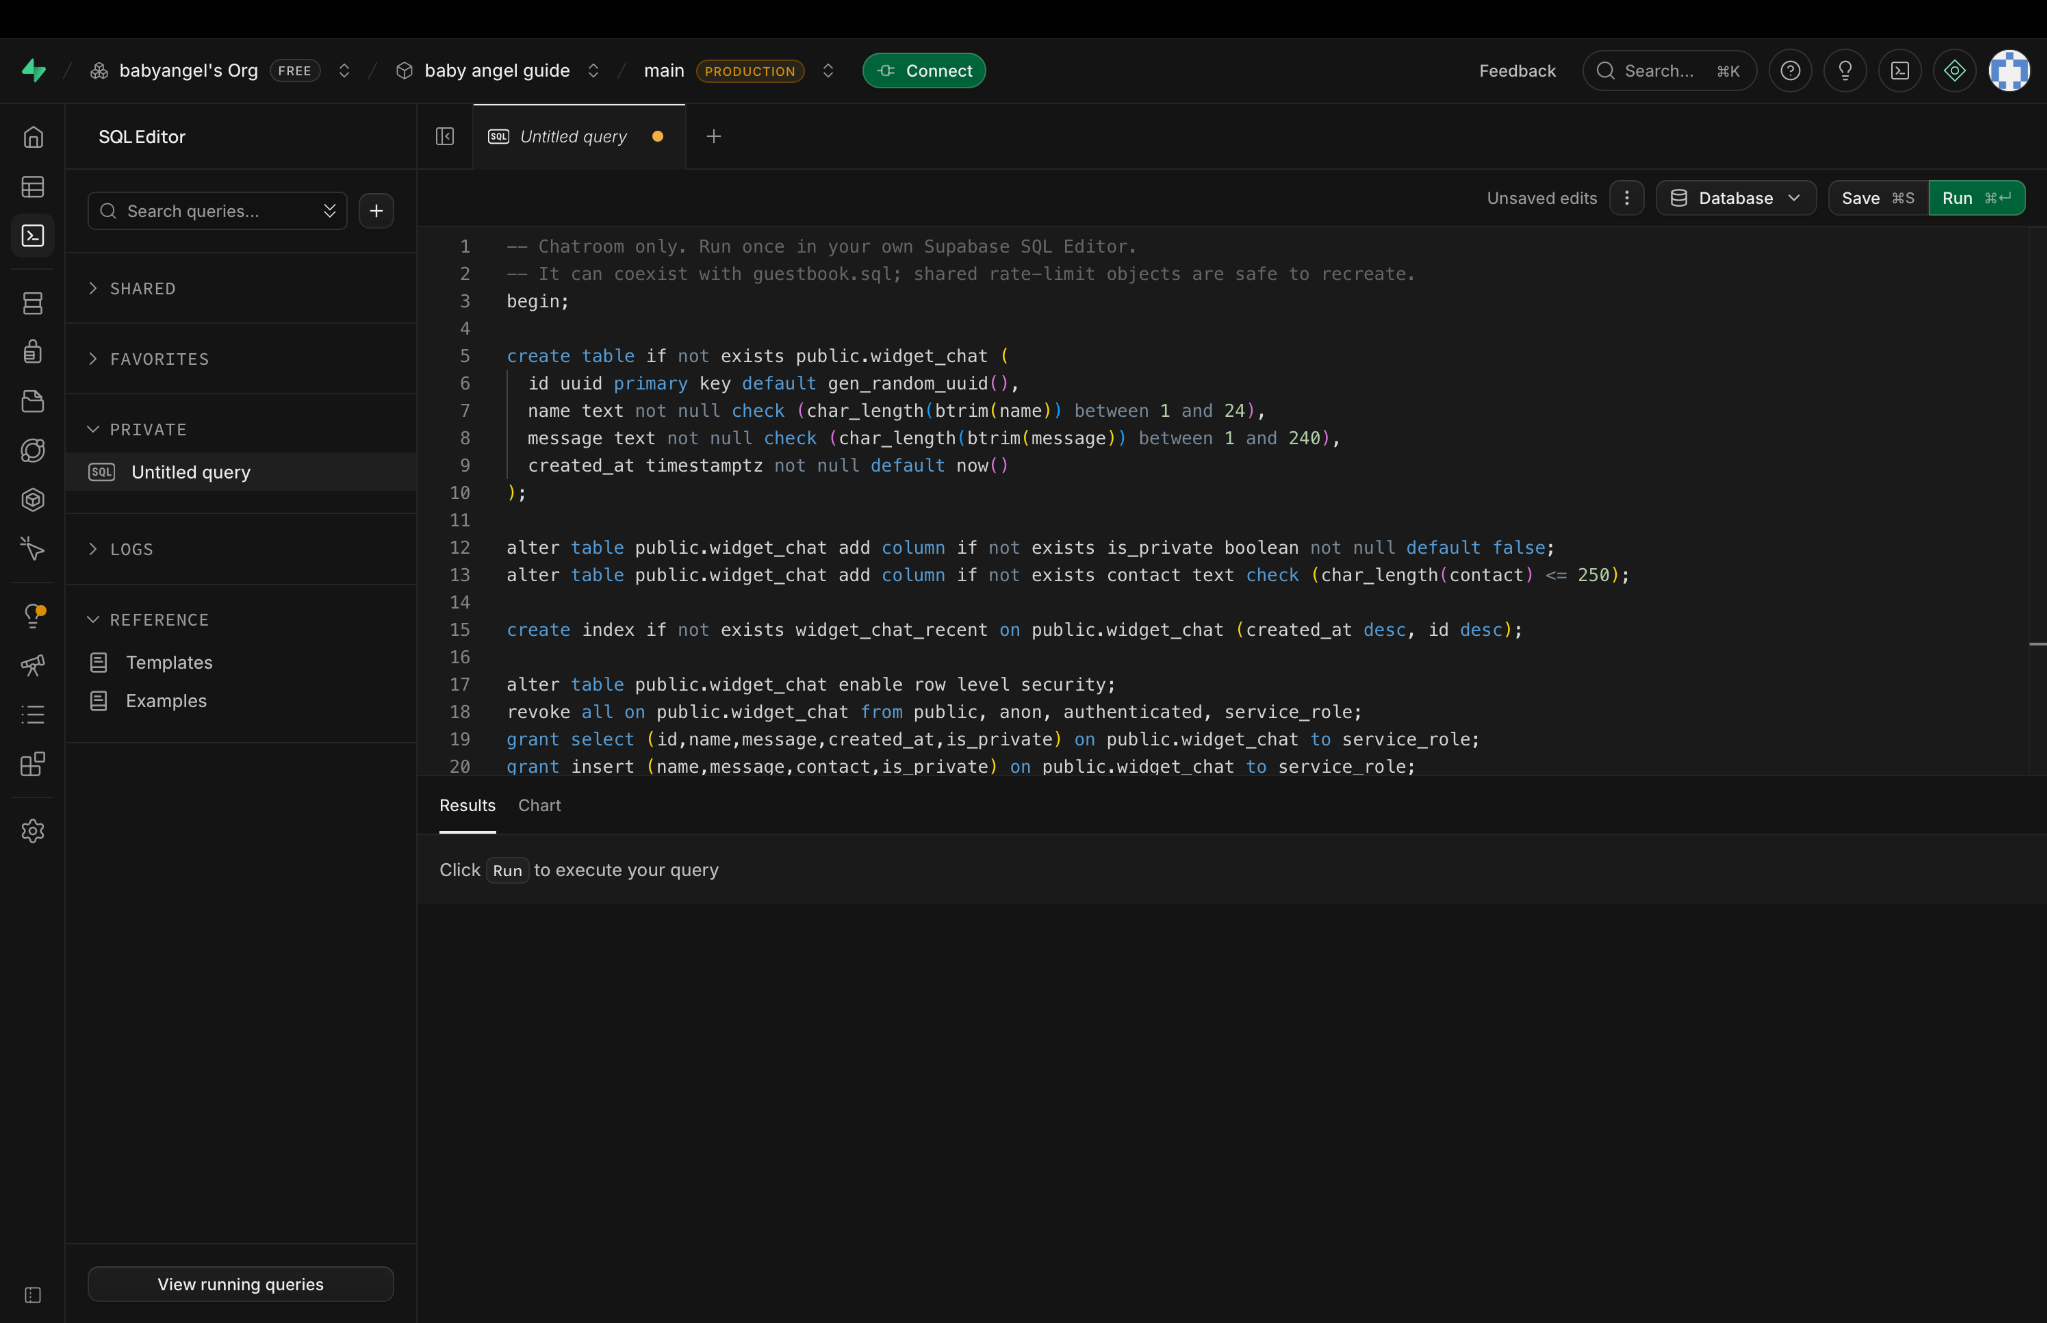
Click the image to view it larger. 10Click Run and look for Success. No rows returned in the results.
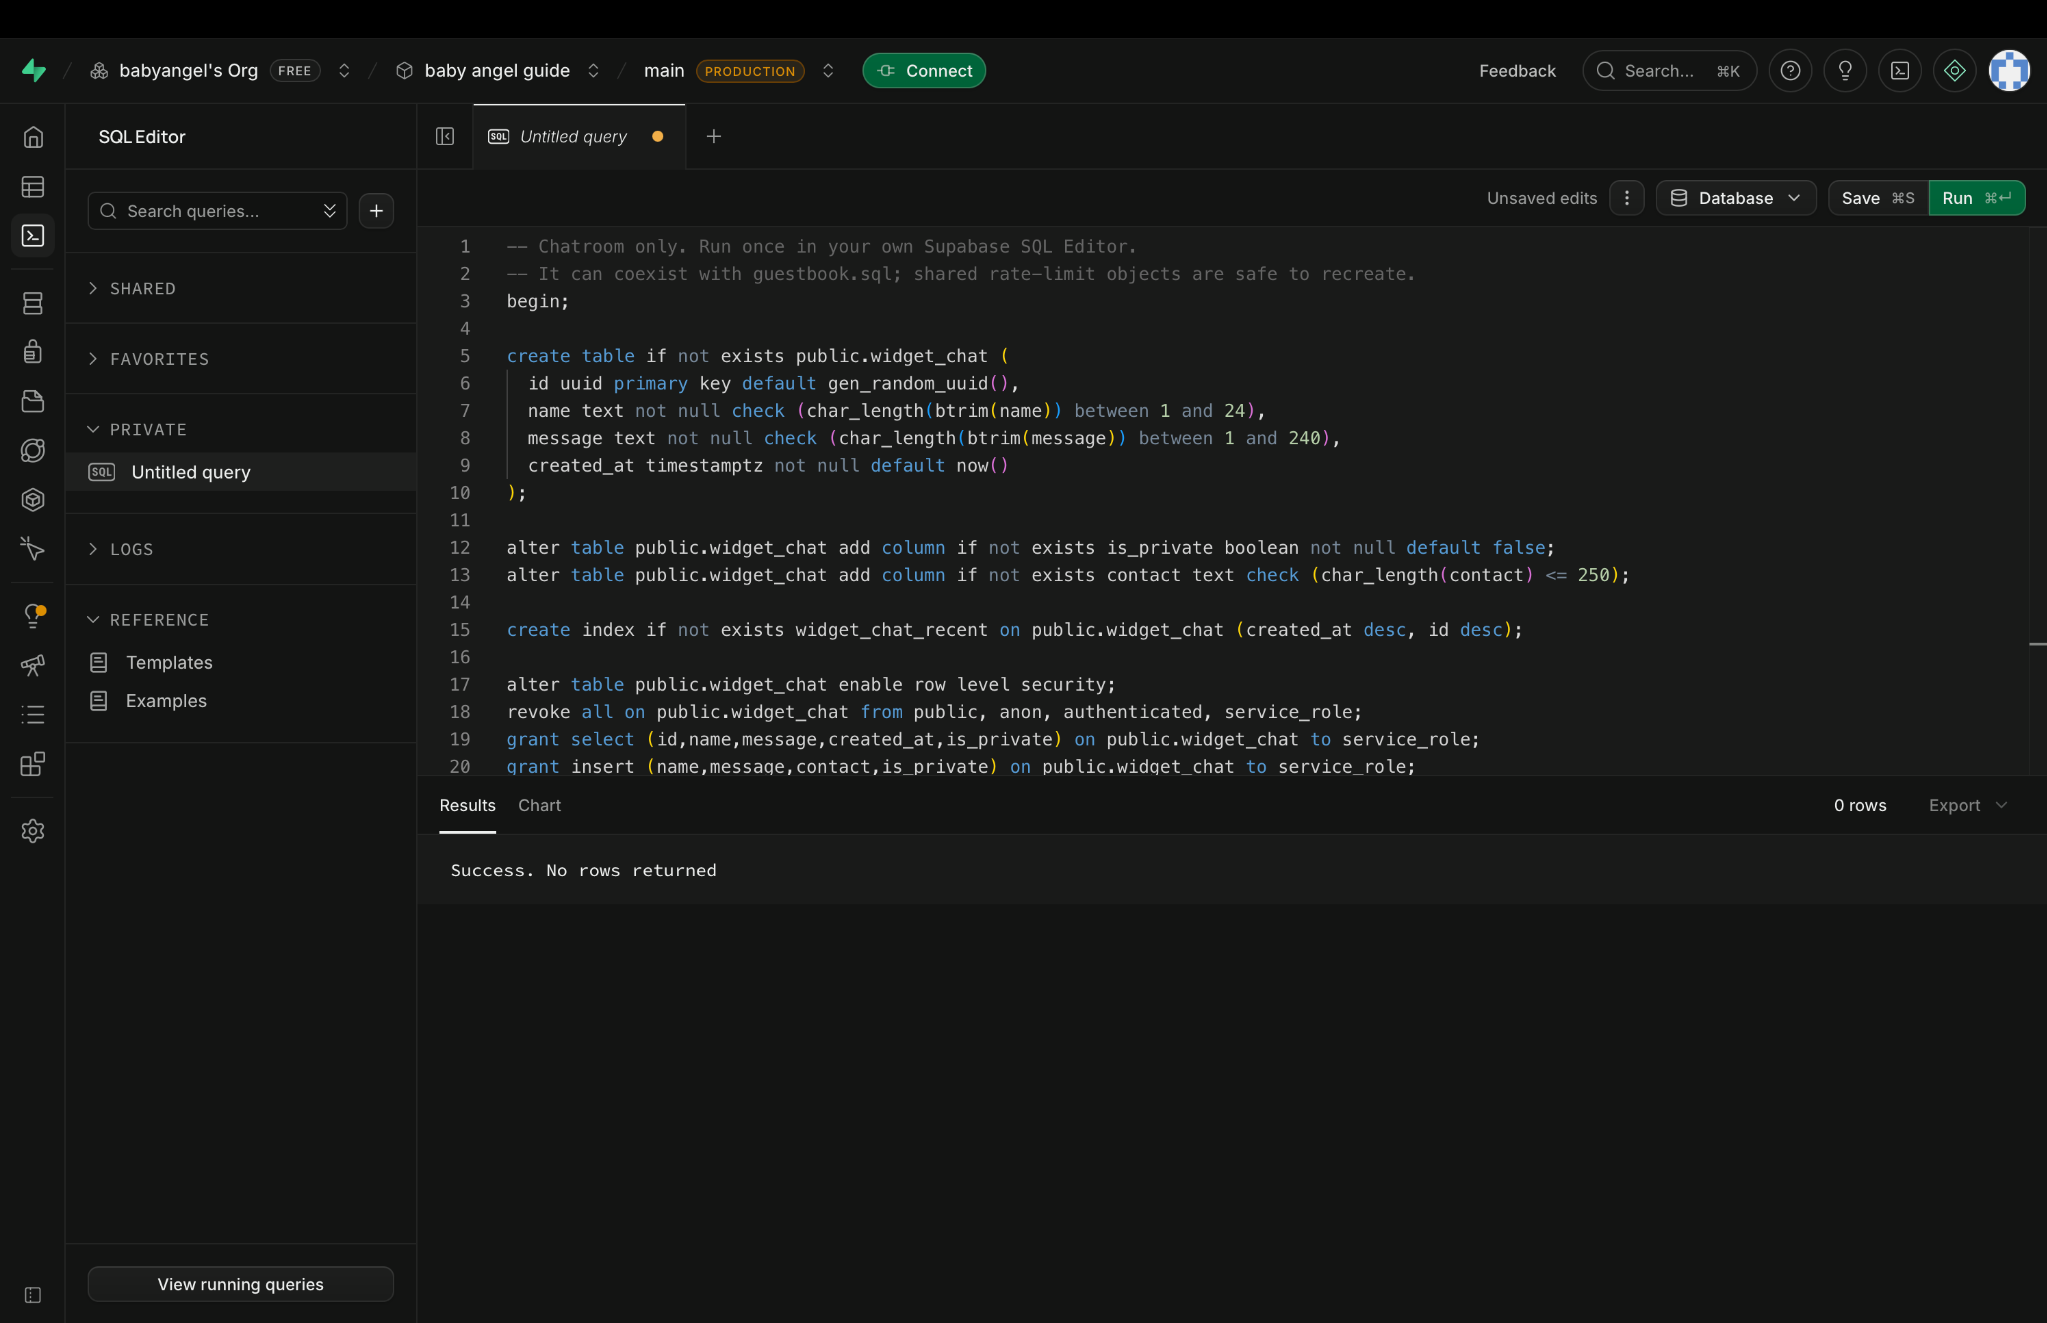
Click the image to view it larger. 11If you are installing both widgets, click the + beside the Untitled query tab to open a blank editor for Guestbook. For Chatroom only, skip to step 14.

Click the image to view it larger. 12Click copy guestbook SQL in the box just above, then paste the copied code into the blank editor.
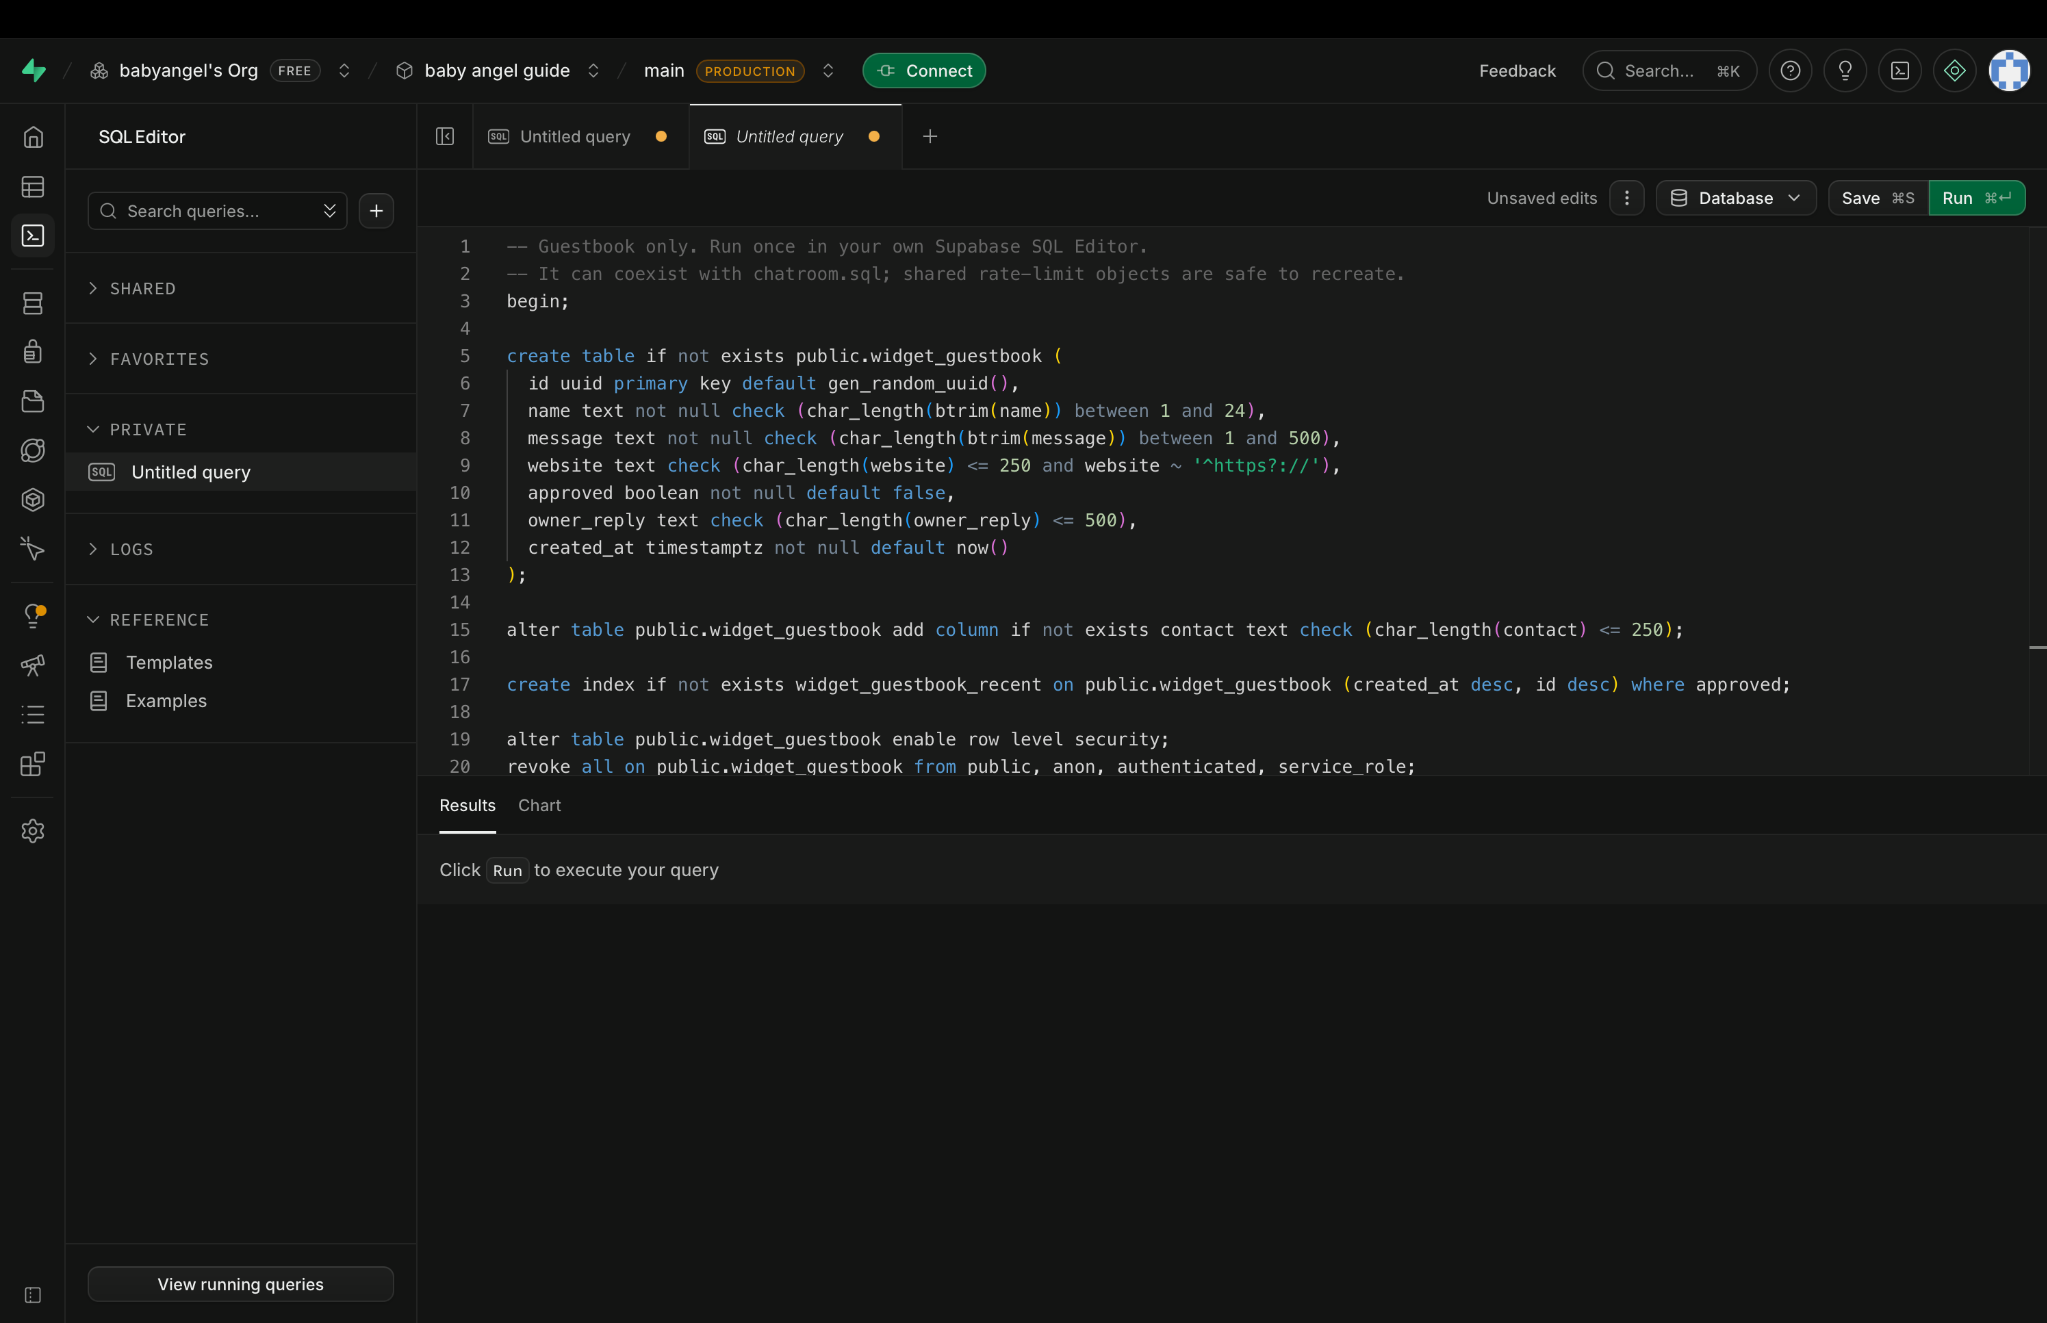
Click the image to view it larger. 13Click Run and look for Success. No rows returned in the results.
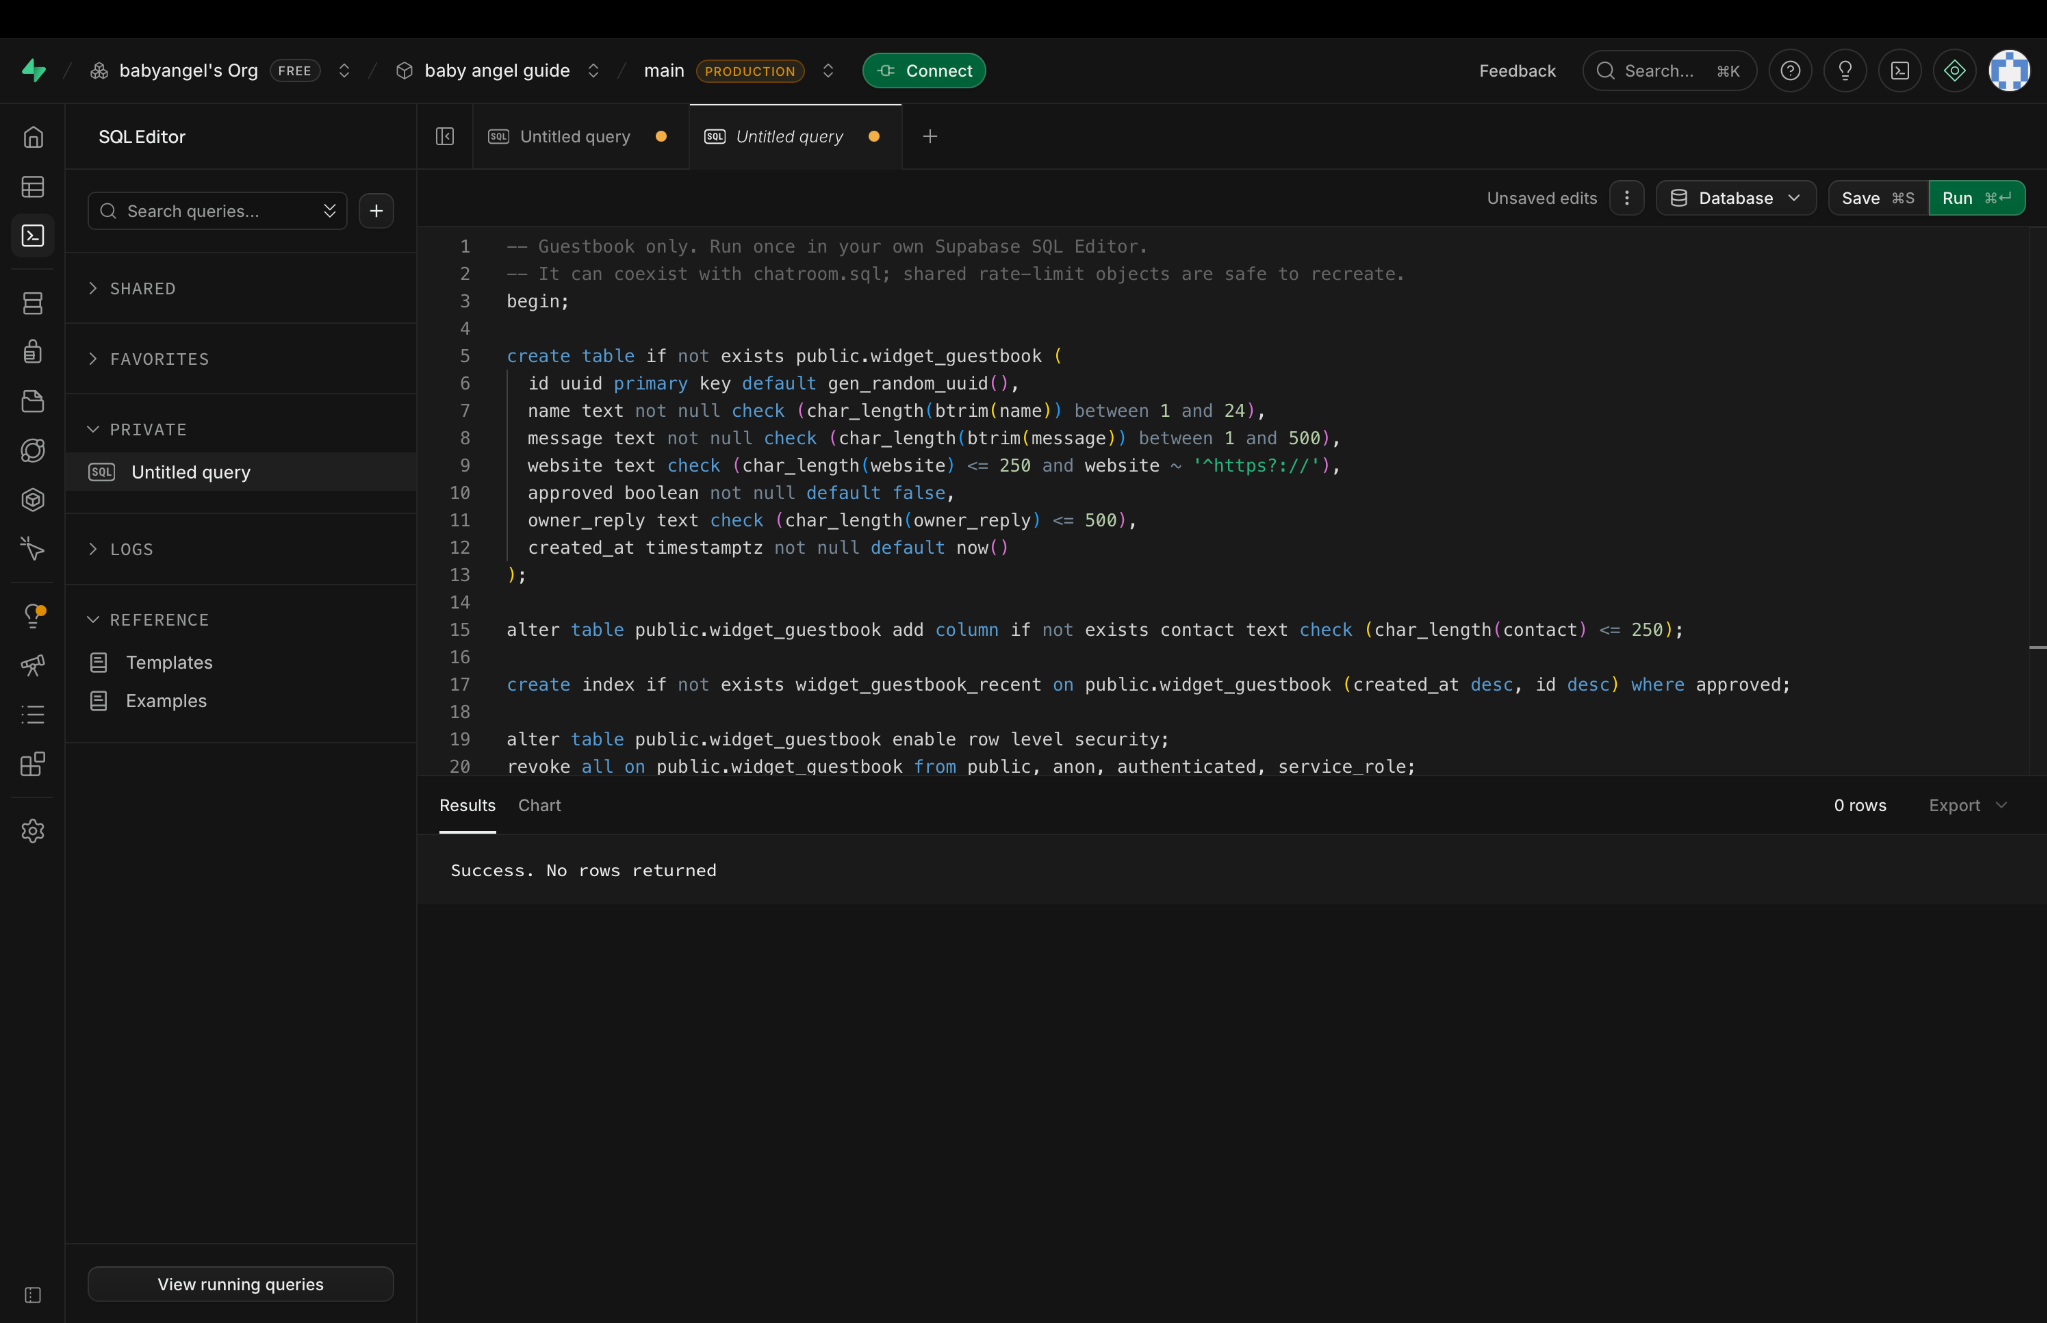
Click the image to view it larger. 14Open Table Editor from the left sidebar.
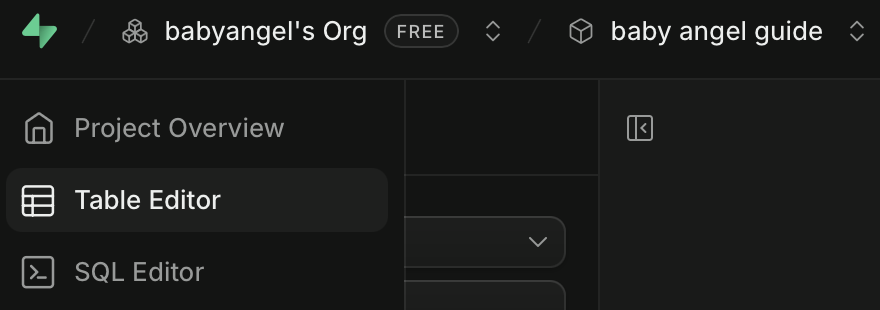
Click the image to view it larger. 15Check the table list on the left. If you installed Chatroom, you should see
widget_chatandwidget_write_limit. If you installed Guestbook, you should seewidget_guestbookandwidget_write_limit. If you installed both, you should see all three tables, just like in the picture. You do not need to create any more tables.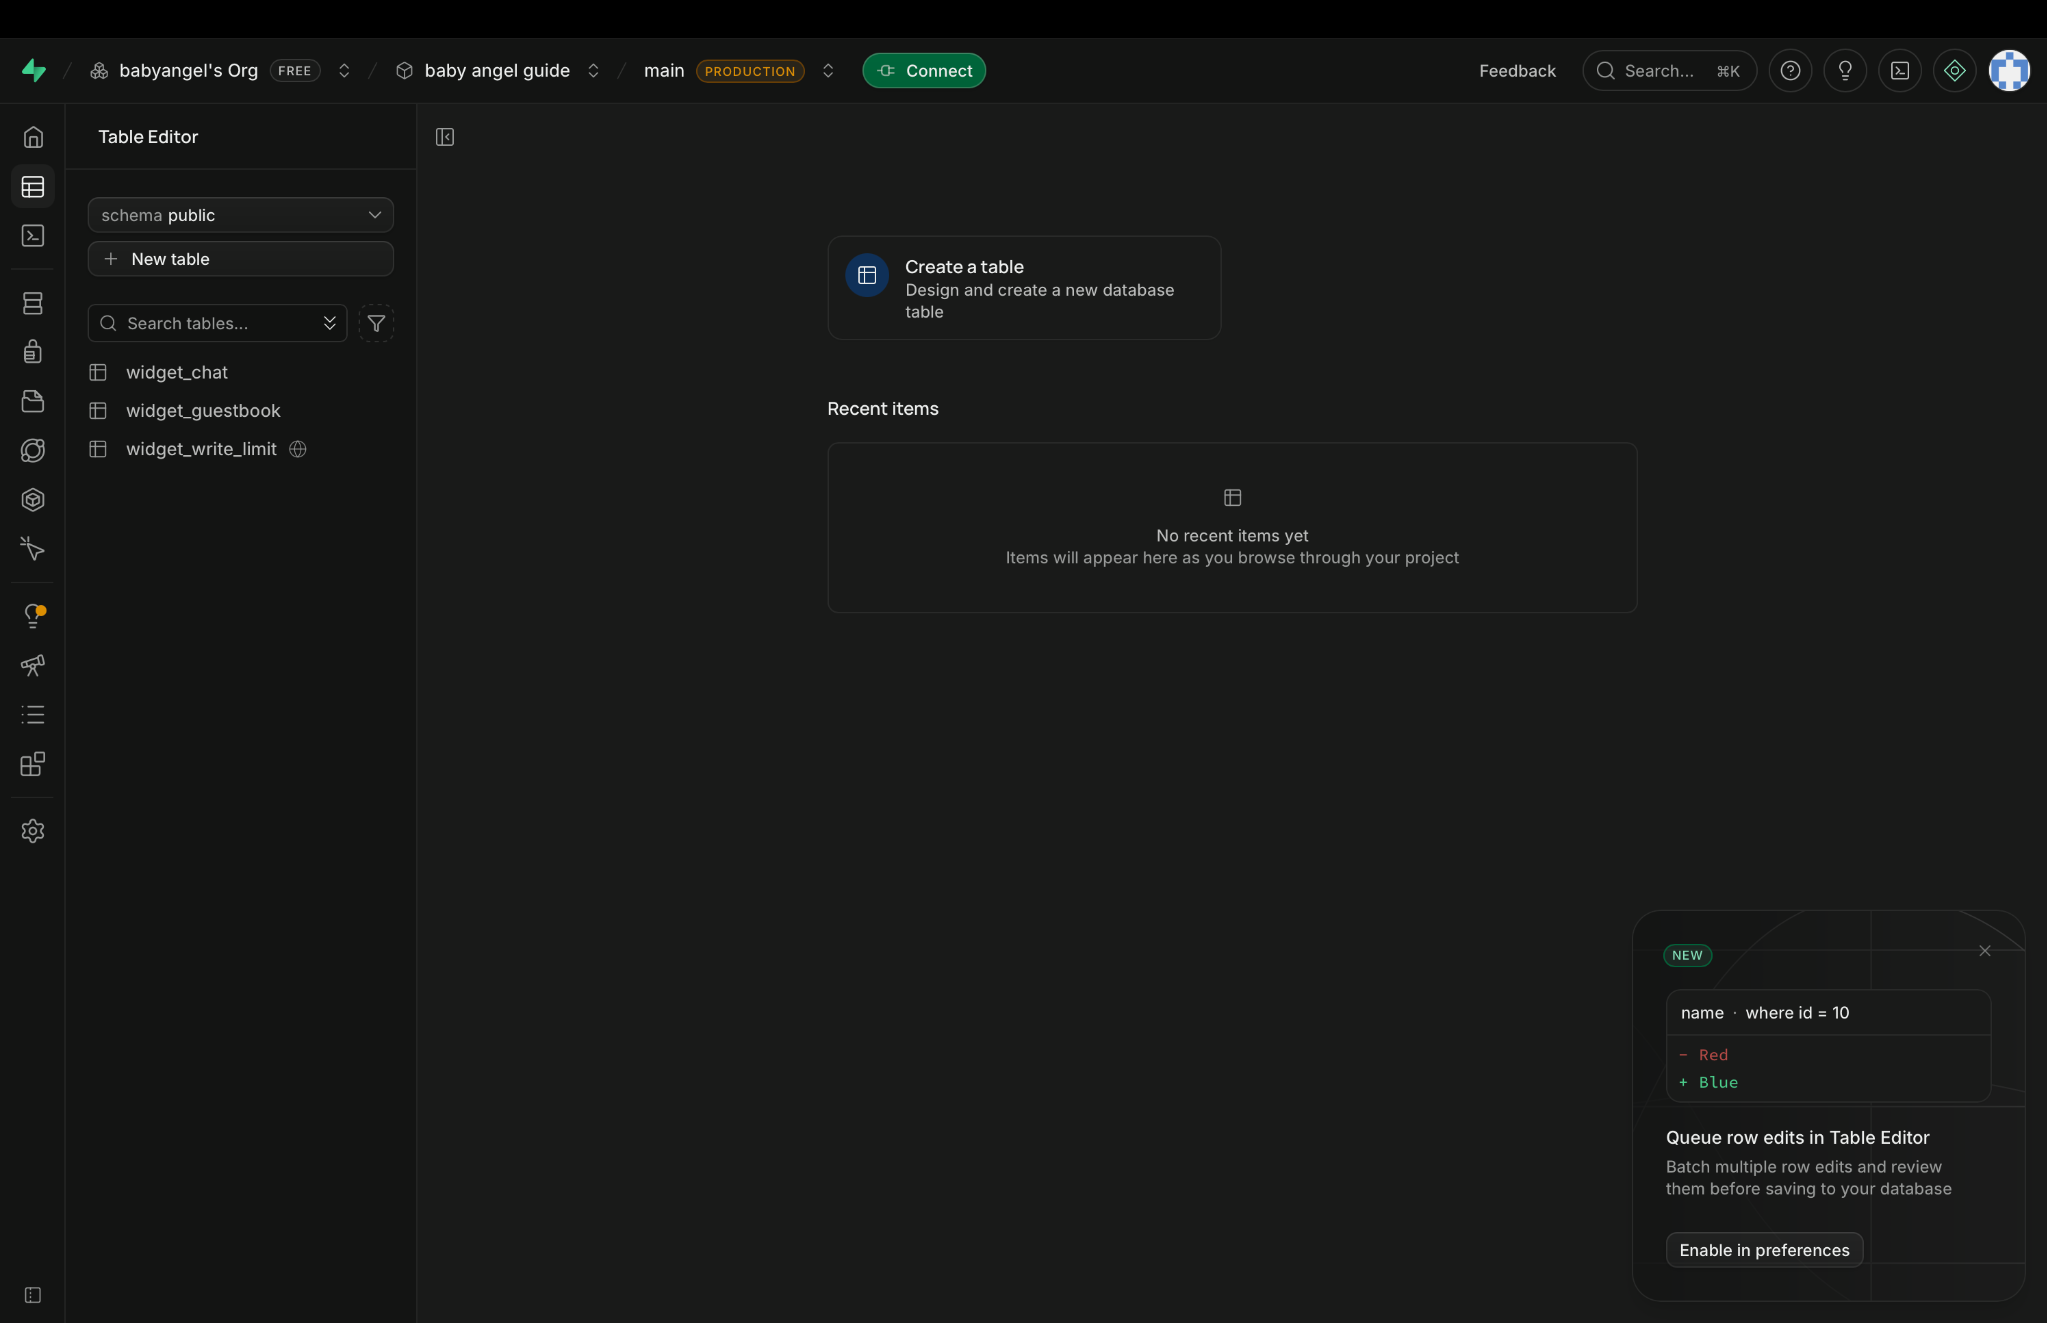
Click the image to view it larger. -
Create a Cloudflare Worker
Create and deploy a Worker from the Hello World template. You’ll replace the starter code in step 33.
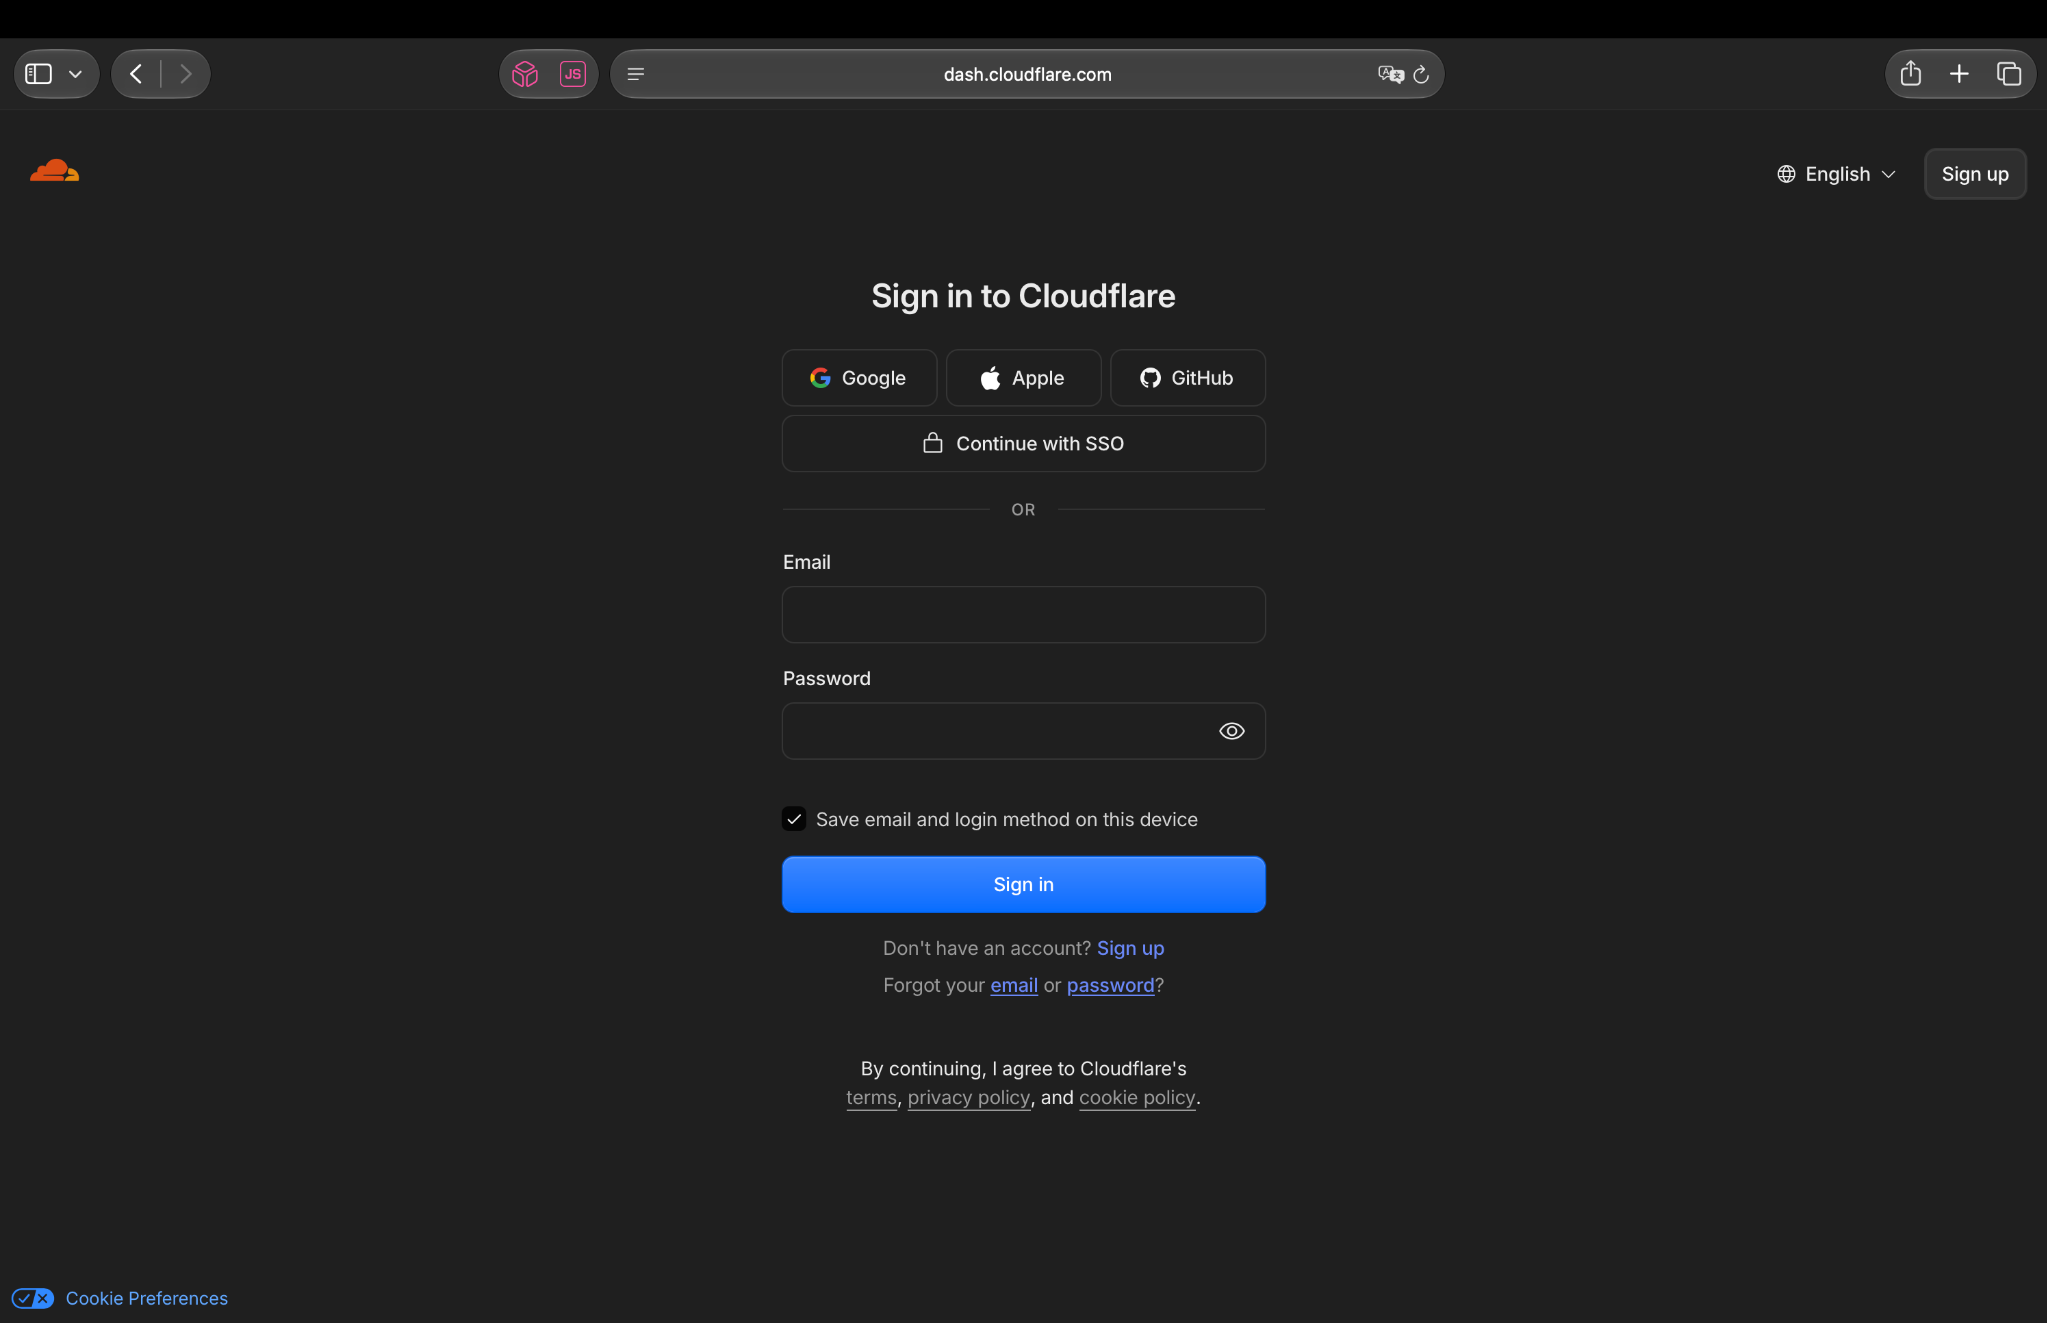
16Go to dash.cloudflare.com and sign in. Use Sign up if you need an account.
Click the image to view it larger. 17This is the Cloudflare account dashboard. Find Compute in the left sidebar for the next step.
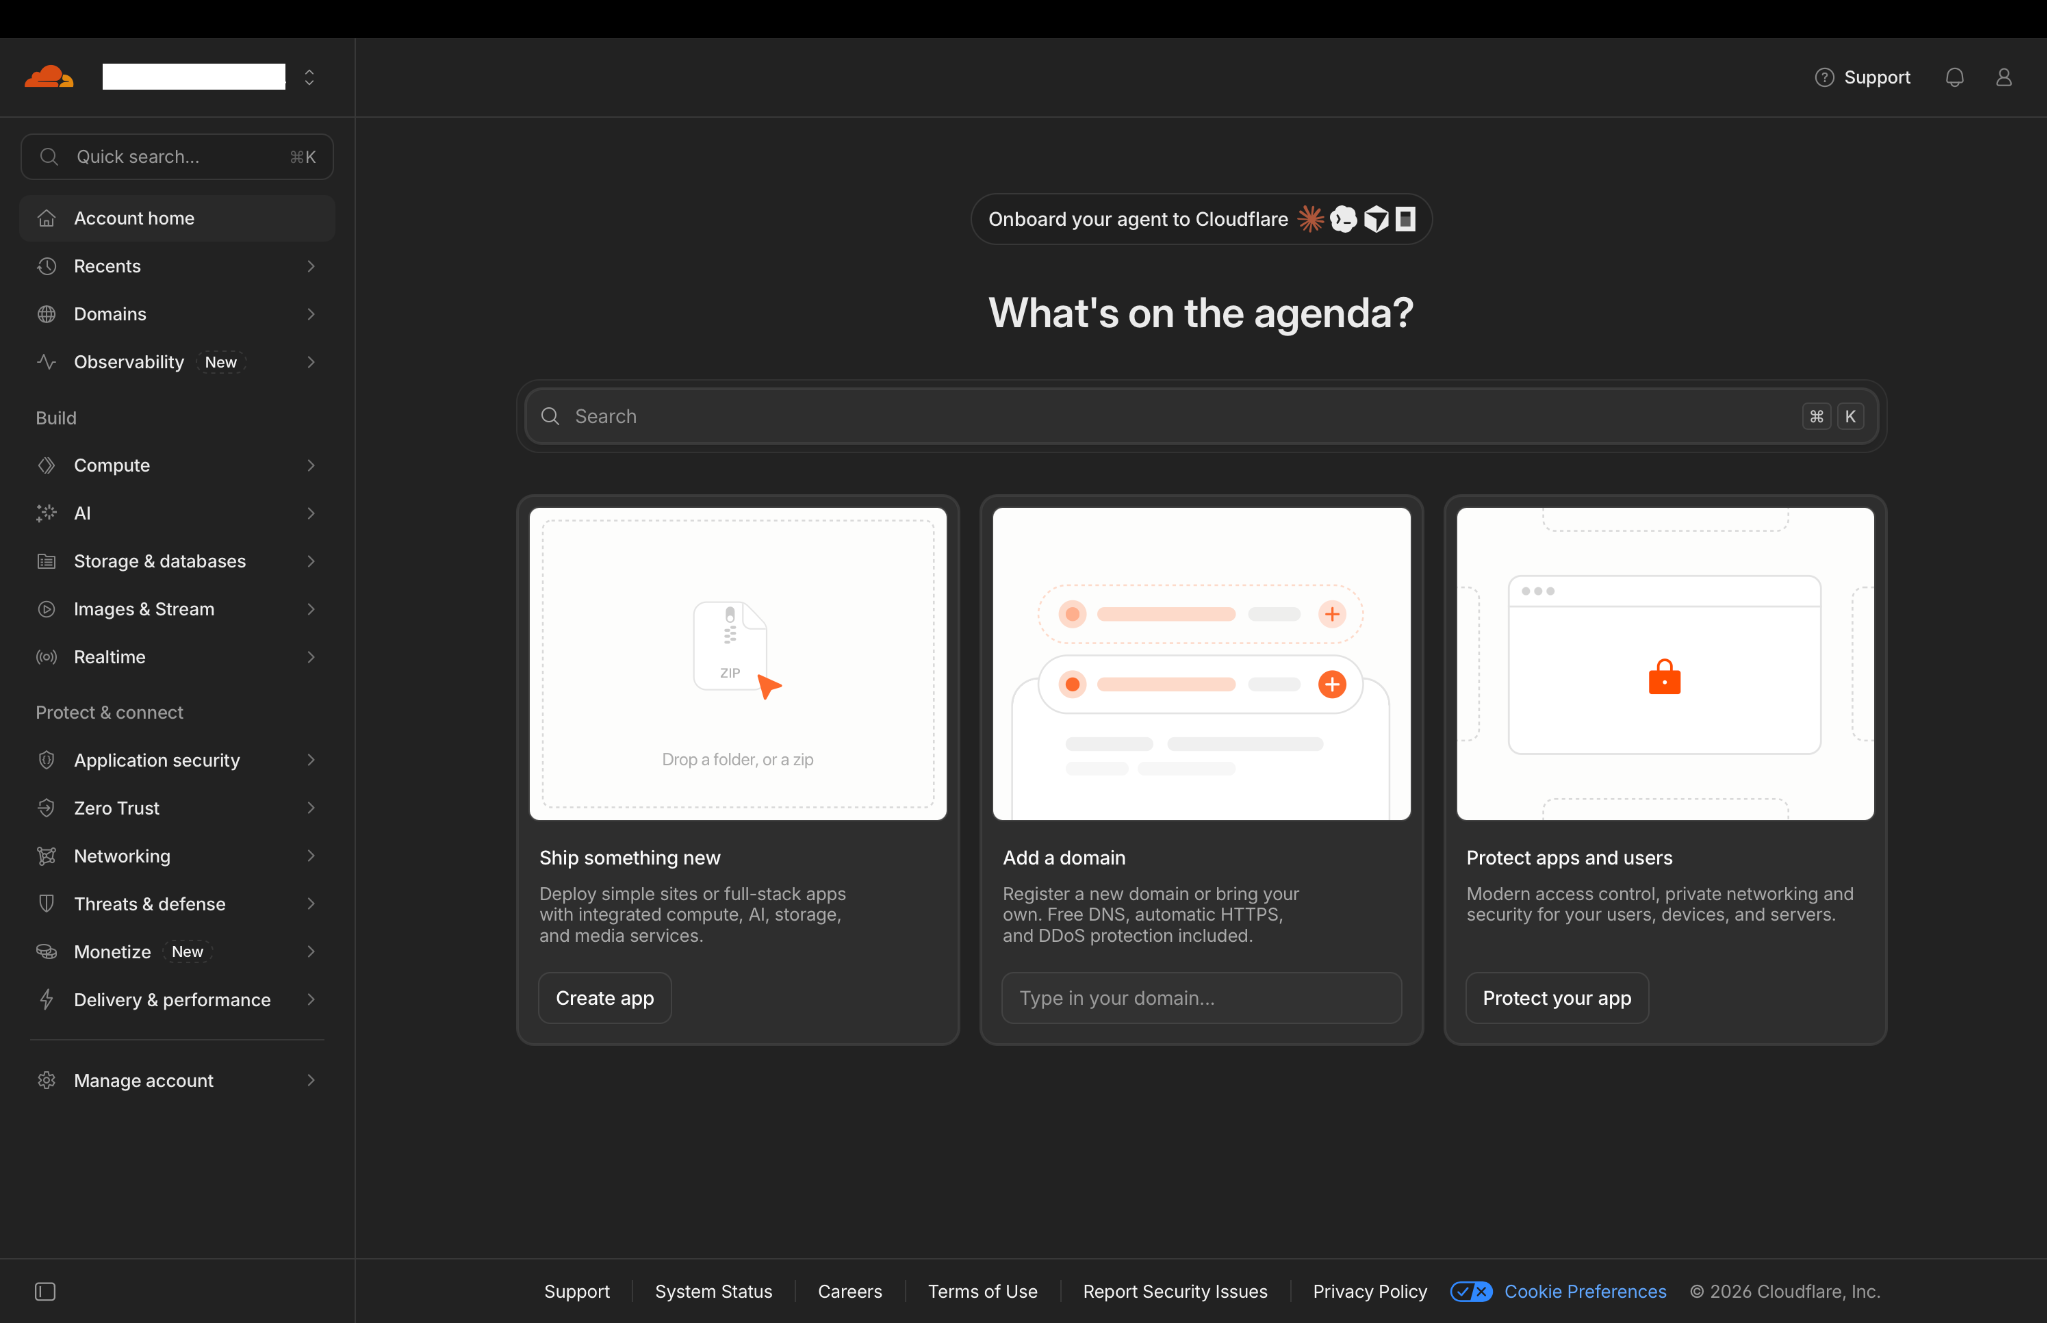
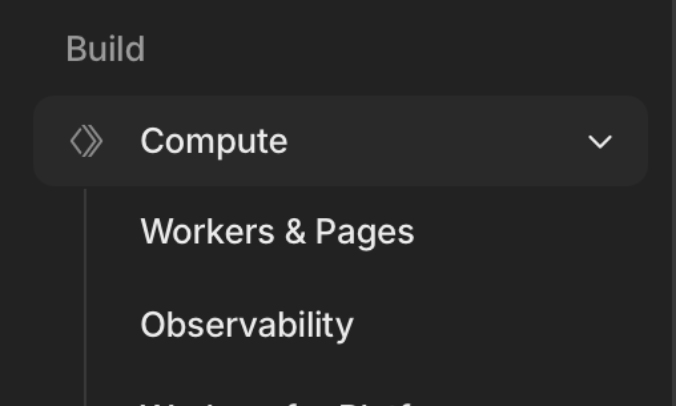
Click the image to view it larger. 18Open Compute from the left menu and choose Workers & Pages.
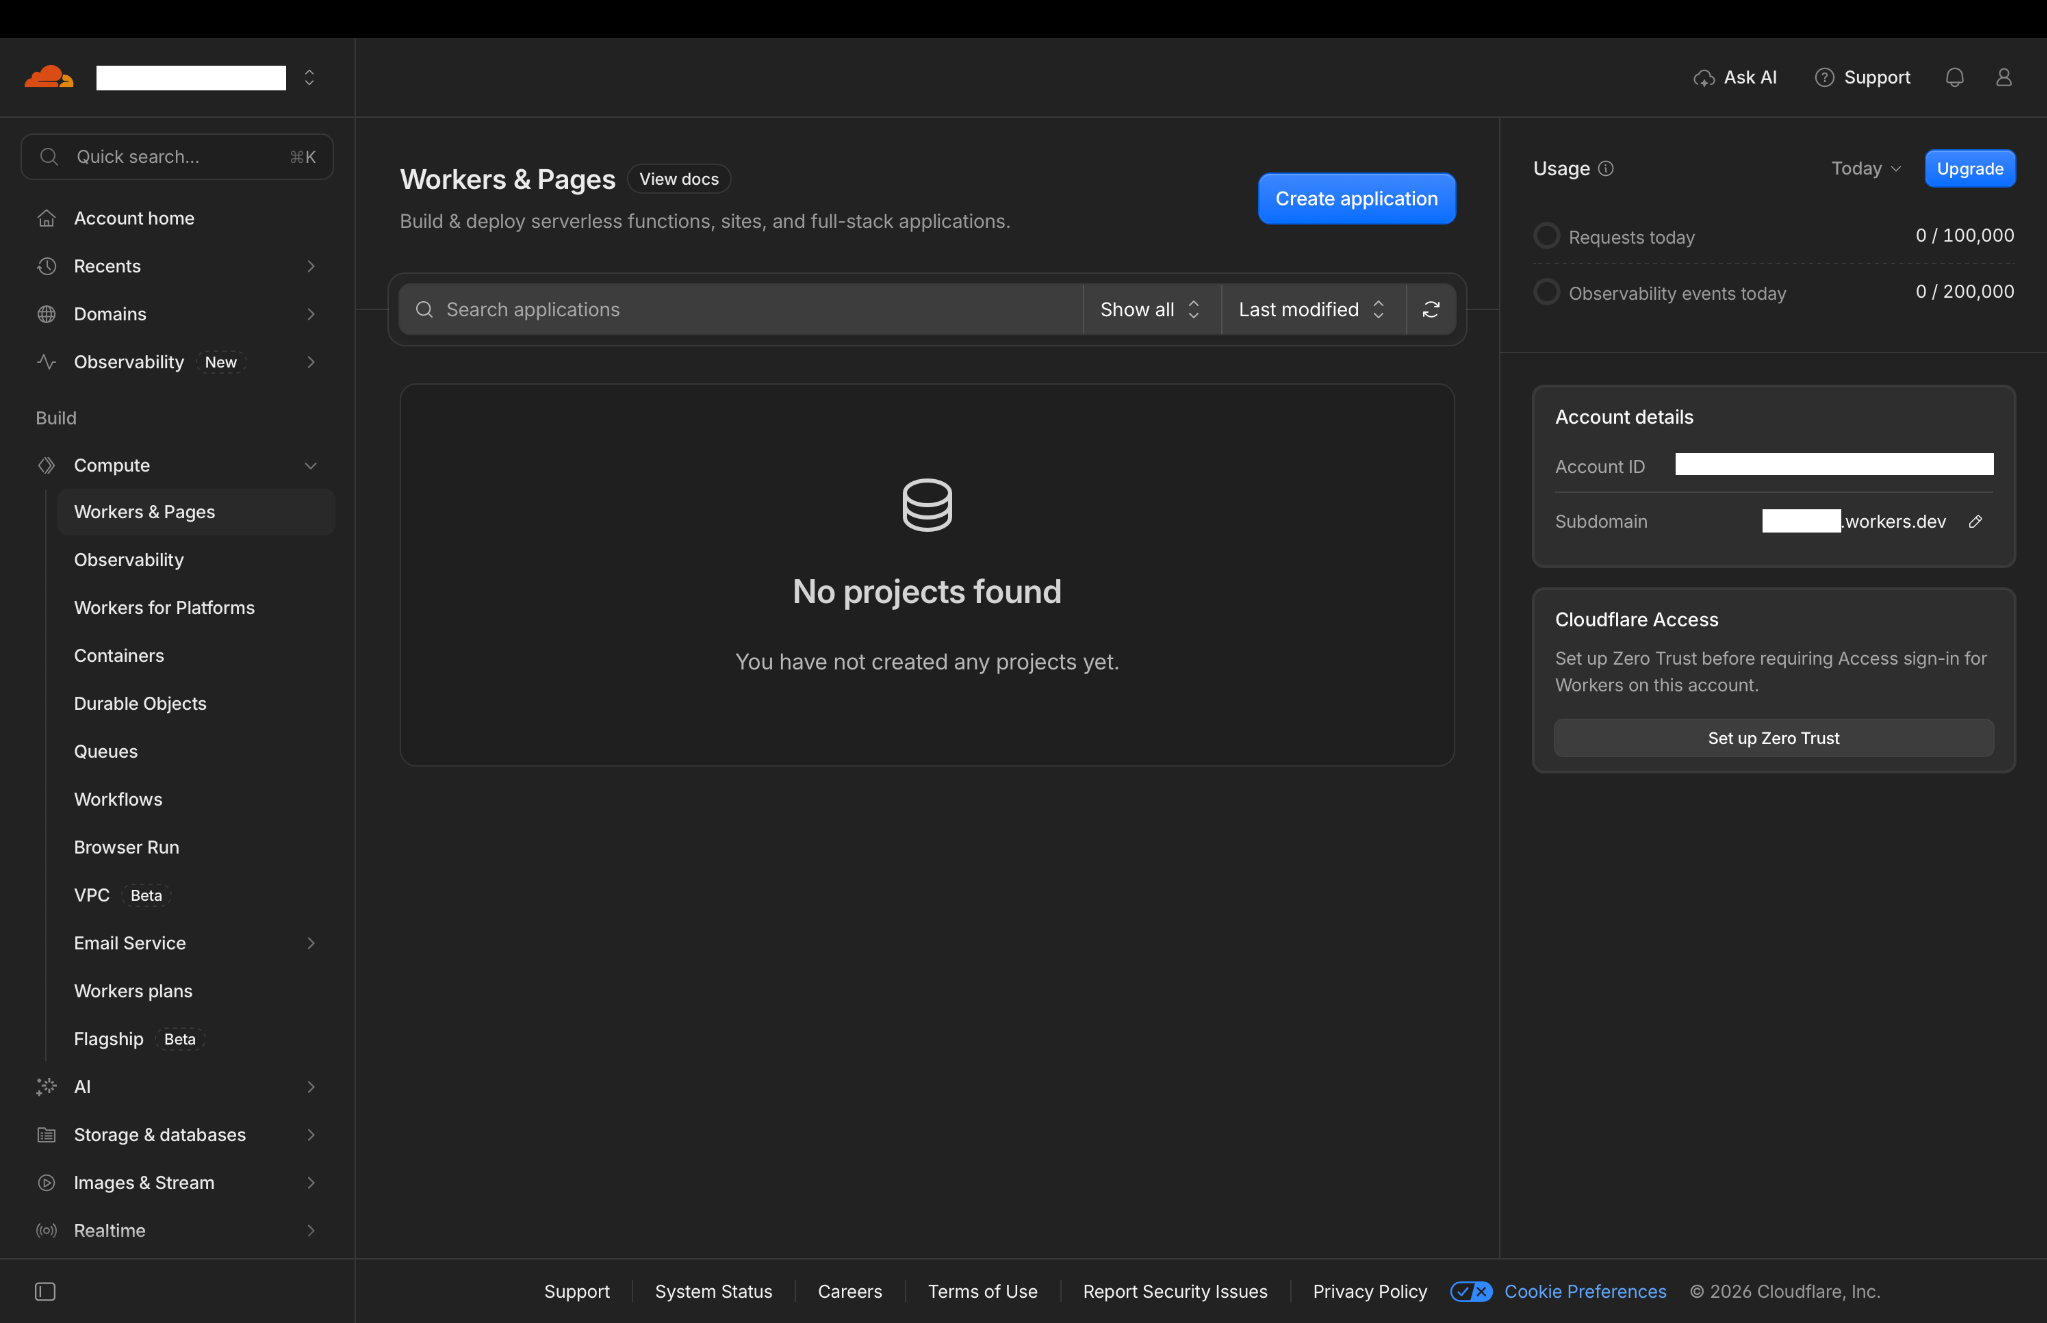
Click the image to view it larger. 19On Workers & Pages, click Create application.
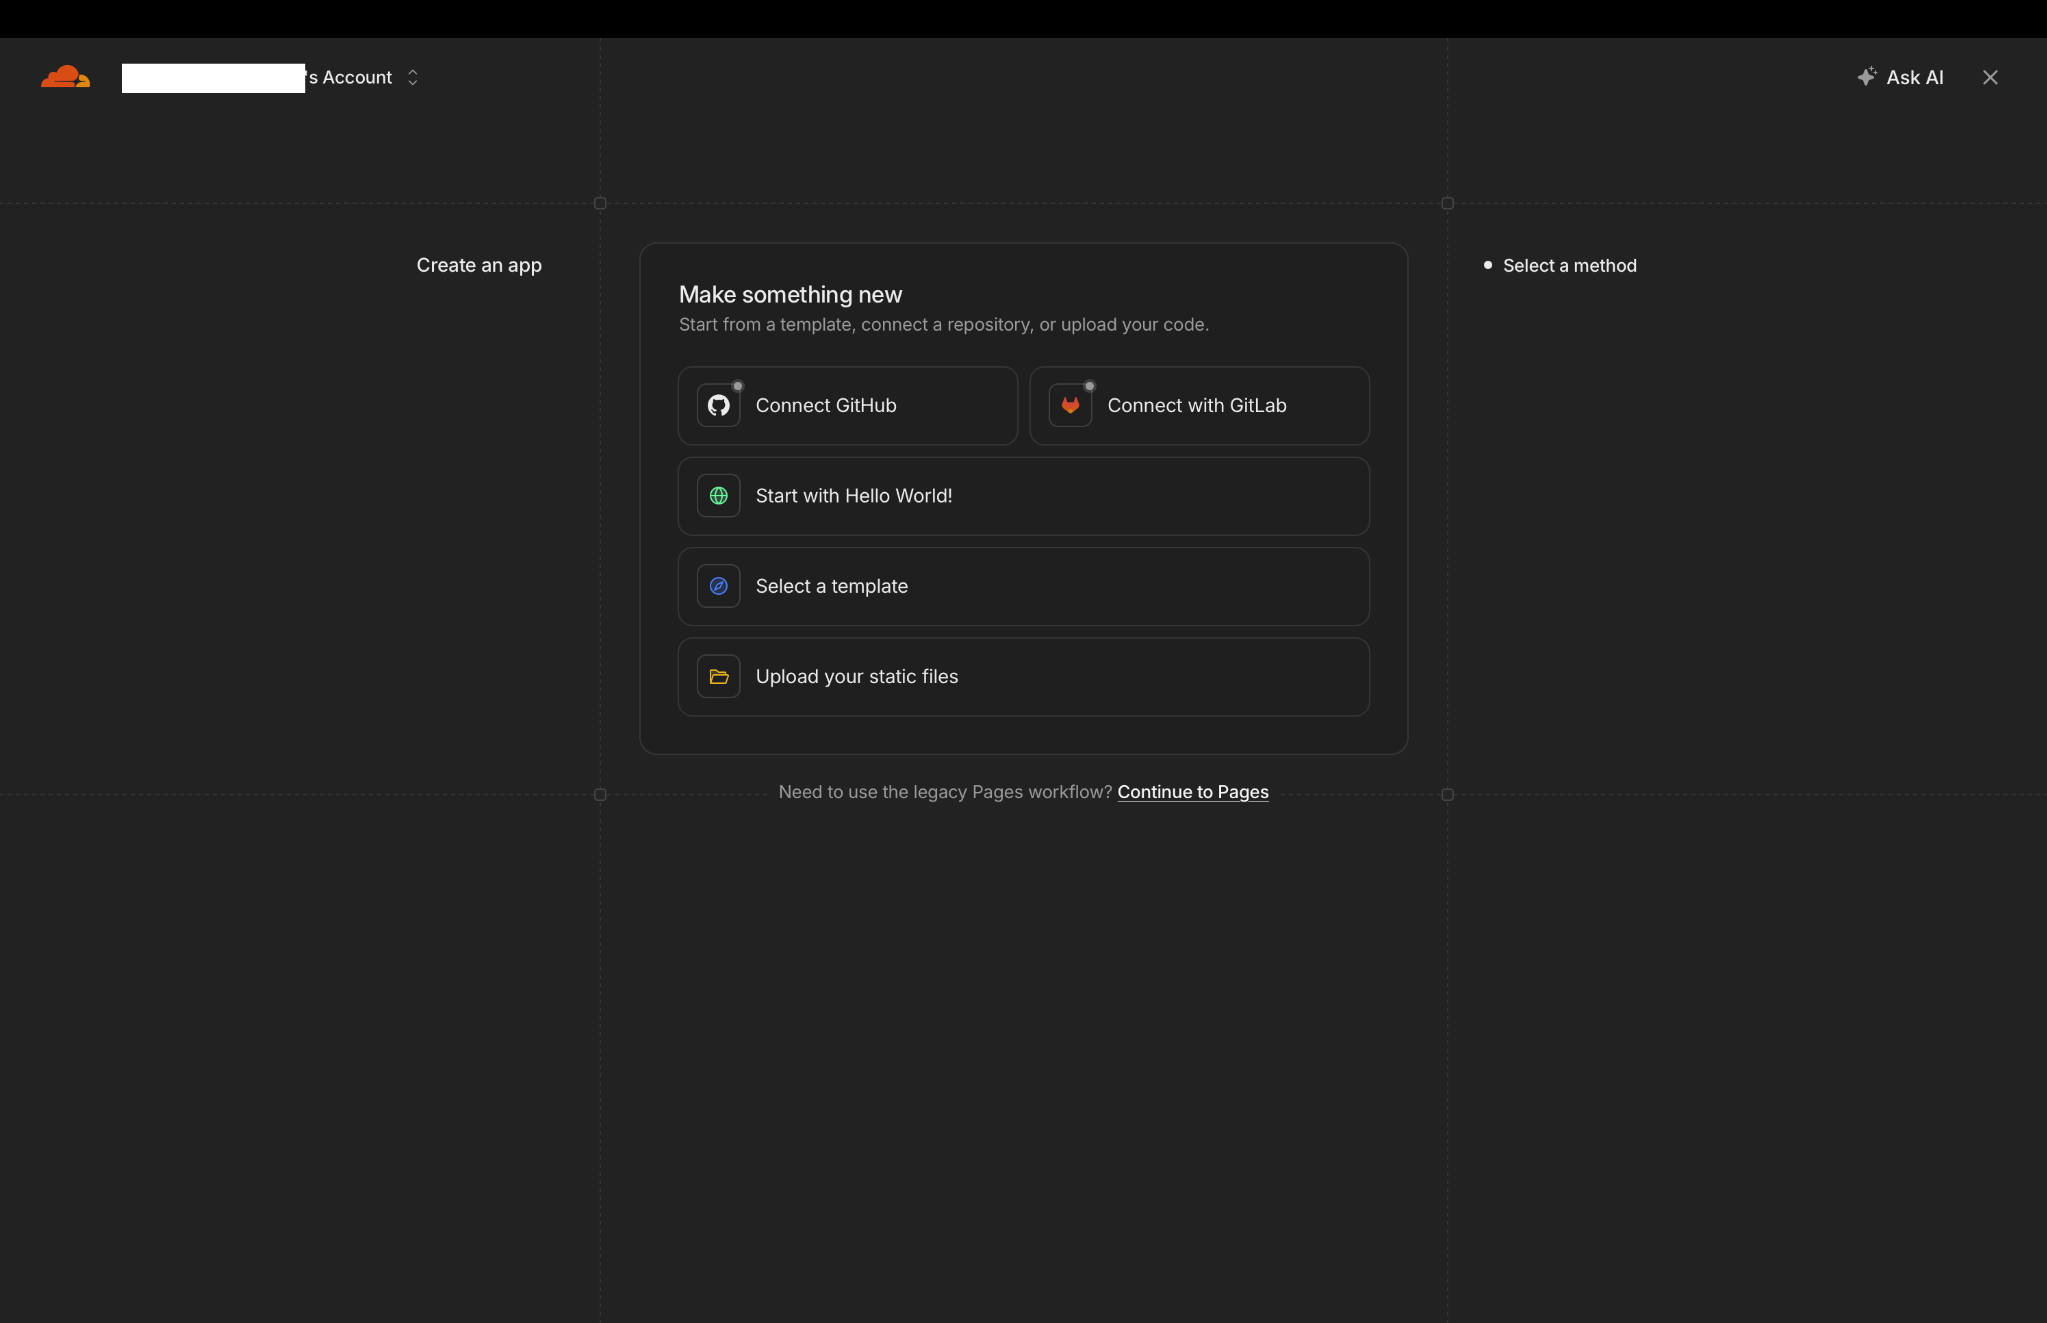
Click the image to view it larger. 20On Create an app, choose Start with Hello World!.
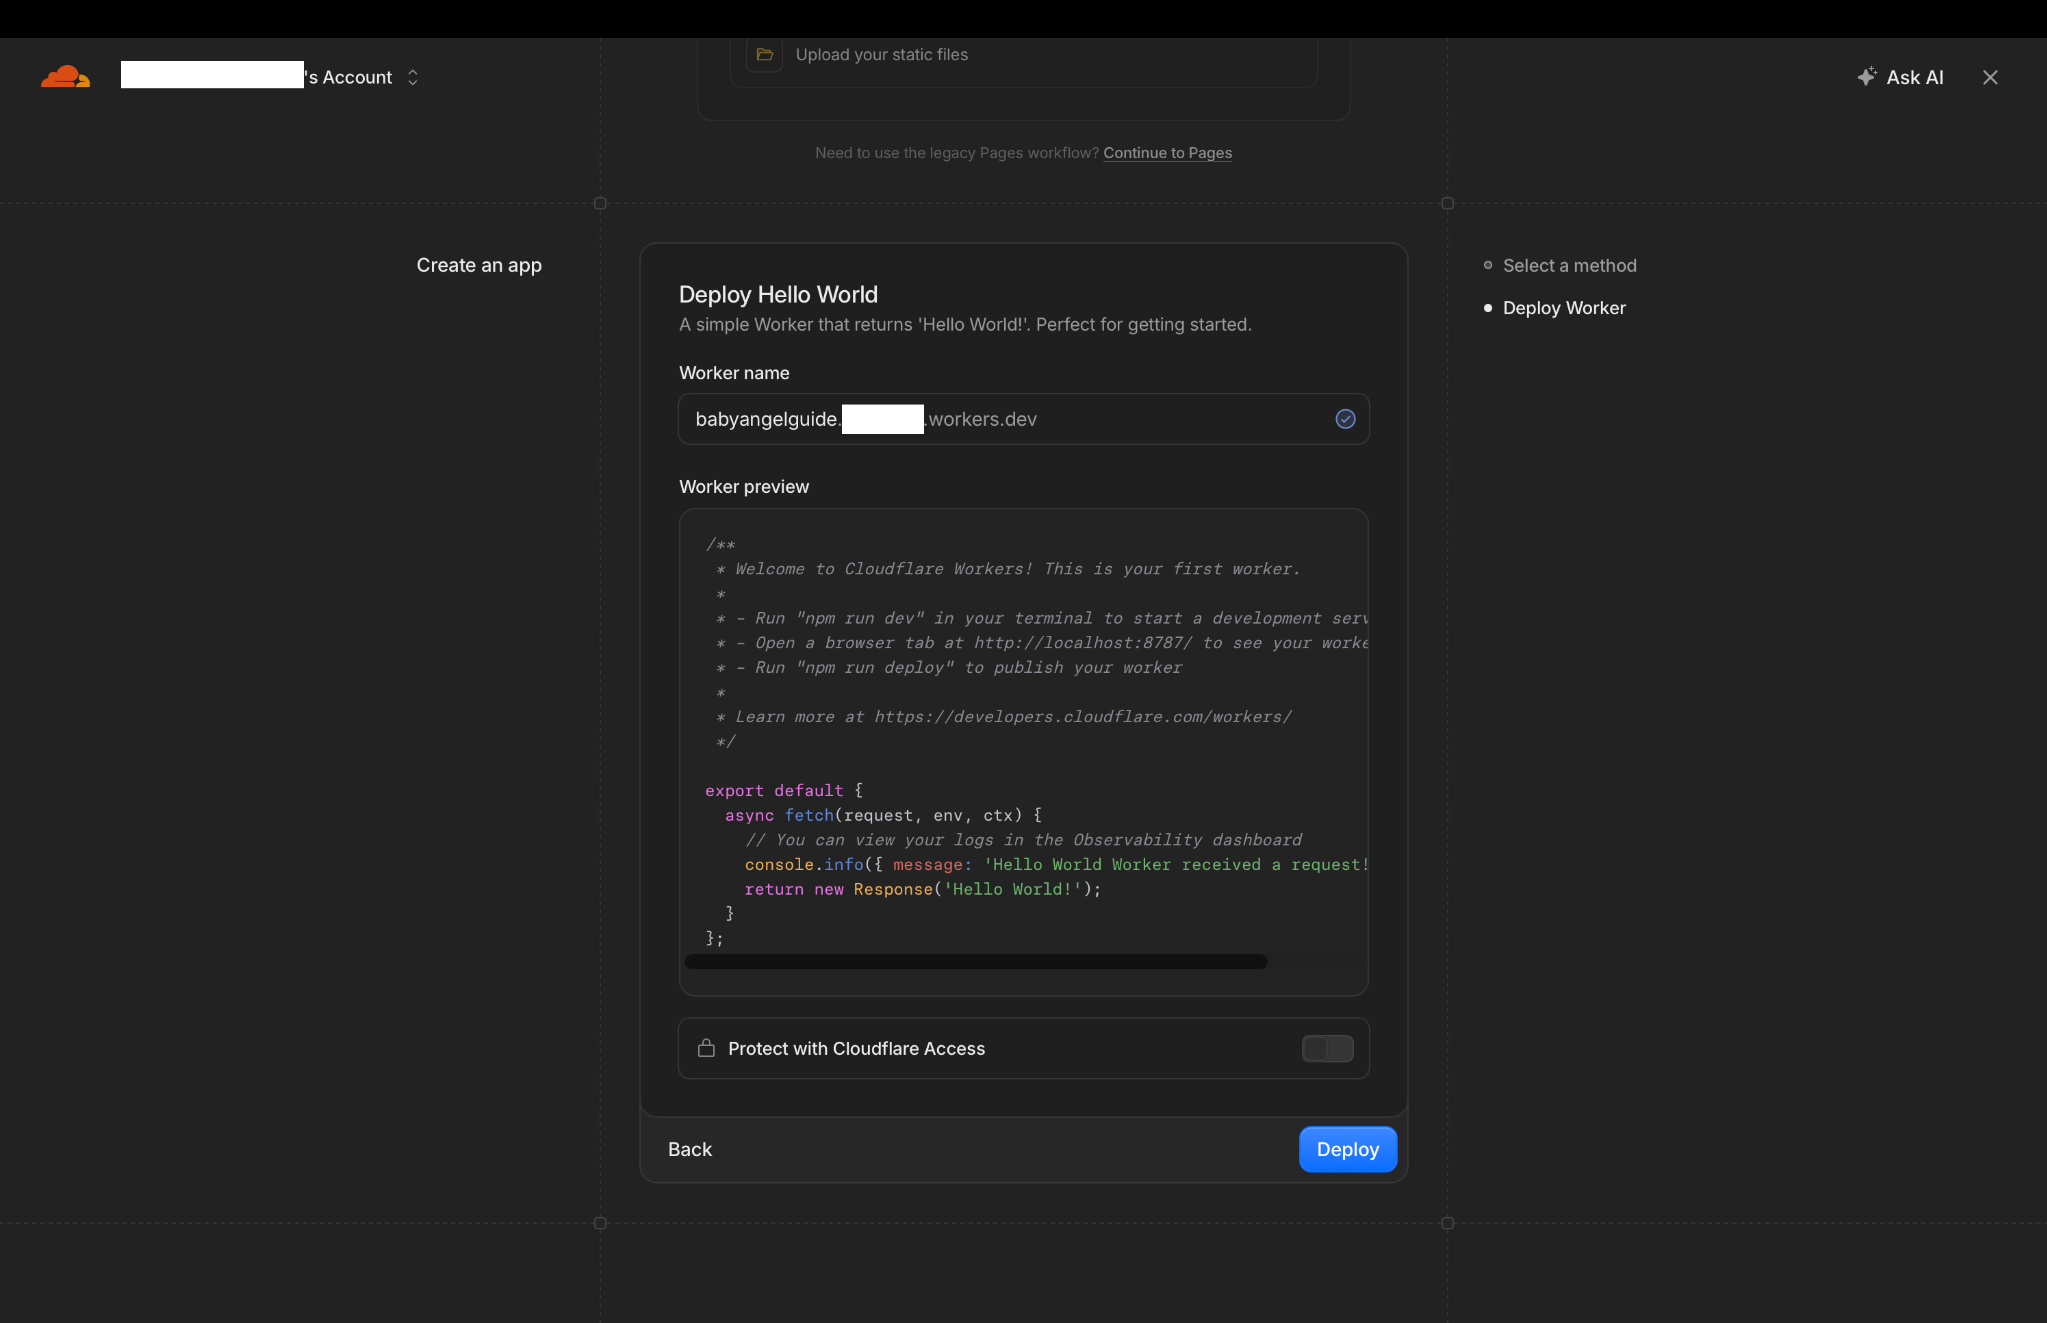
Click the image to view it larger. 21On Deploy Hello World, fill in Worker name and click Deploy.
Click the image to view it larger. 22Your Worker dashboard opens after deployment. Find Edit code near the top right.
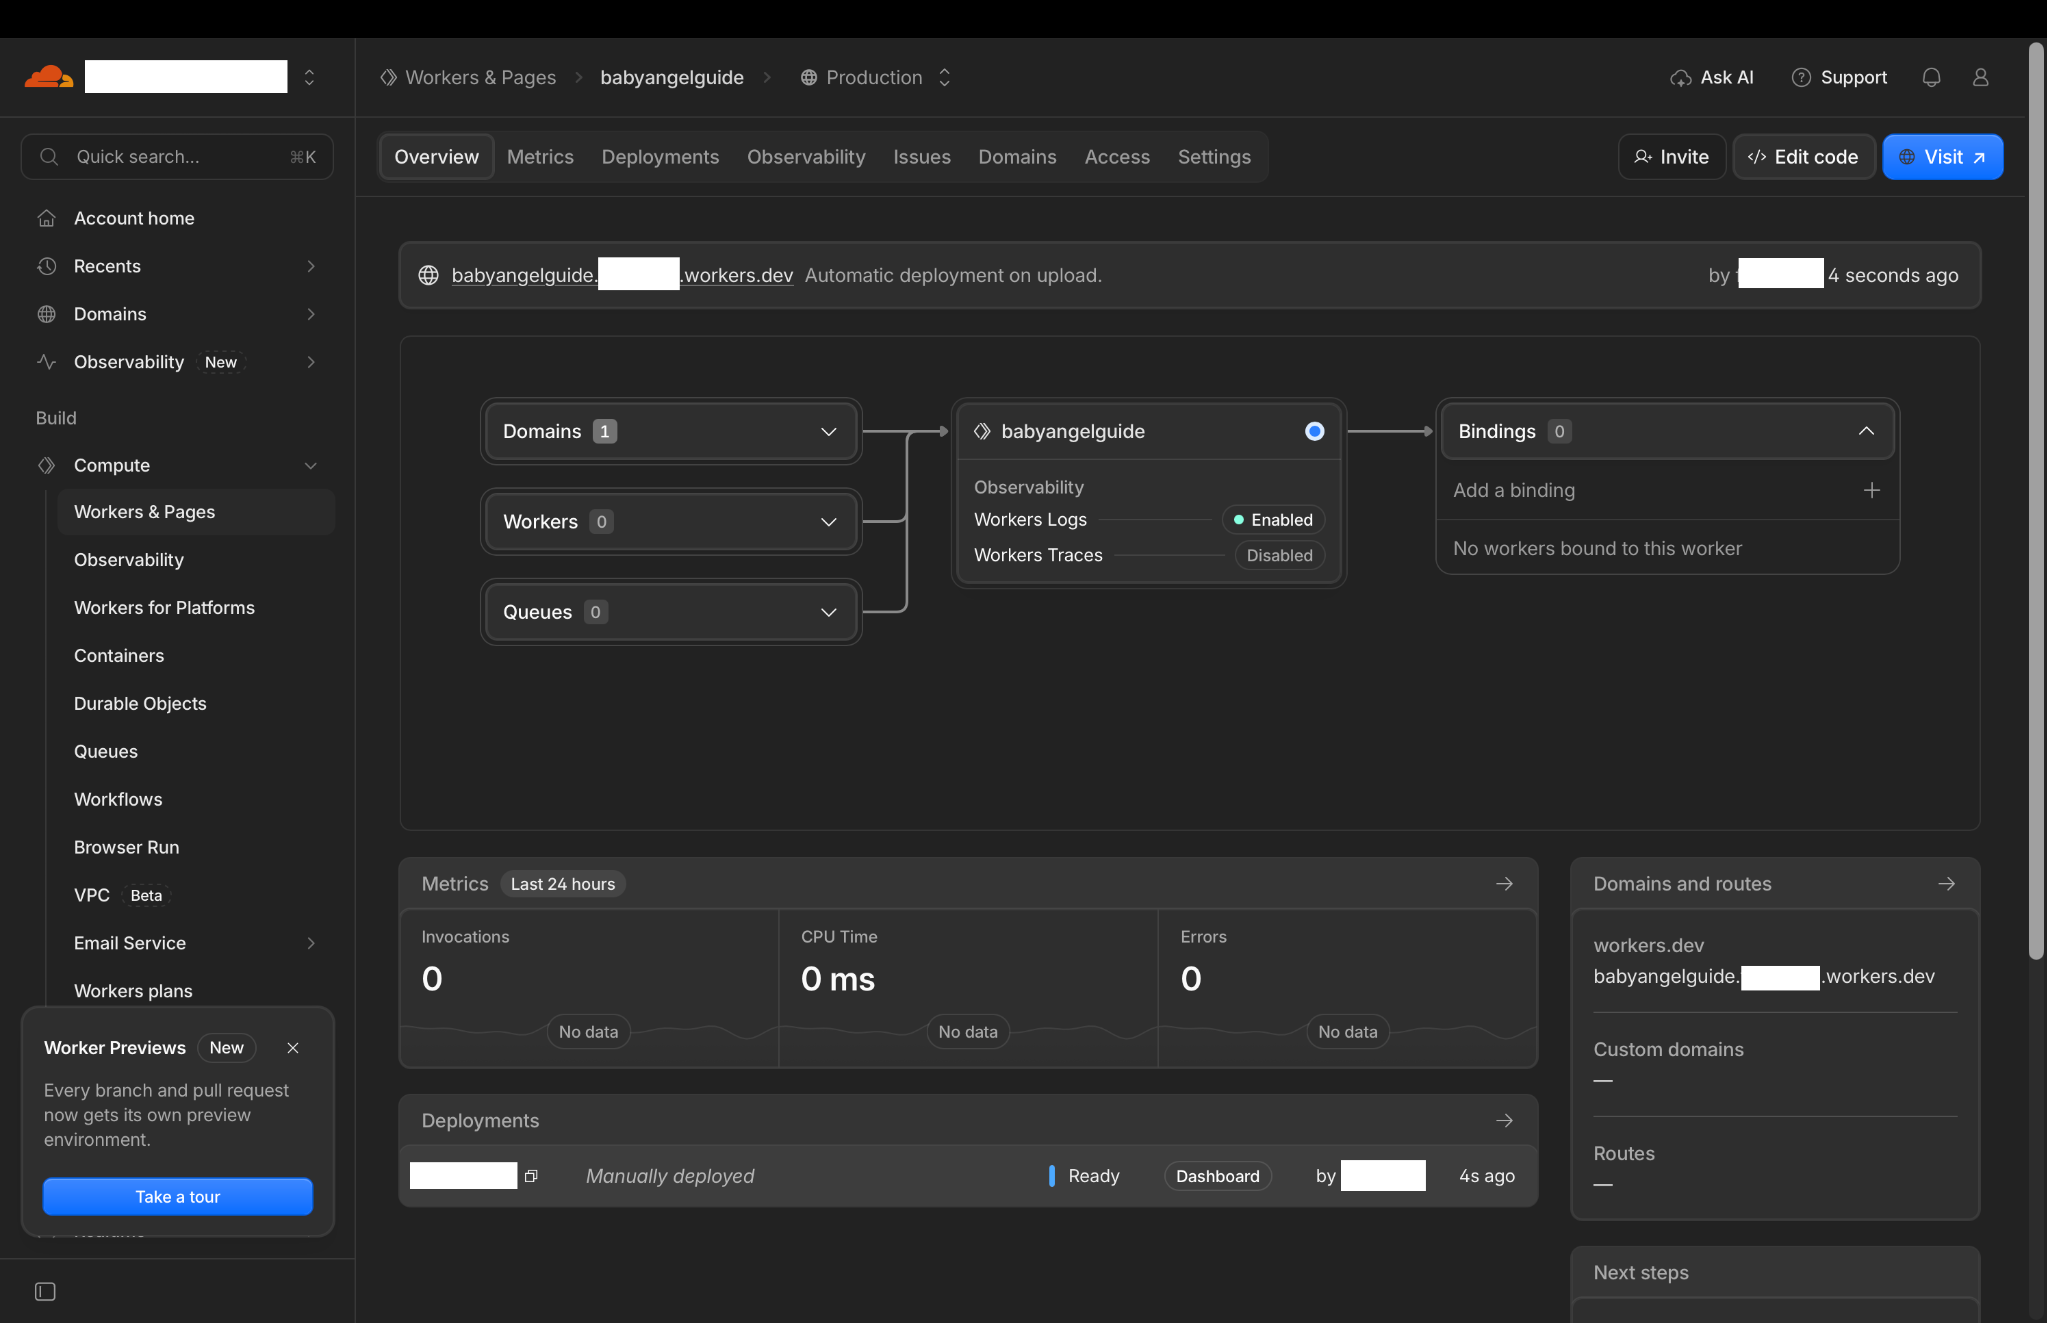
Click the image to view it larger. 23When you open Edit code, you will see the starter
worker.js, like in this picture. To return to the Worker dashboard, click your Worker name at the top left, next to the back arrow (shown as babyangelguide in this picture). Do not change the code yet; you will paste the full Worker code in step 33.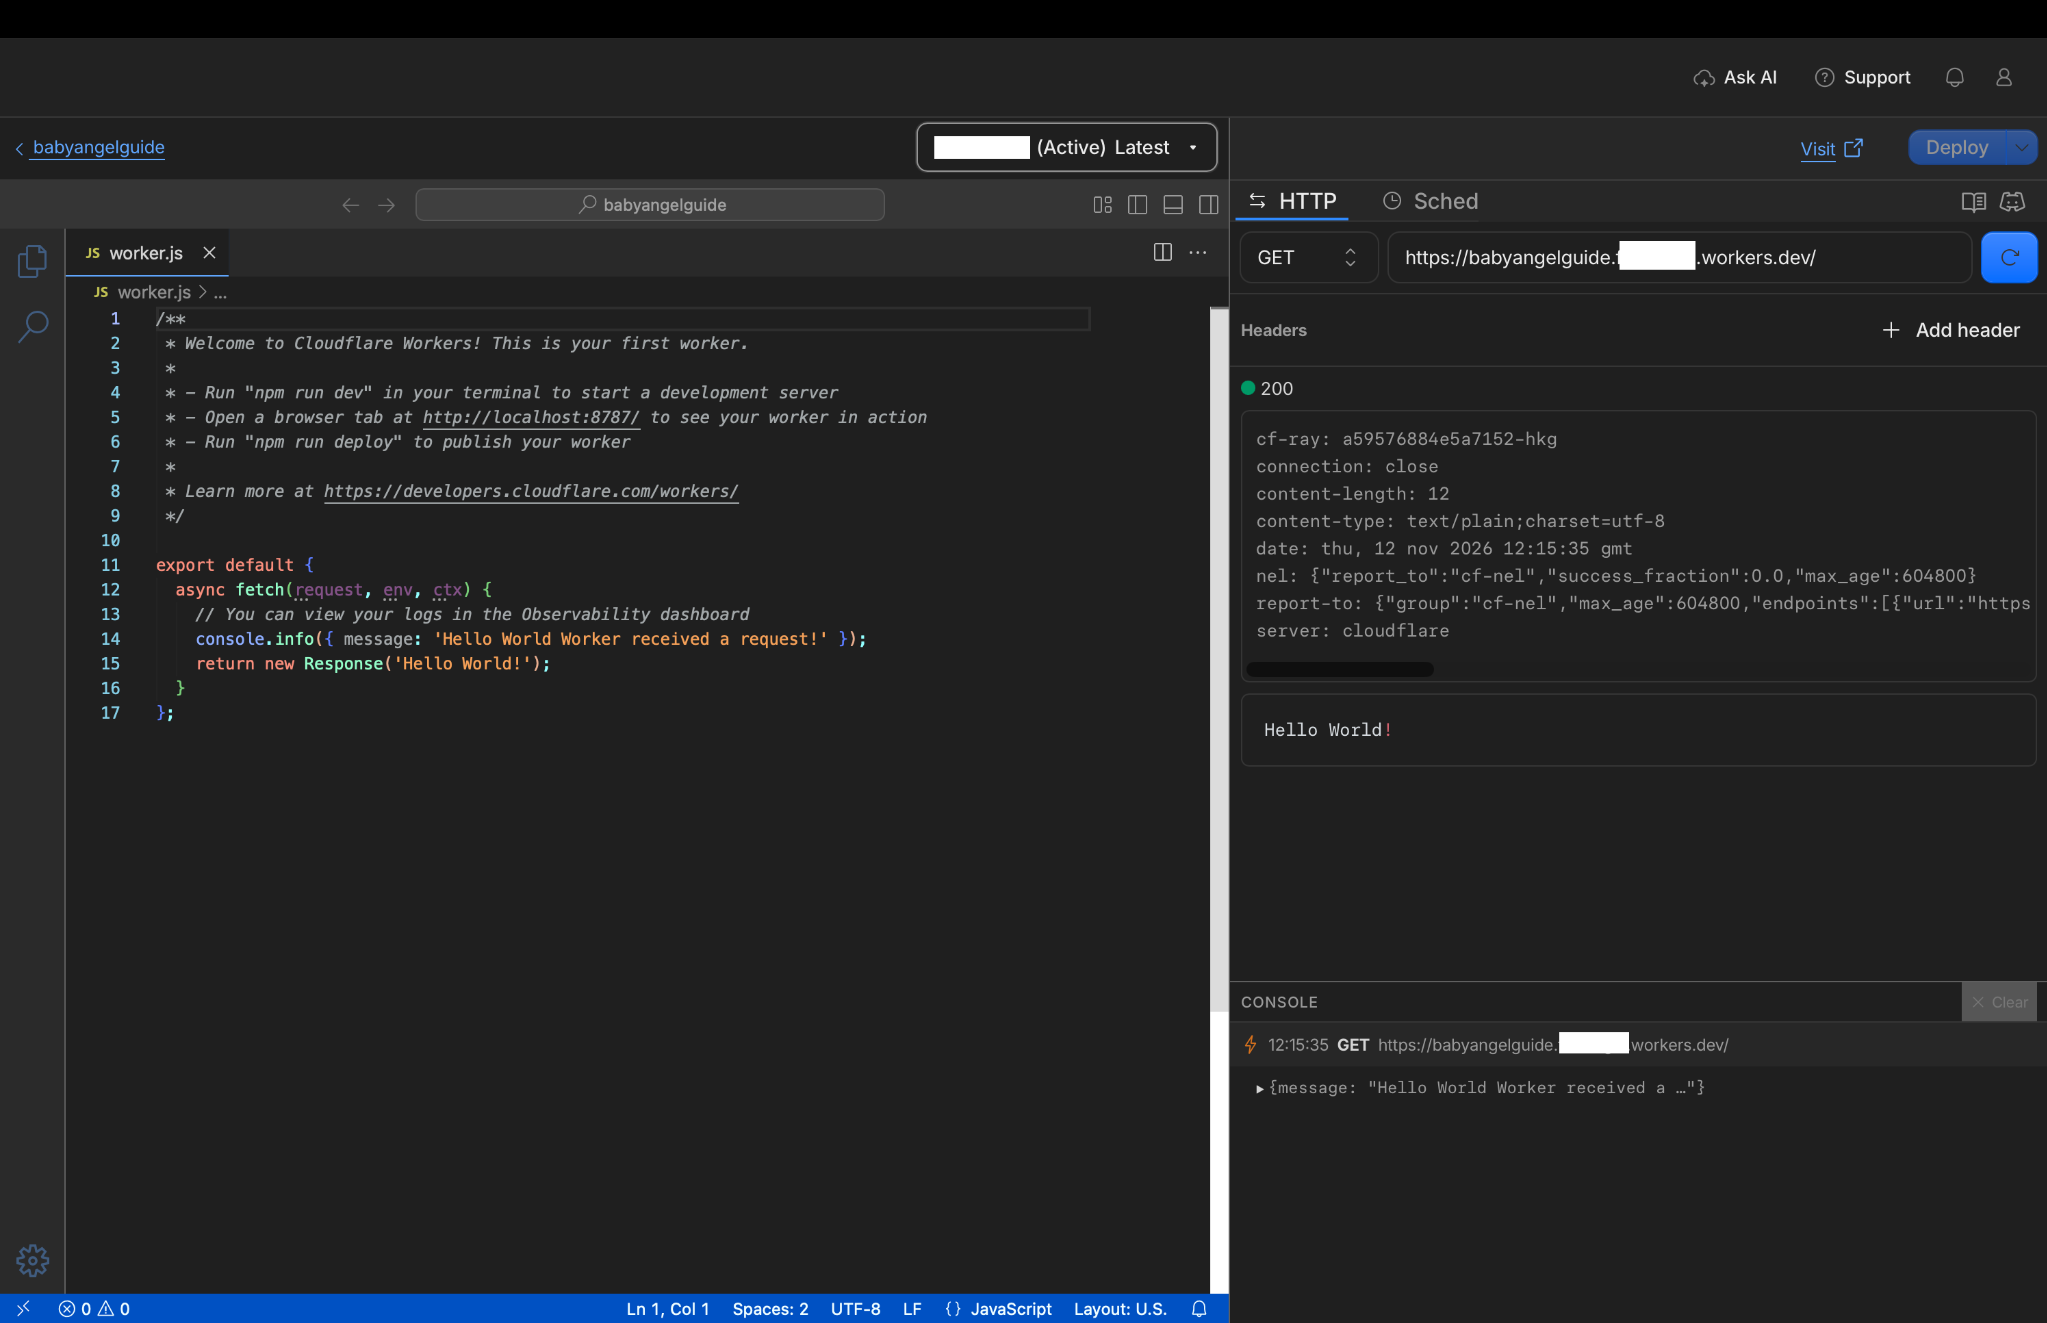
Click the image to view it larger. -
Add your Supabase URL and secret key
Keep the Supabase project and the Cloudflare Worker open in separate tabs. The pictures below show what to copy in Supabase and which field to paste it into in Cloudflare.
24Open the Worker’s Settings tab. Under Runtime variables and secrets (also labeled Variables and Secrets), choose Add or + Add variable.
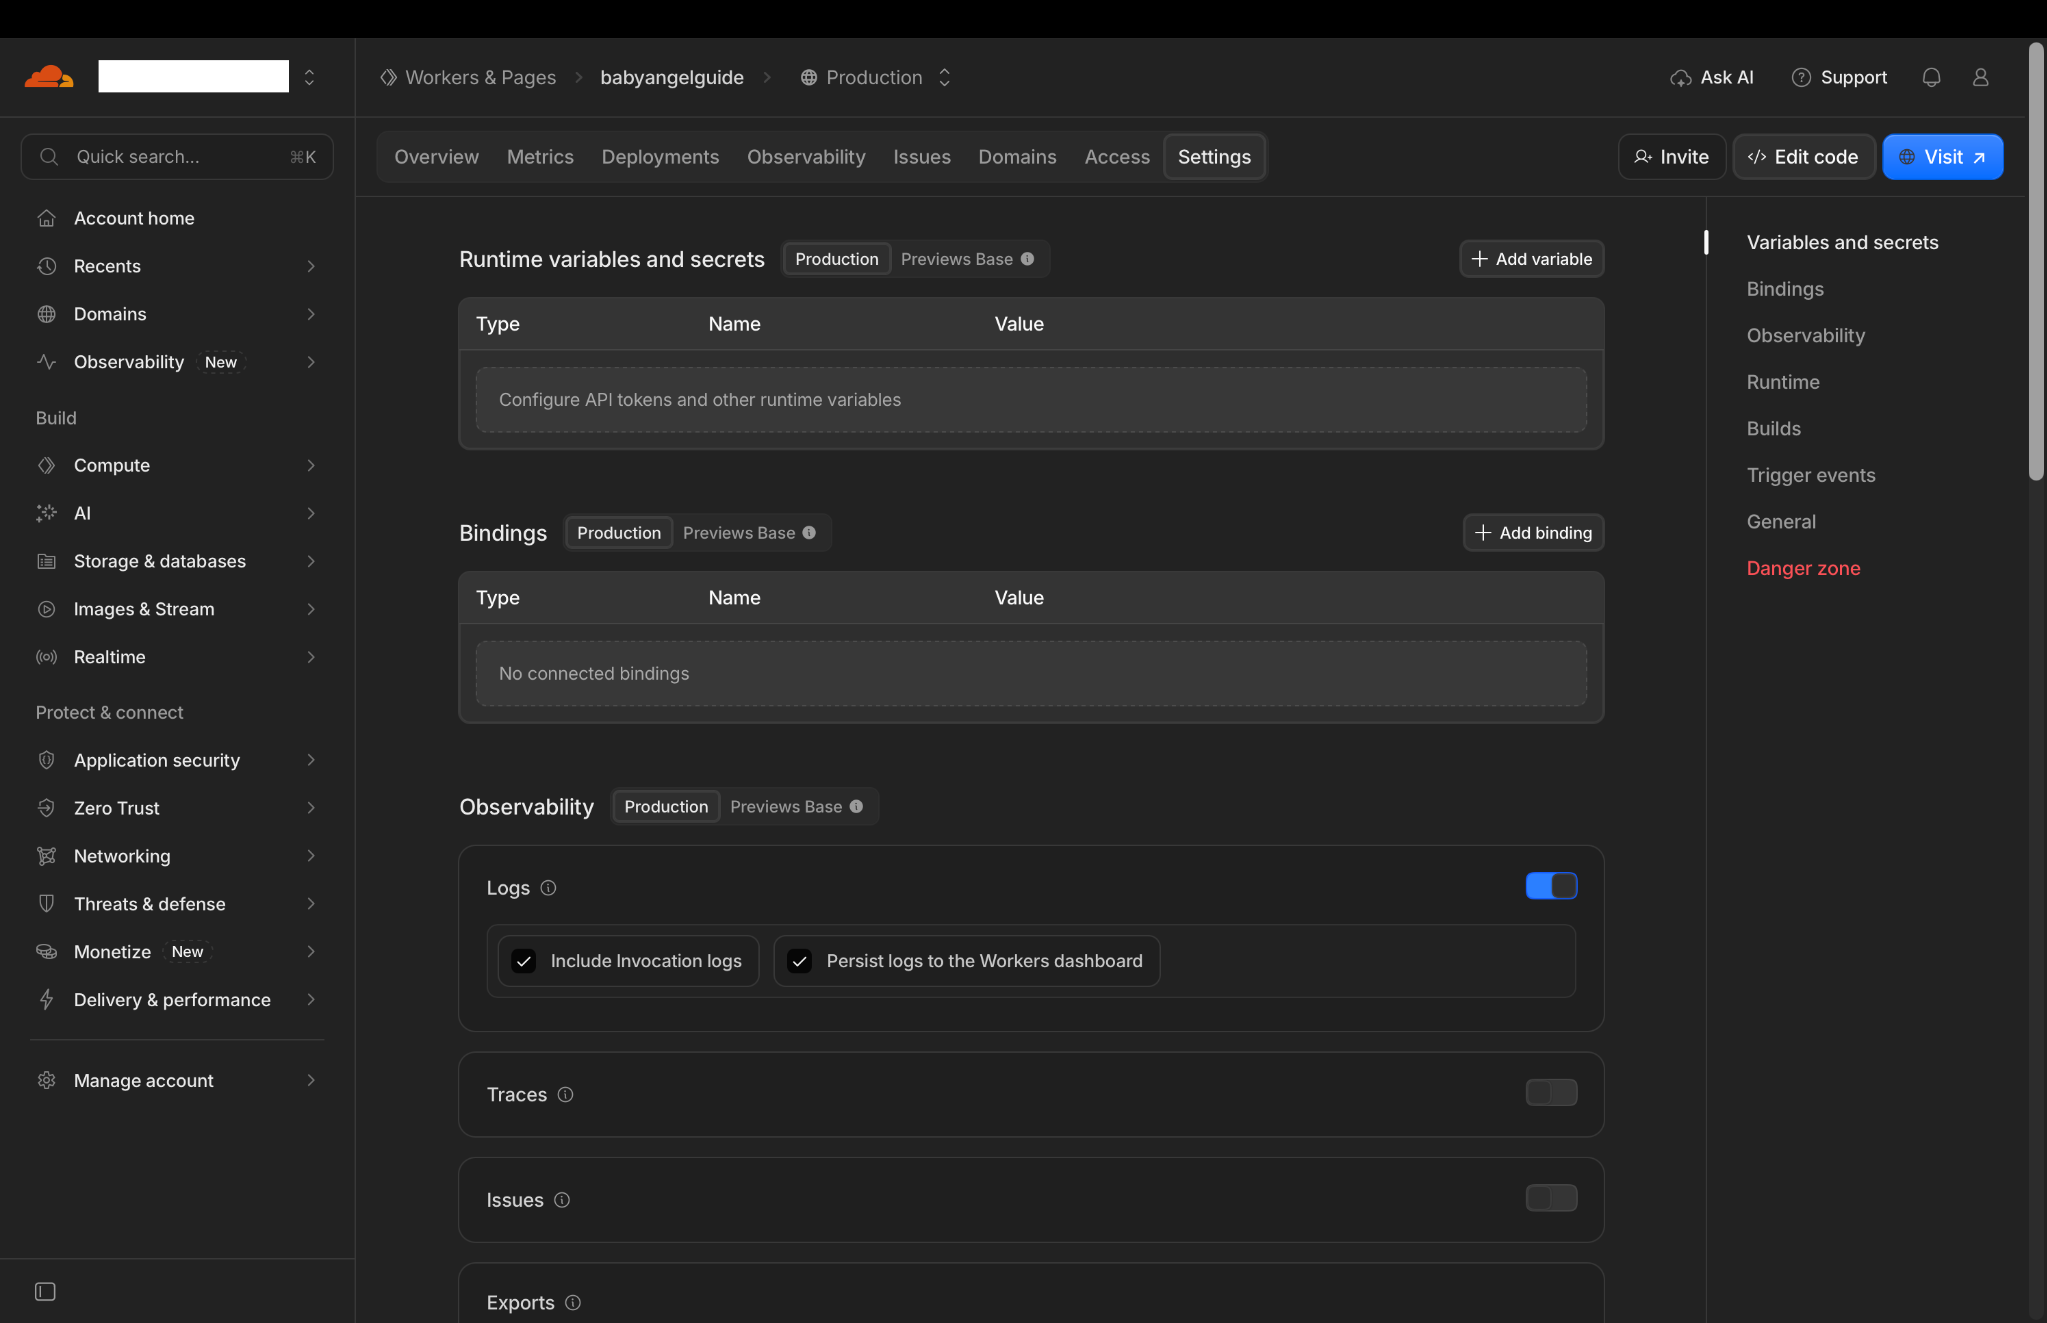
Click the image to view it larger. 25The Add environment variable window opens. If the form shows an environment selector, choose Production. Leave this tab open.
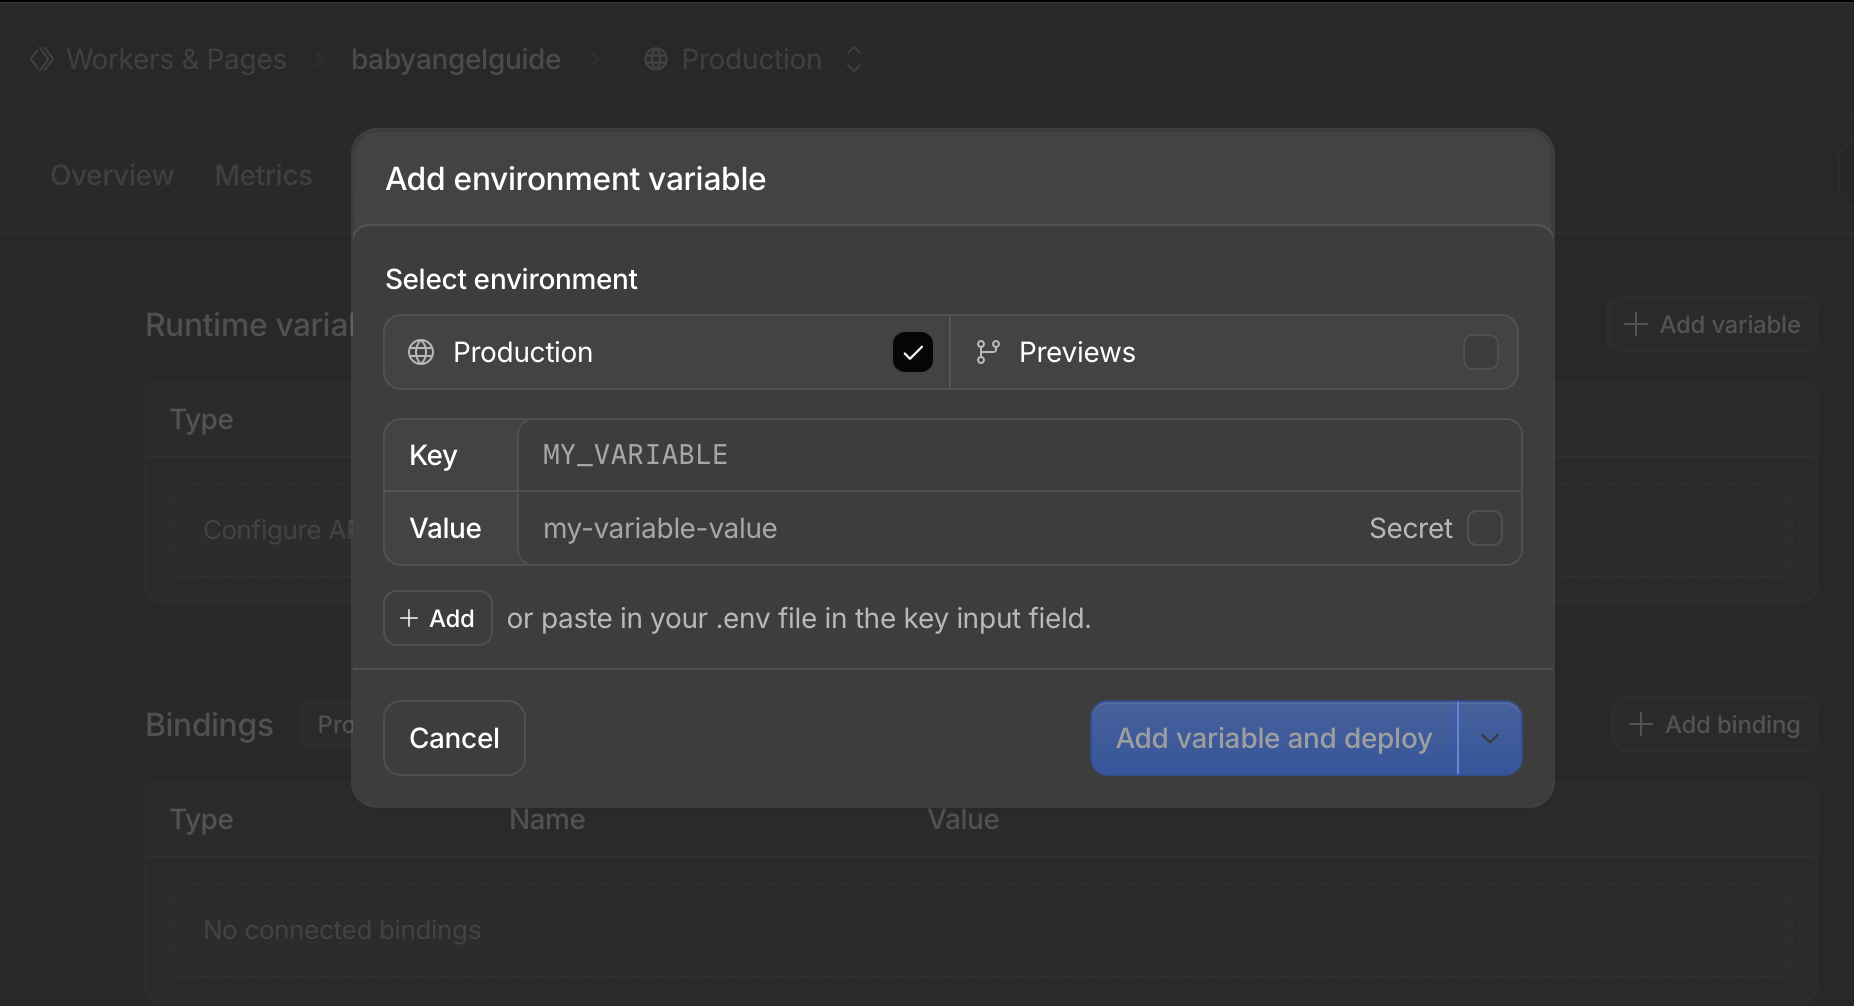
Click the image to view it larger. 26Now switch back to the Supabase tab with the same project where you ran the SQL. On the project overview, copy the Project URL ending in
.supabase.co. You can also find it in the project’s Connect dialog.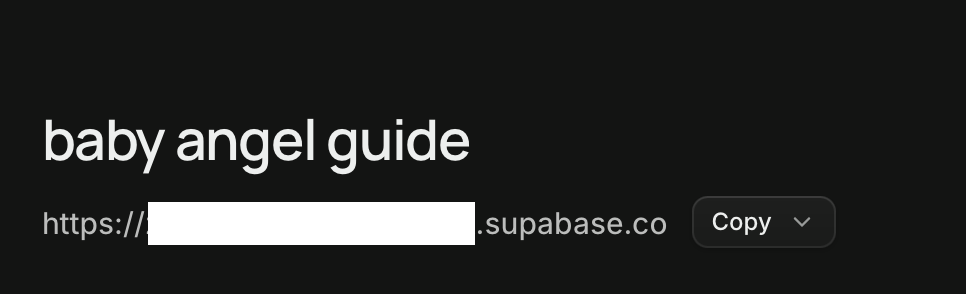
Click the image to view it larger. 27Return to the open Cloudflare form. Enter
SUPABASE_URLin Key and paste the address you just copied into Value. Save it as a text variable. In the form shown here, leave Secret unchecked and click Add 1 variable and deploy.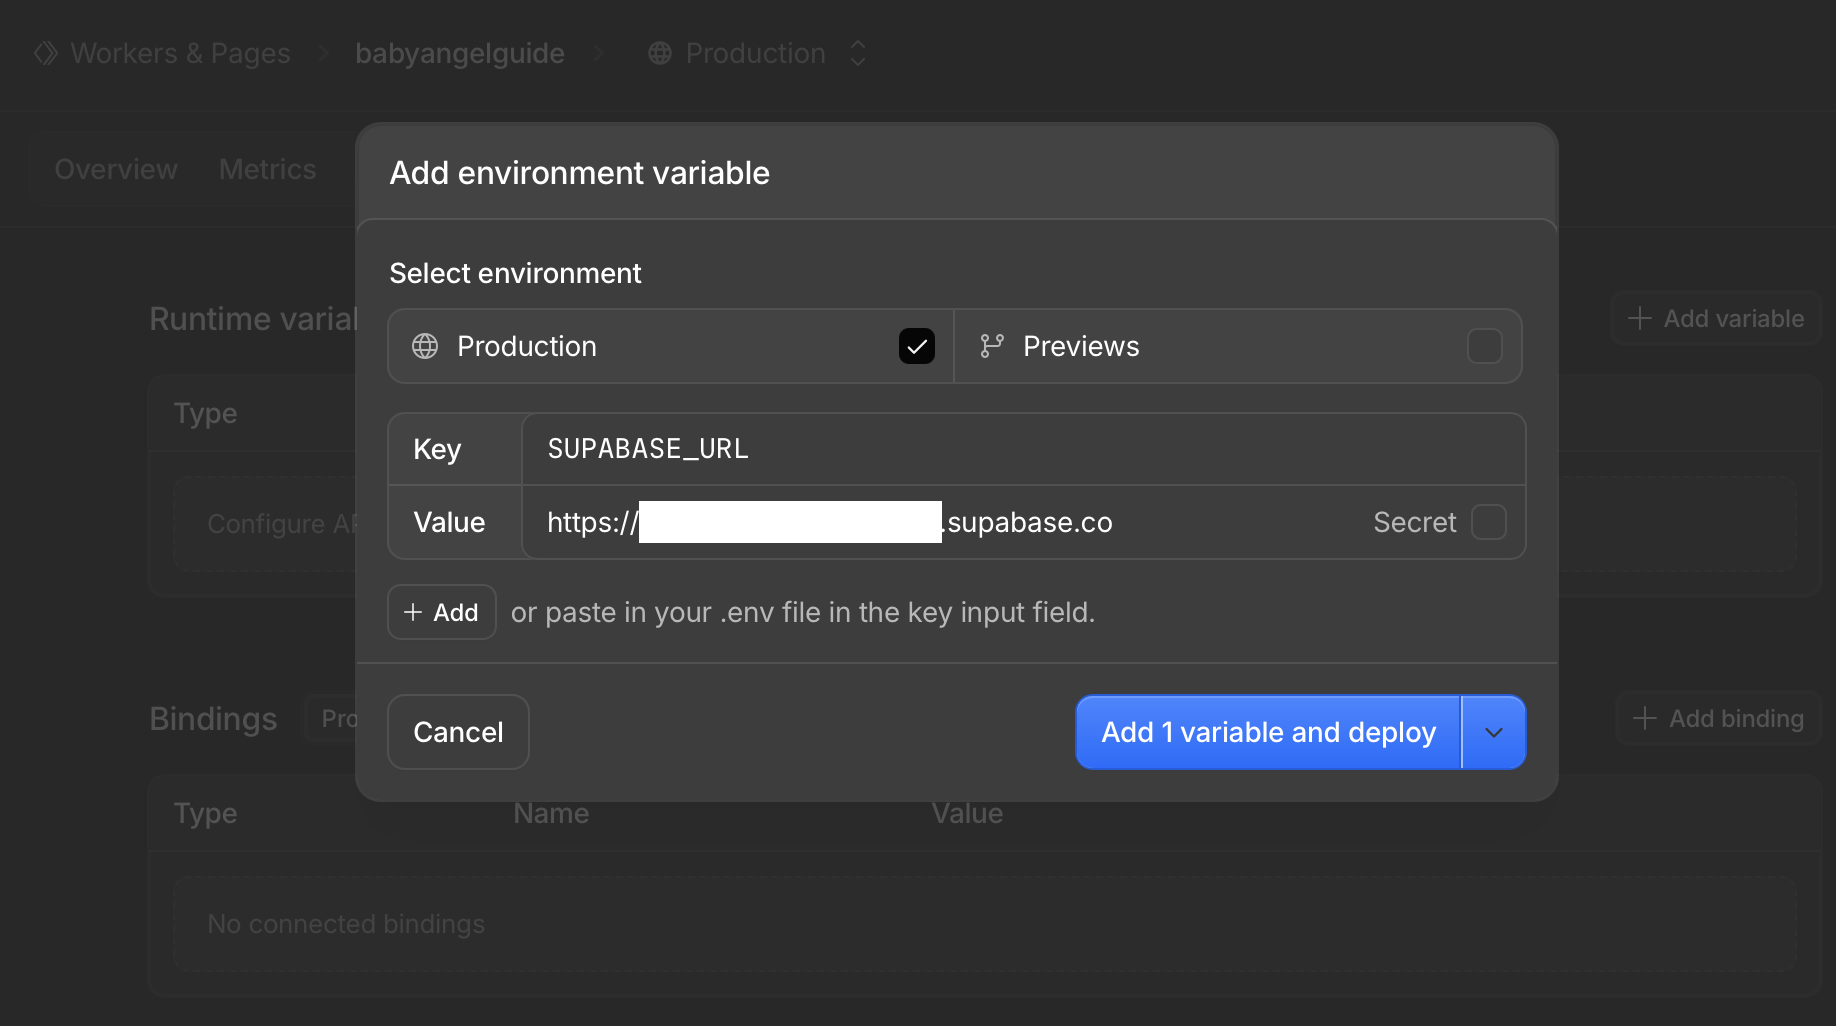
Click the image to view it larger. 28Check that
SUPABASE_URLappears as a Variable. Click + Add variable again and leave the Cloudflare form open while you get the secret key.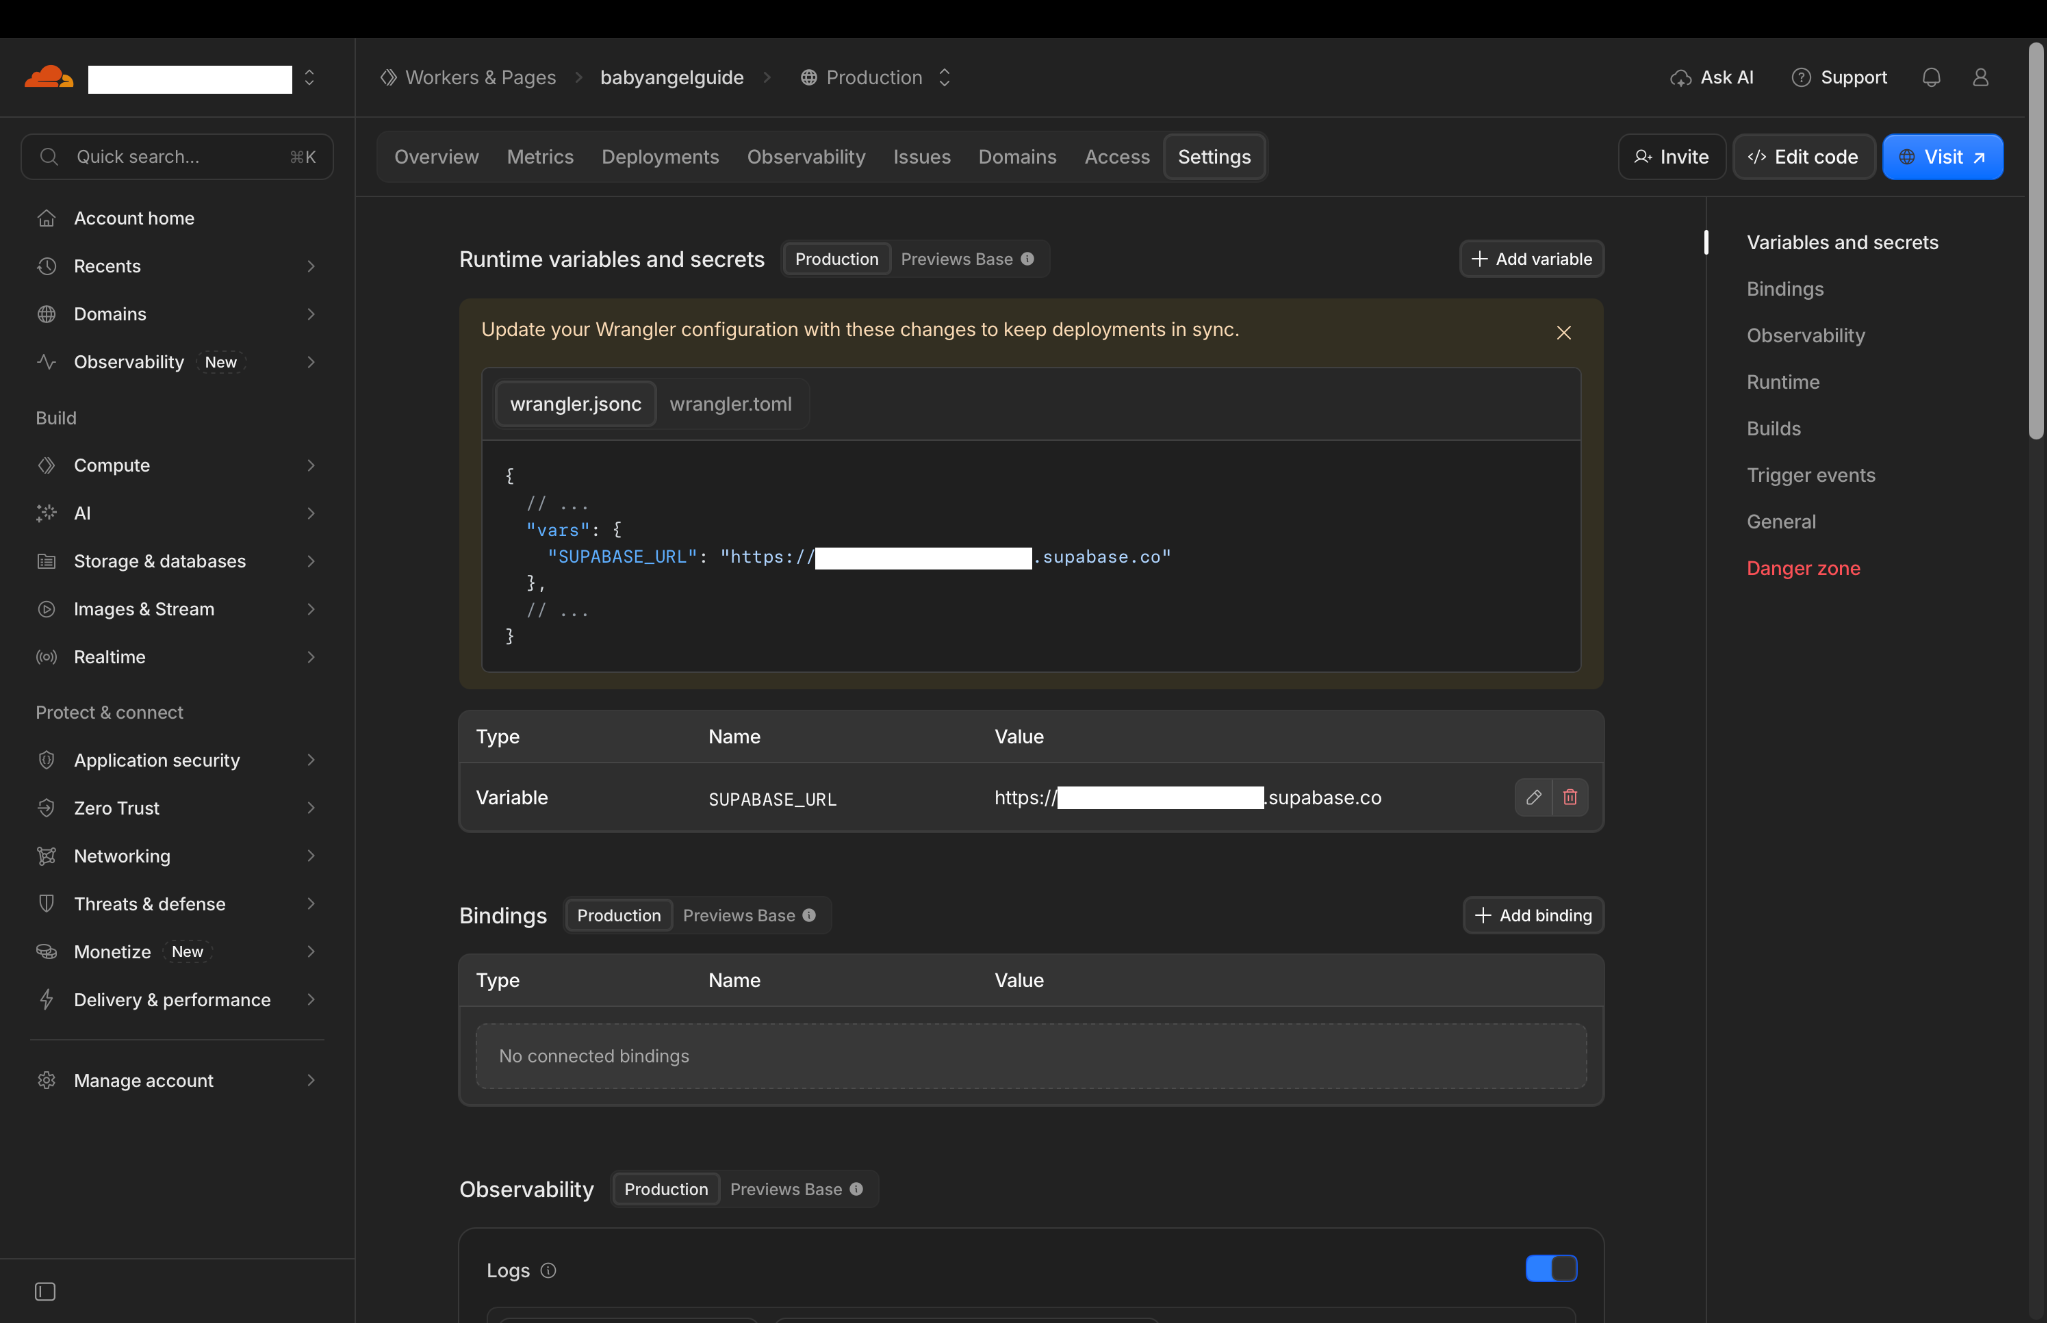
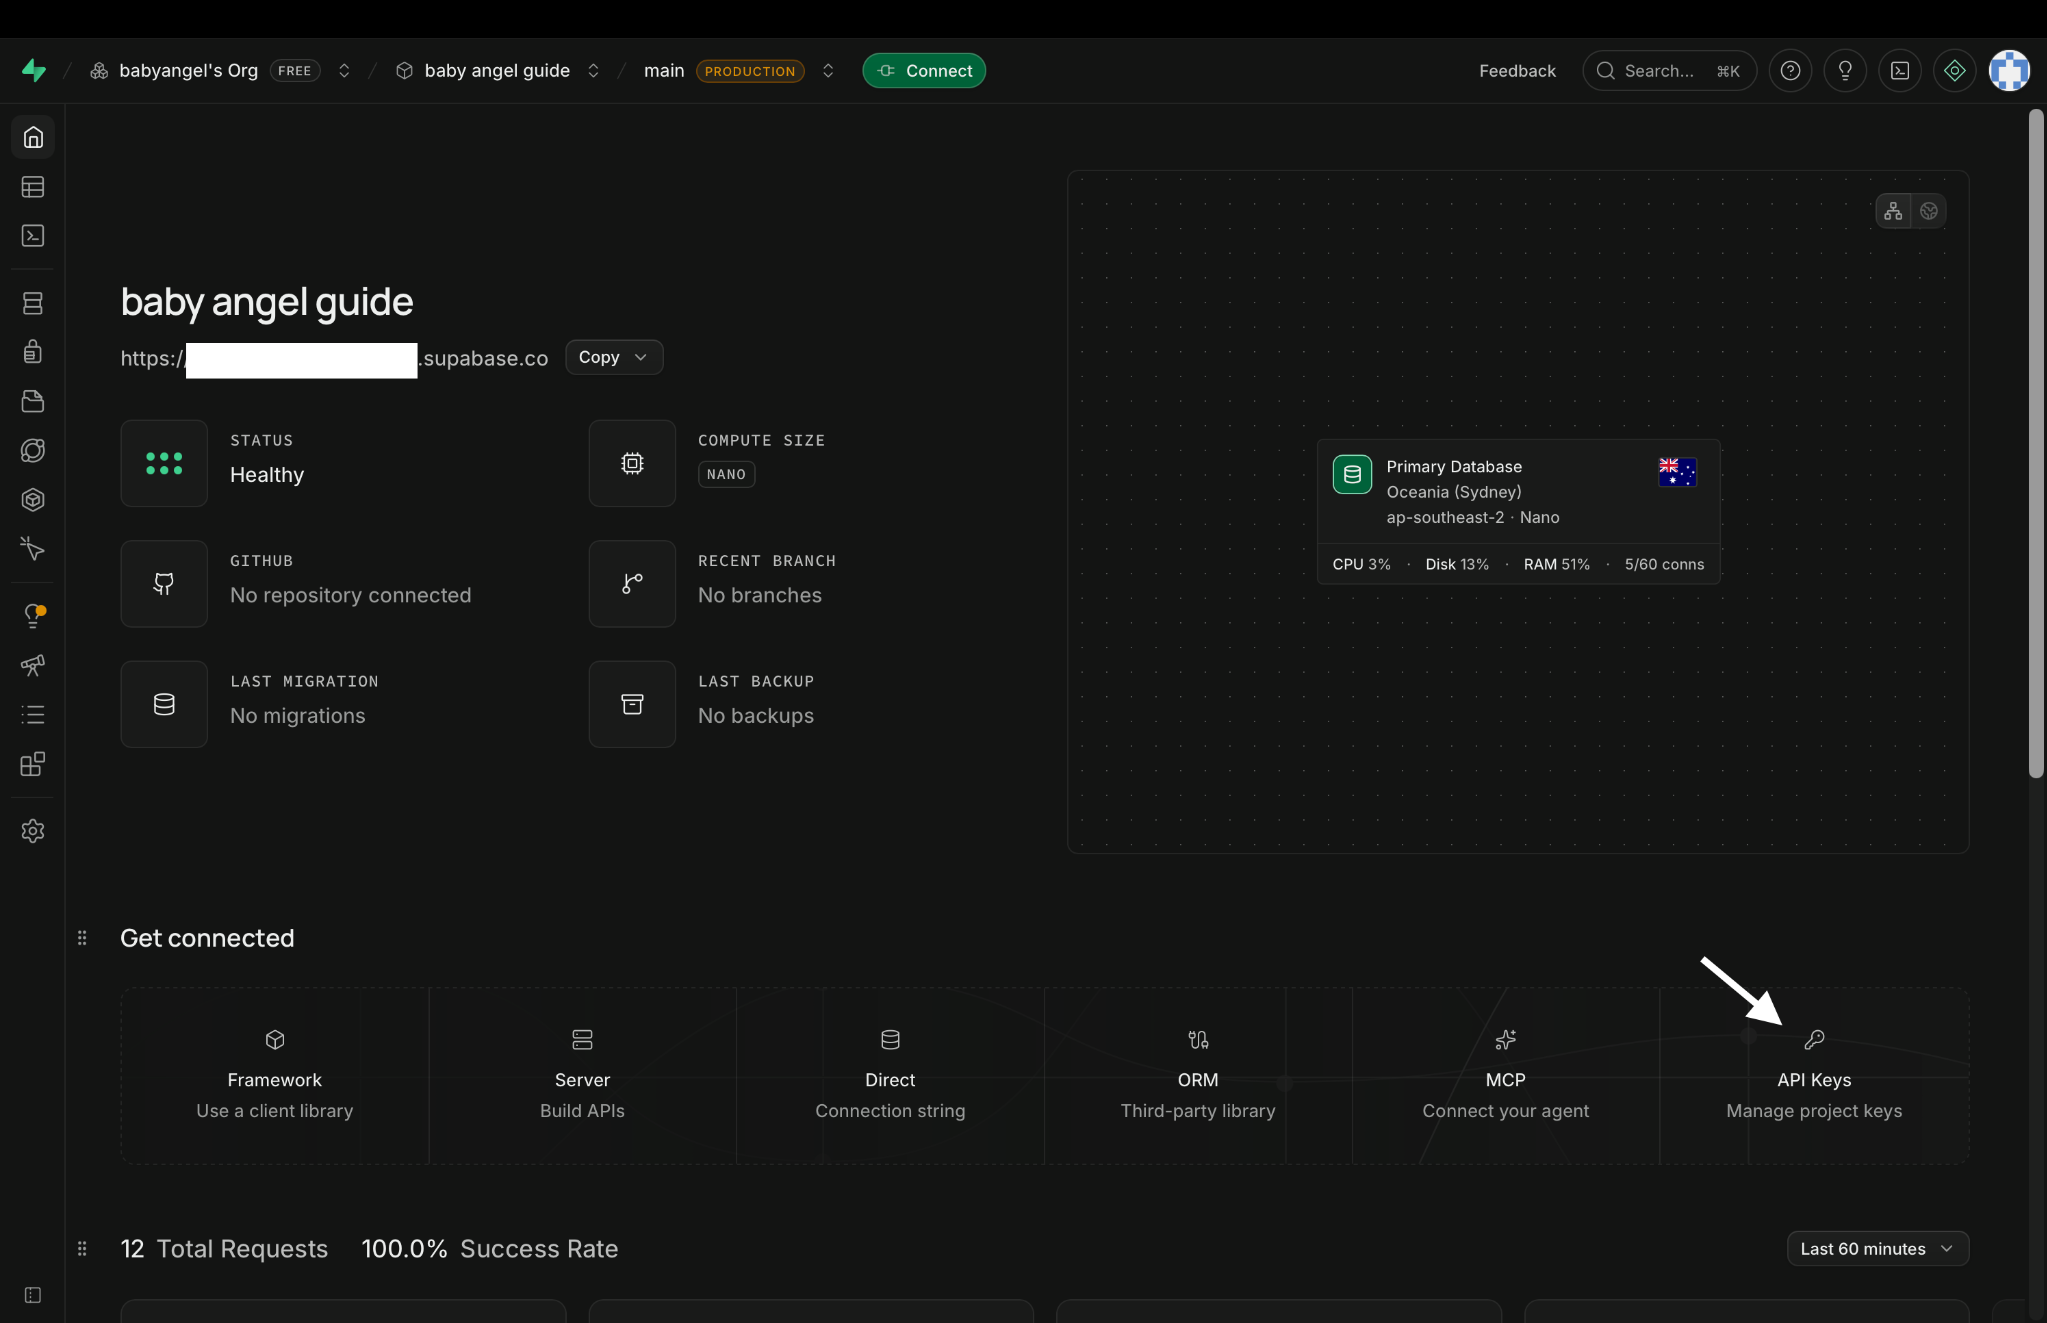
Click the image to view it larger. 29Switch back to the same Supabase project. On its overview, click the API Keys card marked Manage project keys, or go to Settings → API Keys.
Click the image to view it larger. 30On the API Keys page, scroll to Secret keys. Copy a key beginning with
sb_secret_. If the section is empty, create a secret key there first. Paste the key only into the Cloudflare secret field in the next step.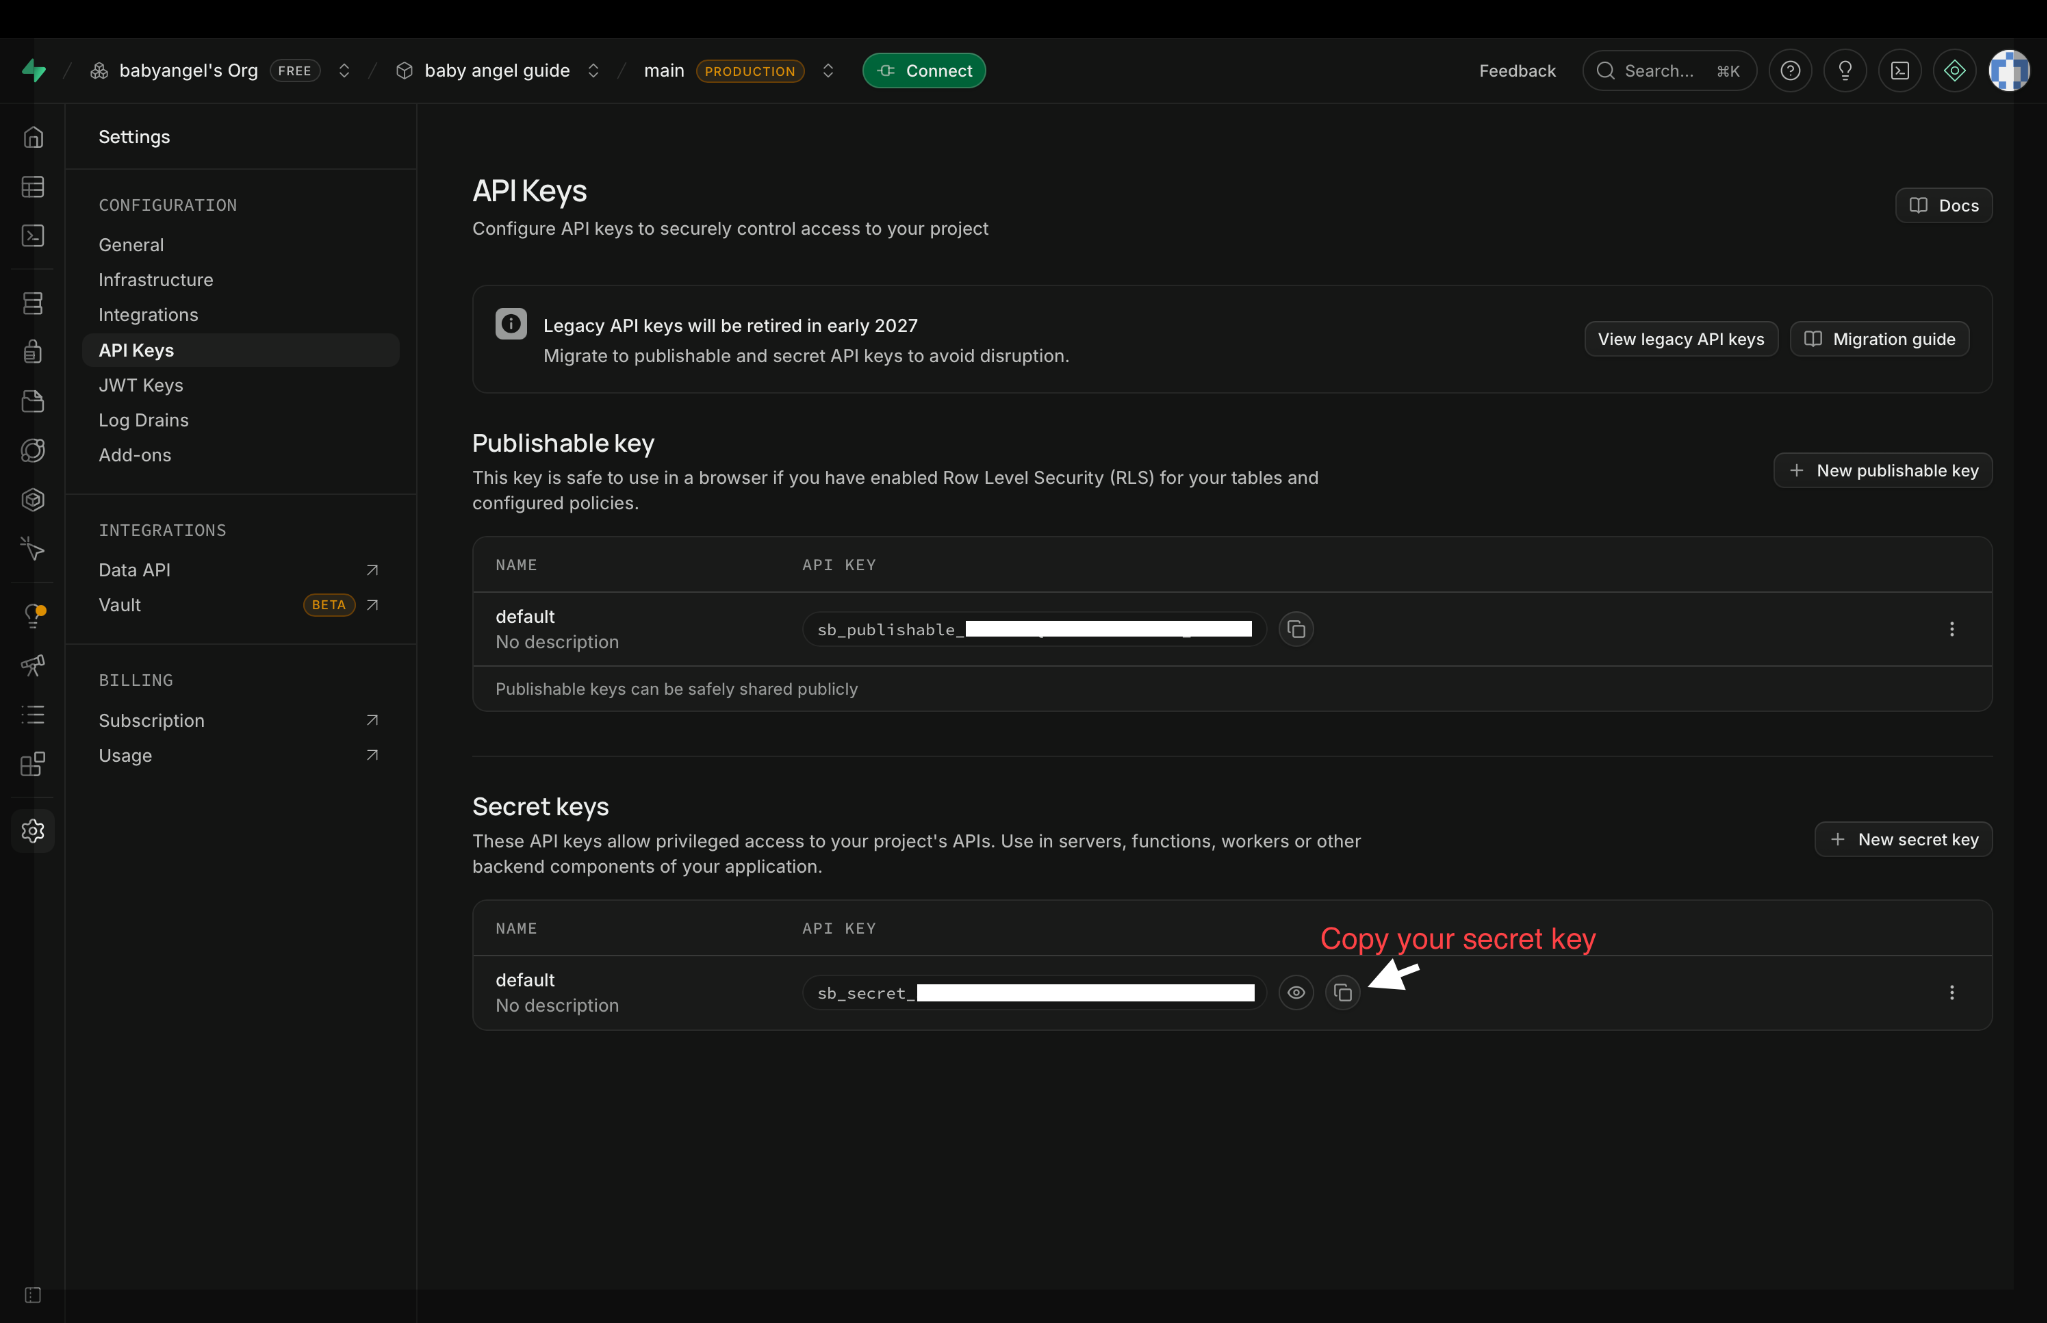
Click the image to view it larger. 31Return to Cloudflare. Choose Production if prompted. Name the variable
SUPABASE_SECRET_KEY, select the Secret type or check Secret, then paste the key into Value and deploy.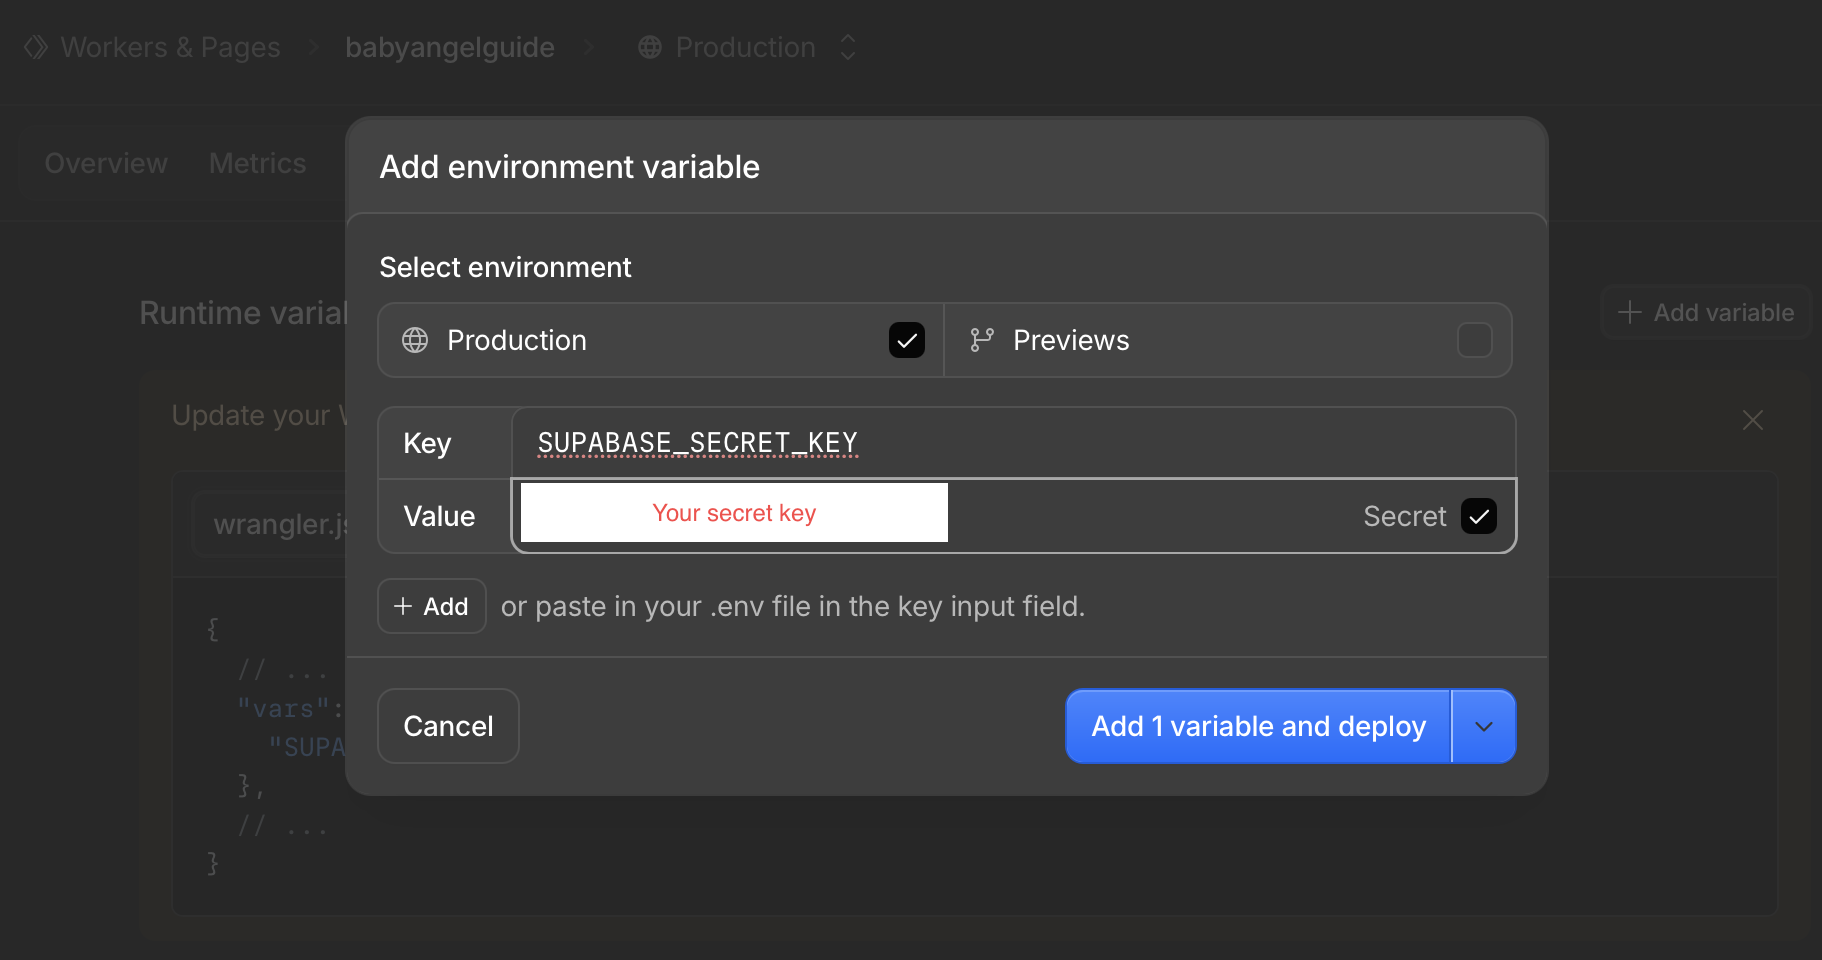
Click the image to view it larger. 32Back in Runtime variables and secrets, check that both entries are listed and
SUPABASE_SECRET_KEYis saved as a Secret with its value hidden.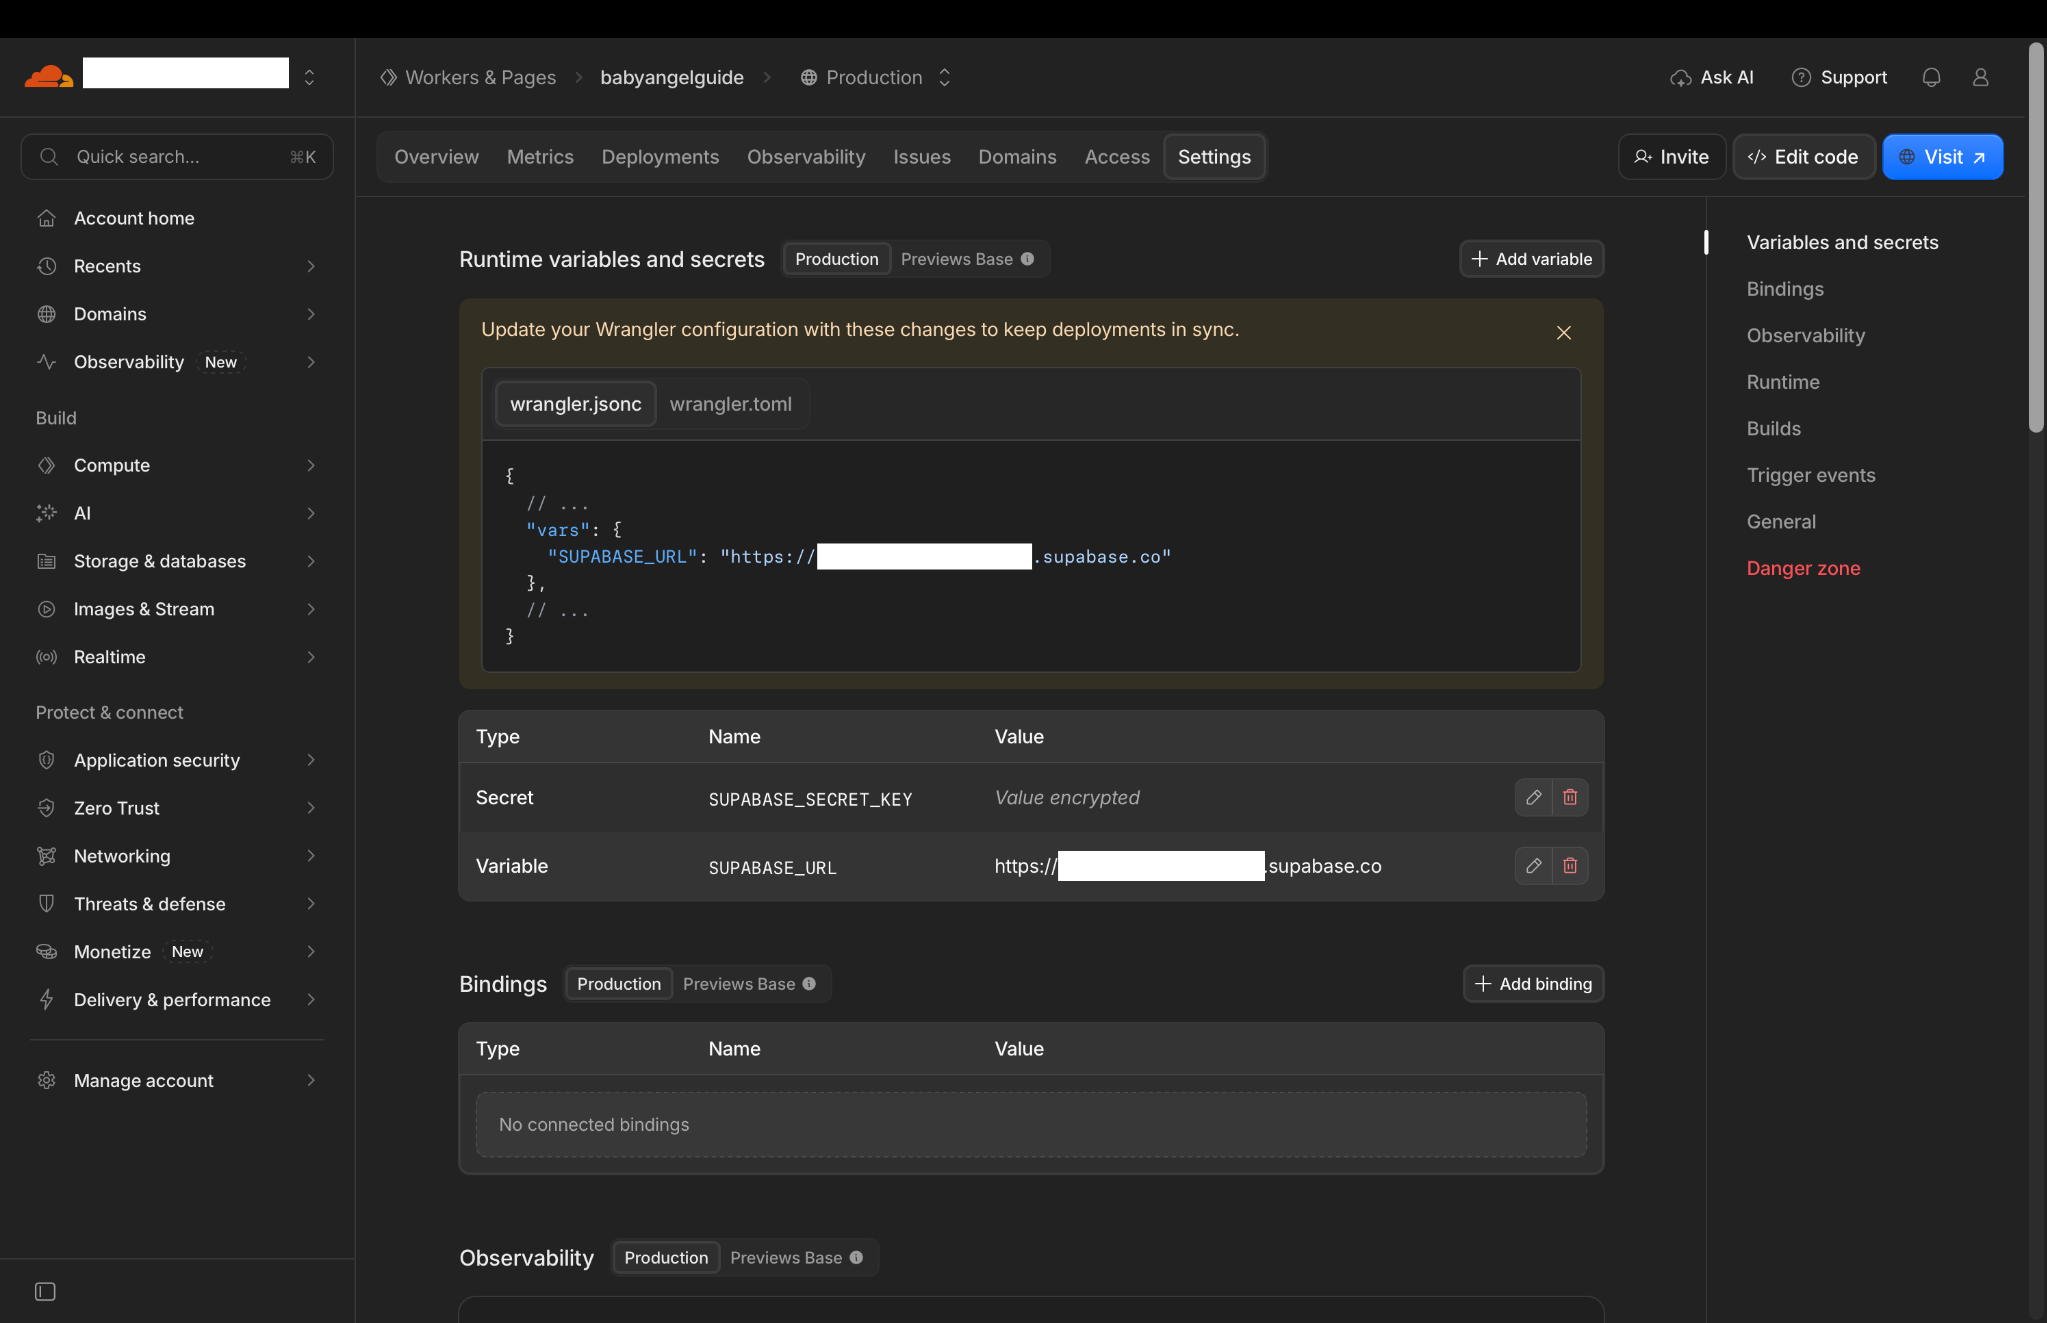
Click the image to view it larger. -
Copy the Worker code, paste it, and deploy
Back on the Worker dashboard, click Edit code to open
worker.jsagain. The first picture below shows the Hello World starter code you will replace. Next, click Copy Worker code in the code box, select all the starter code in the editor and paste the copied code. The last picture shows how the editor should look before you click Deploy.Before: the original worker.js(also shown in step 23). Click the image to view it larger.33After pasting the full Worker code from the box above into
worker.js, your editor should look like this picture. Click Deploy at the top right of the full editor (outside this cropped image).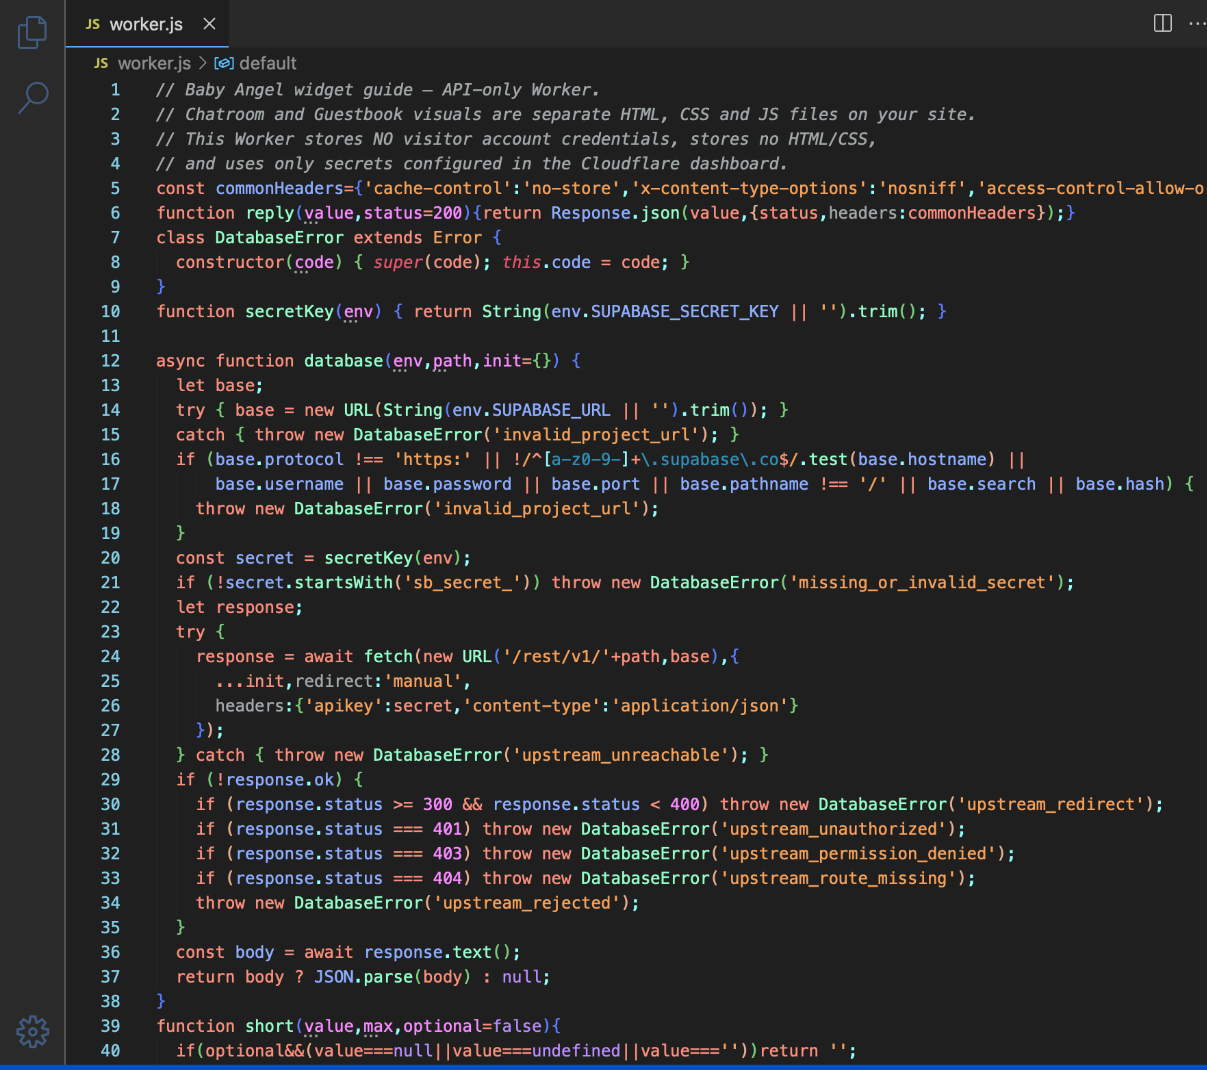
Click the image to view it larger.
Manage and reply to Guestbook notes
Use Table Editor → widget_guestbook in your Supabase project to view and manage the notes on your site and post replies.
- Open your own Supabase project and go to Table Editor → widget_guestbook.
- Find the note you want to reply to by its name or message. Scroll right until you see the
owner_replycolumn. - Double-click the
owner_replycell on that same row. Type your reply and save the cell. - Open or refresh the Guestbook on your site. The reply appears below the original note.
To change or remove your reply, edit or clear that same cell and save.
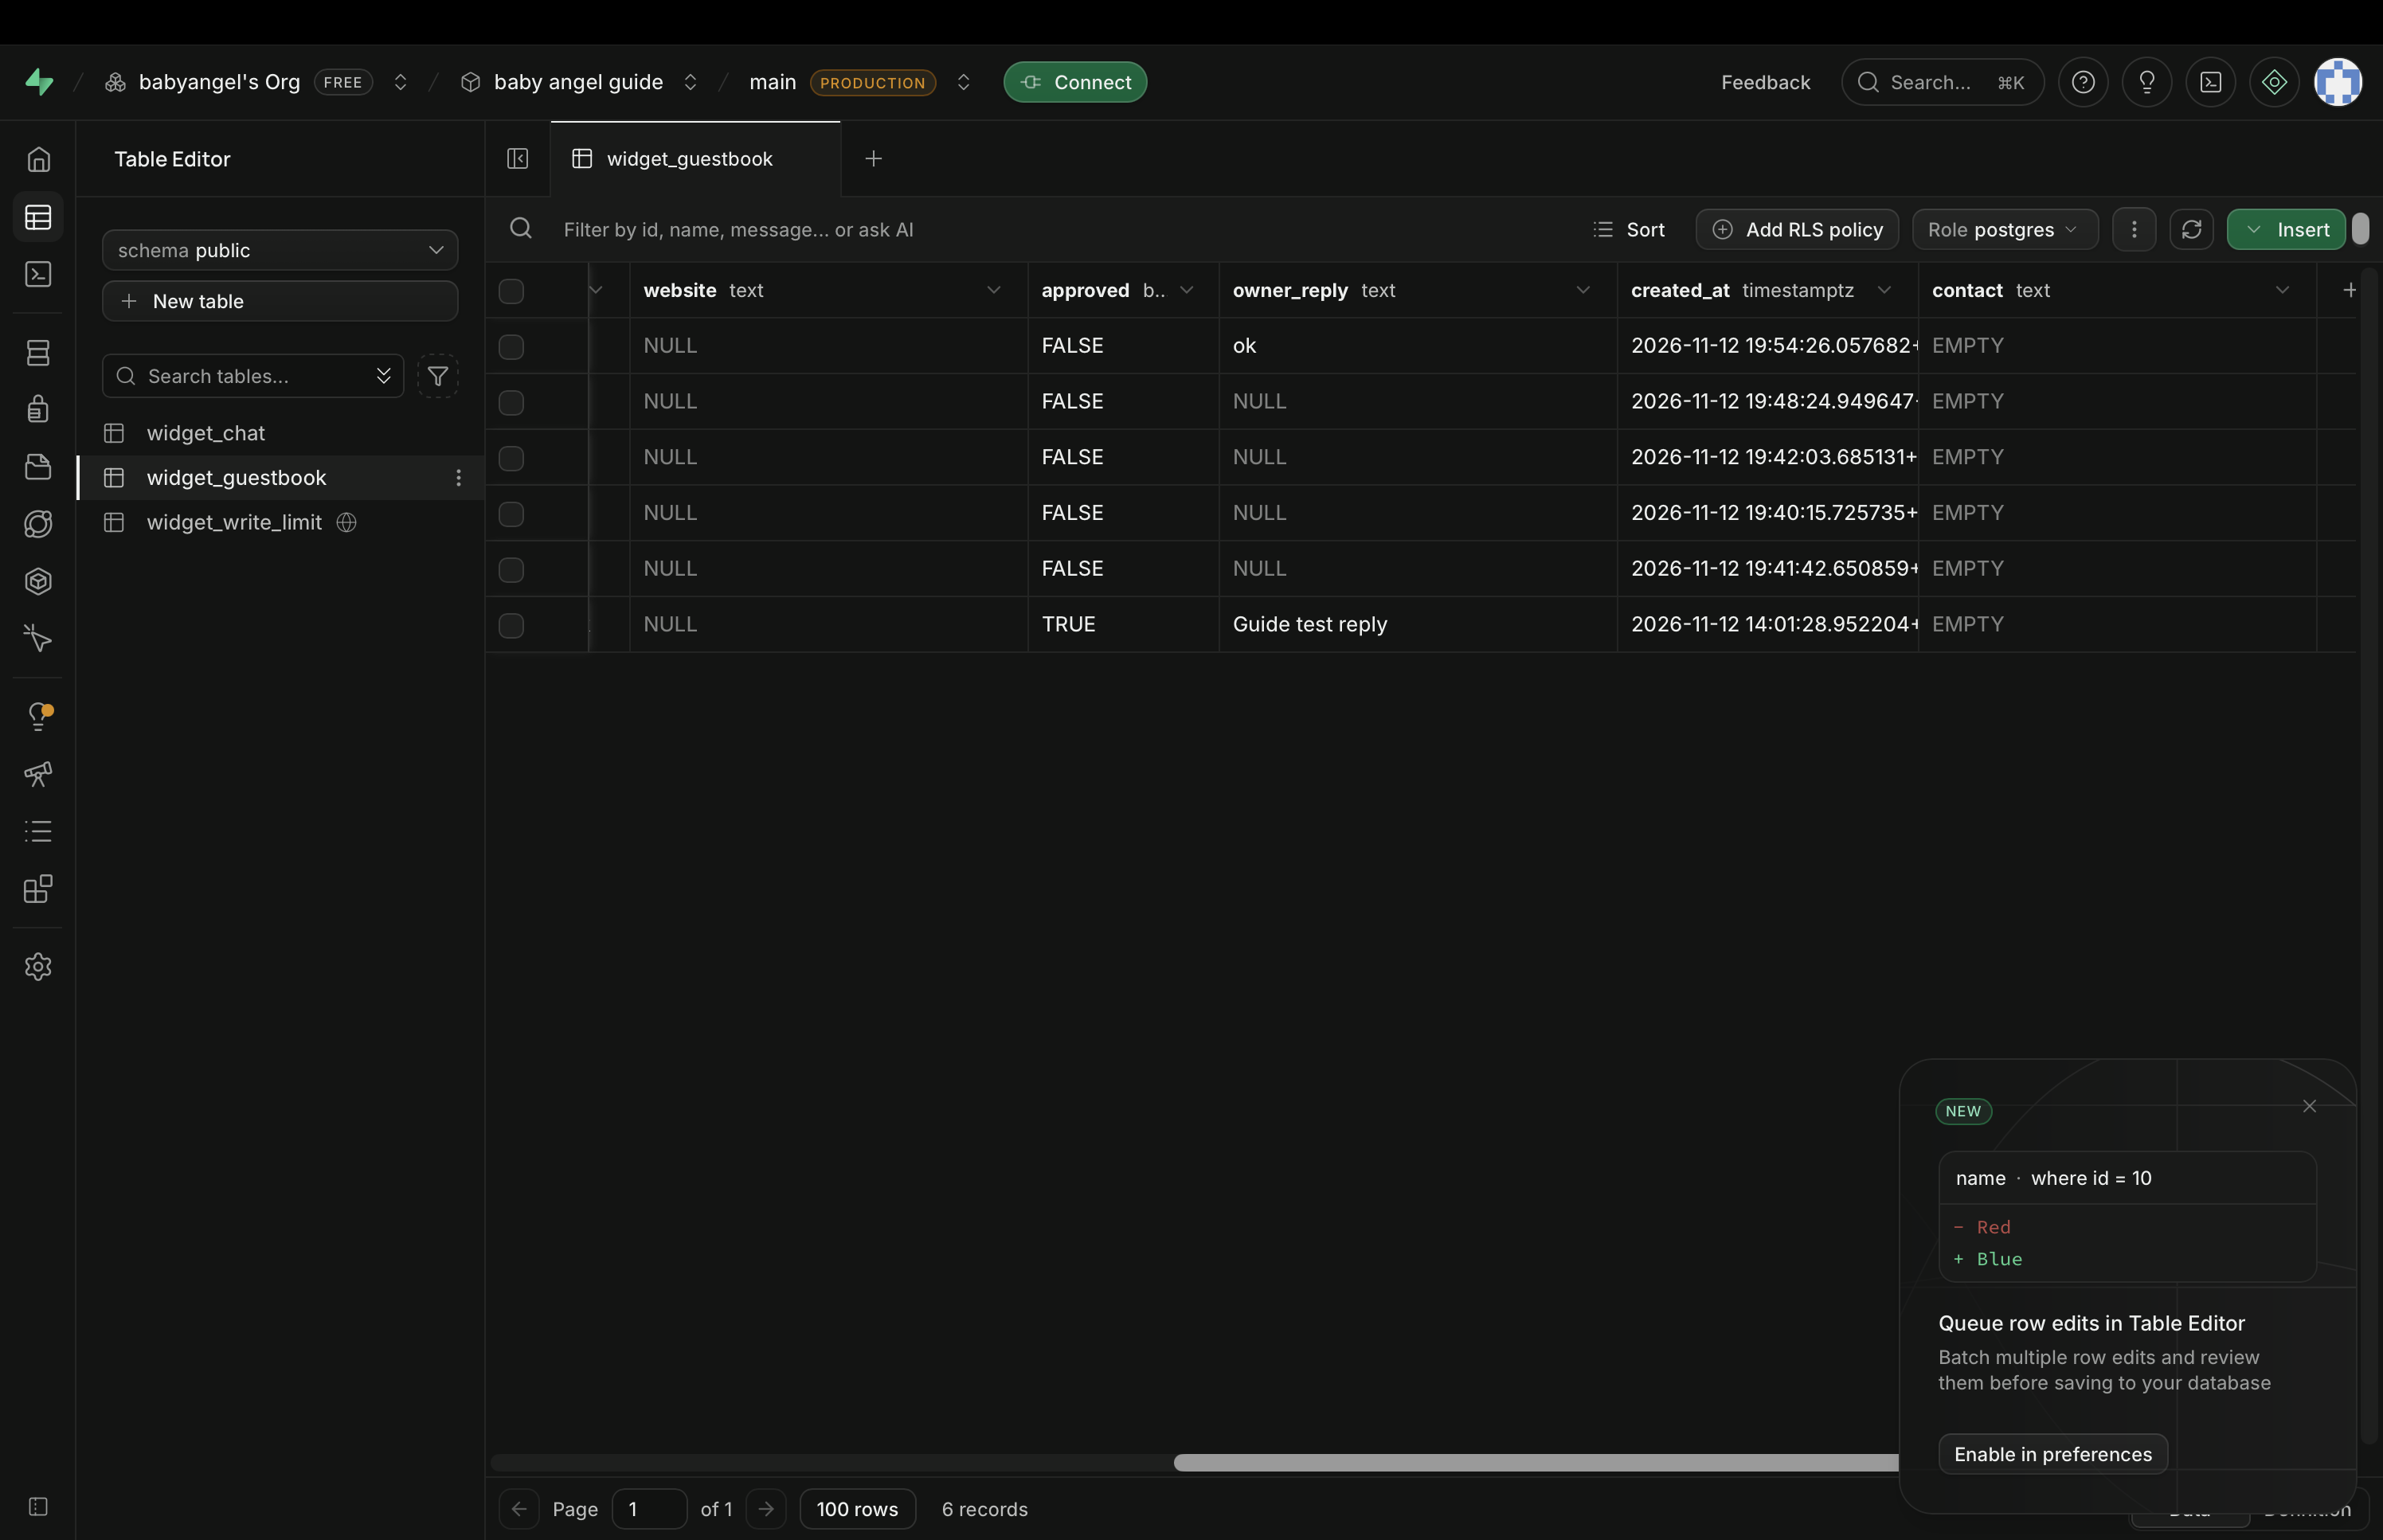
owner_reply column holds the reply for each note. The approved column shown here is from an older setup and can be ignored. Click the image to view it larger.